Category: Shahi Cards
Easy Ink Blending Techniques
Hi, Sorry it’s been so long since I have posted something about my course. Like all of you, I have been intently following reports of Coronavirus Disease 2019 (COVID-19) and considering the many ways in which its future course might alter our day to day lives. These past few weeks have been a powerful reminder of just how connected we are to one another and how our choices today determine our options tomorrow. As the number of confirmed cases is increasing day by day, I pray that all of you stay safe and healthy. May the almighty God bless this whole humanity with good health. Ameen.
To refresh my mind and thoughts, I decided to enter my craft room today. As I am completing my AECP projects one by one, it’s getting real fun at the altenew educator certification program. My today’s task is to make a card based on the lesson, Easy Ink Blending Techniques.
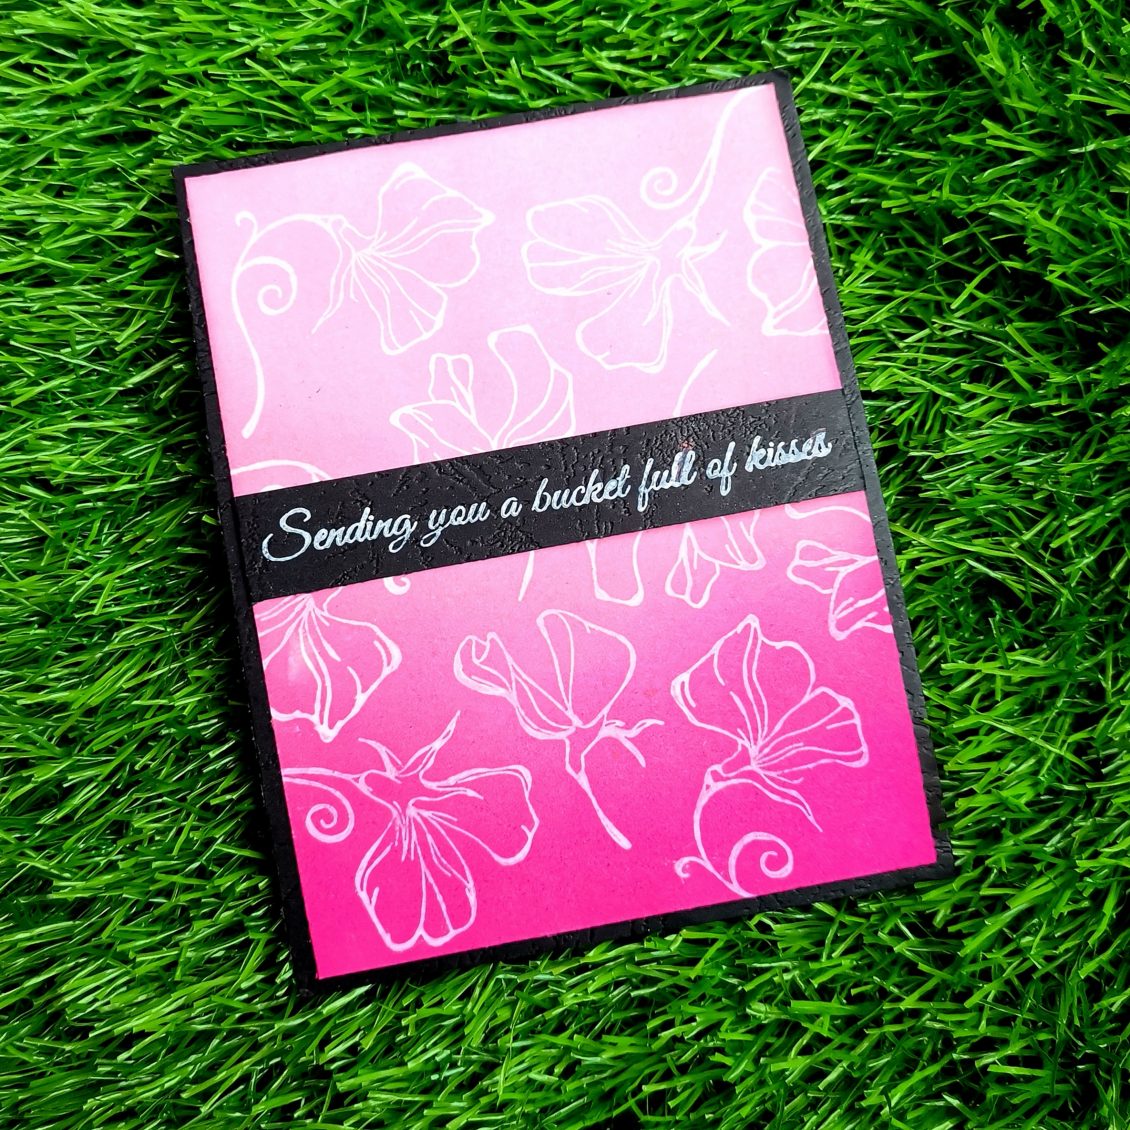
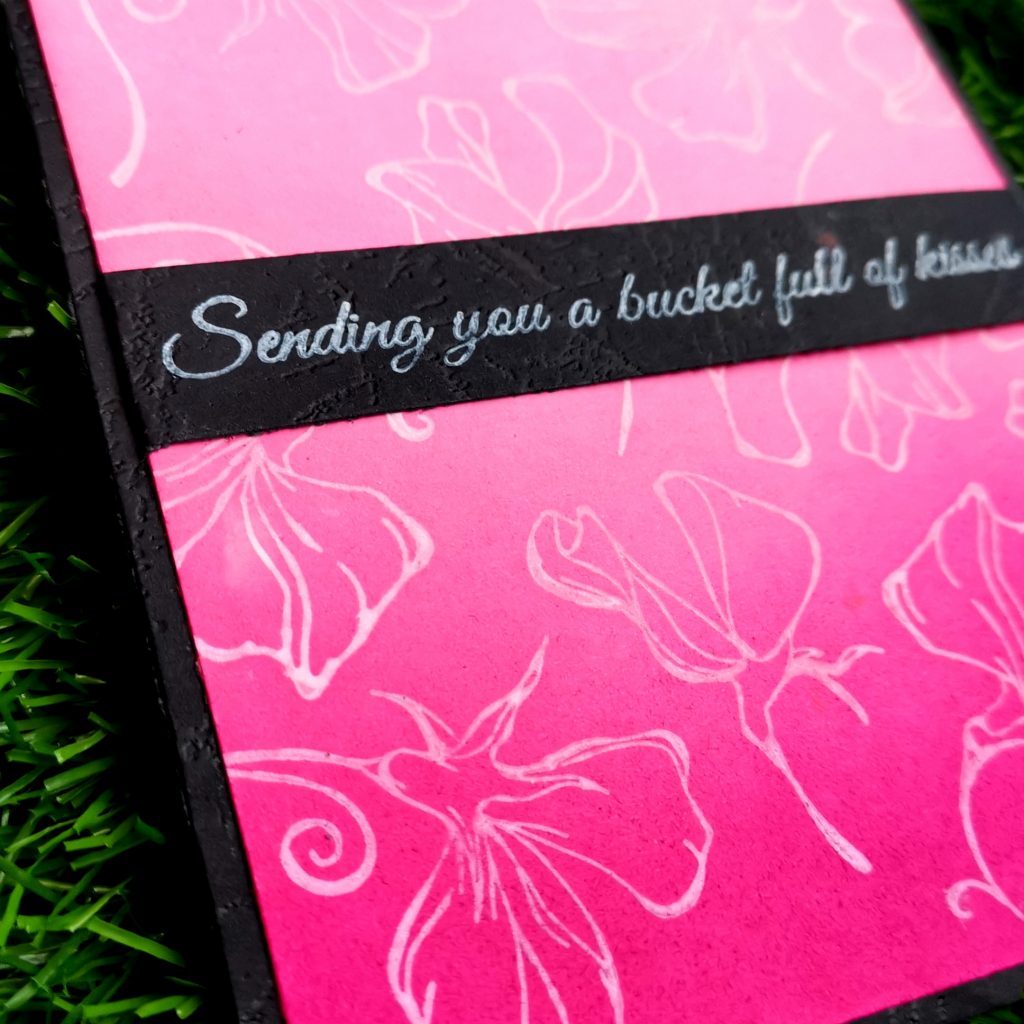
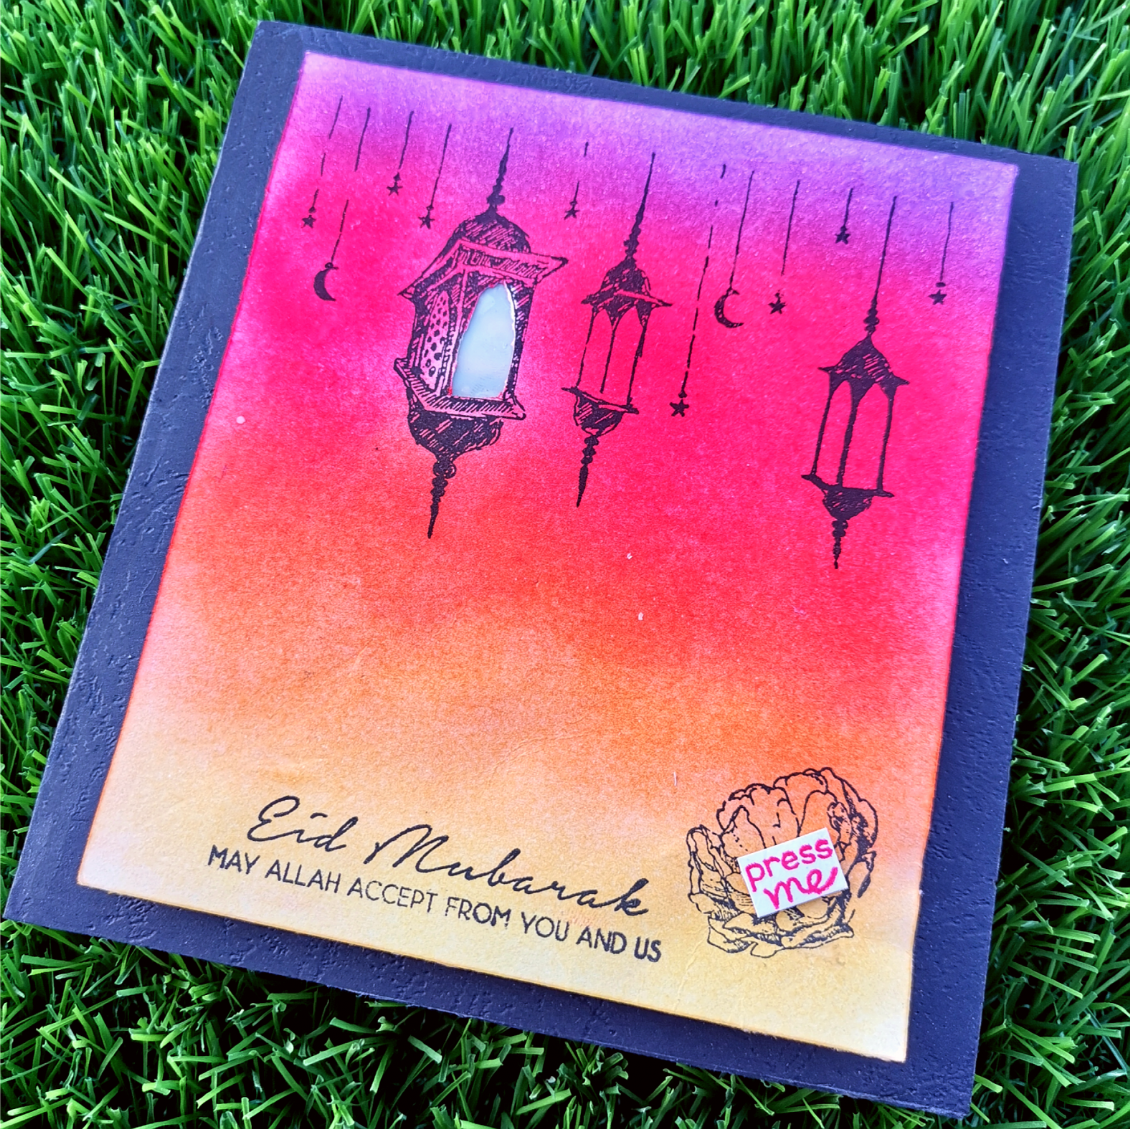
My plan is to create a pink ombre look on the card base. For putting on that vibrant look, I decided to blend “cherry blossom” crisp die ink collection from Altenew. Darker to lighter color from bottom to top, I blended Razzleberry, Rubellite, Pinkalicious, and Pink Diamond accordingly on my 5 1/4*4 inch Neenah classic crest solar white cardstock.
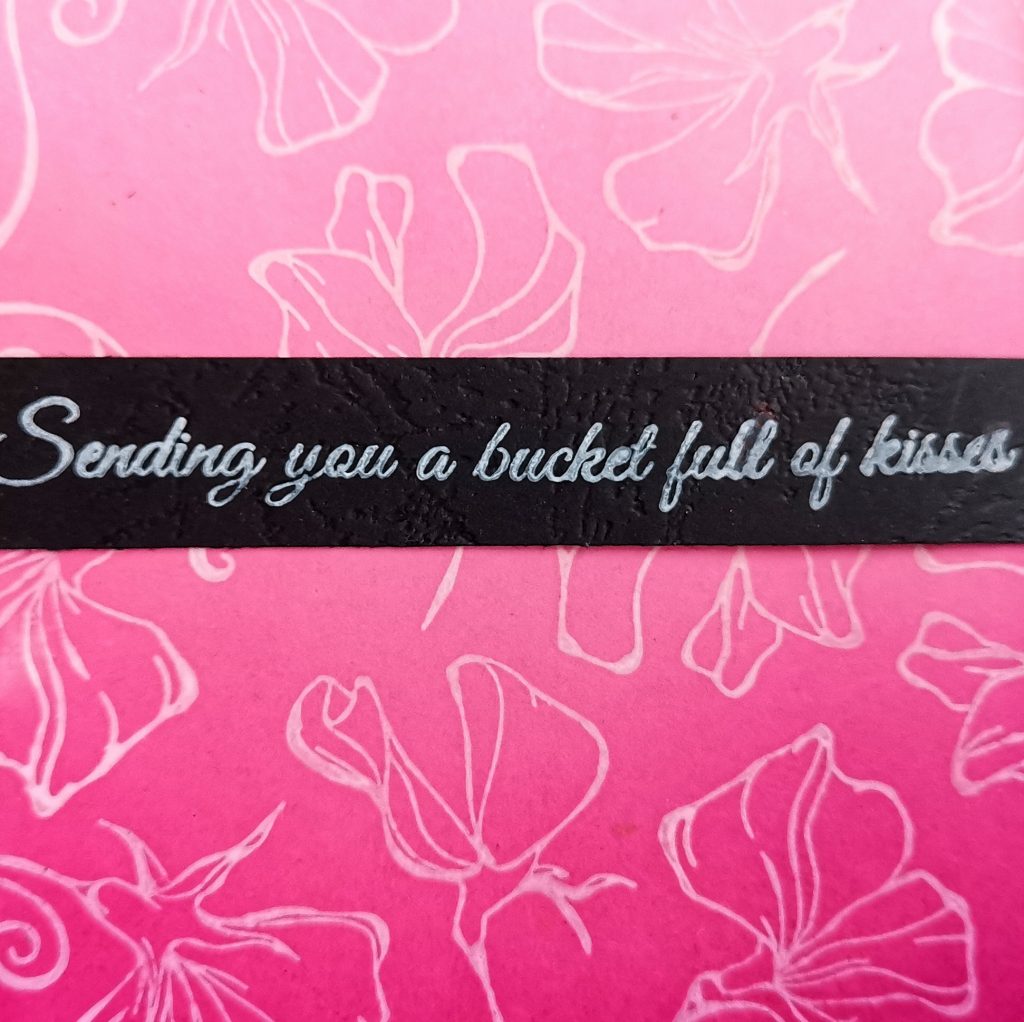
I didn’t want my cardstock to stay ordinary, I wanted to add some background to it. That’s when my eyes got caught up with the Altenew’s sweetest peas stamp set. I stamped them in various directions all around in my cardstock with Hero Arts unicorn white pigment ink. I wanted to stick a sentiment which completely fills the center of my card. That’s how I came across a sentiment from a stamp set bought online a few years ago. It said, “sending you a bucket full of kisses”. I stamped it on black leather paper with Hero Arts unicorn white pigment ink and trimmed it to a strip. And stuck it on the center of the card with glue.
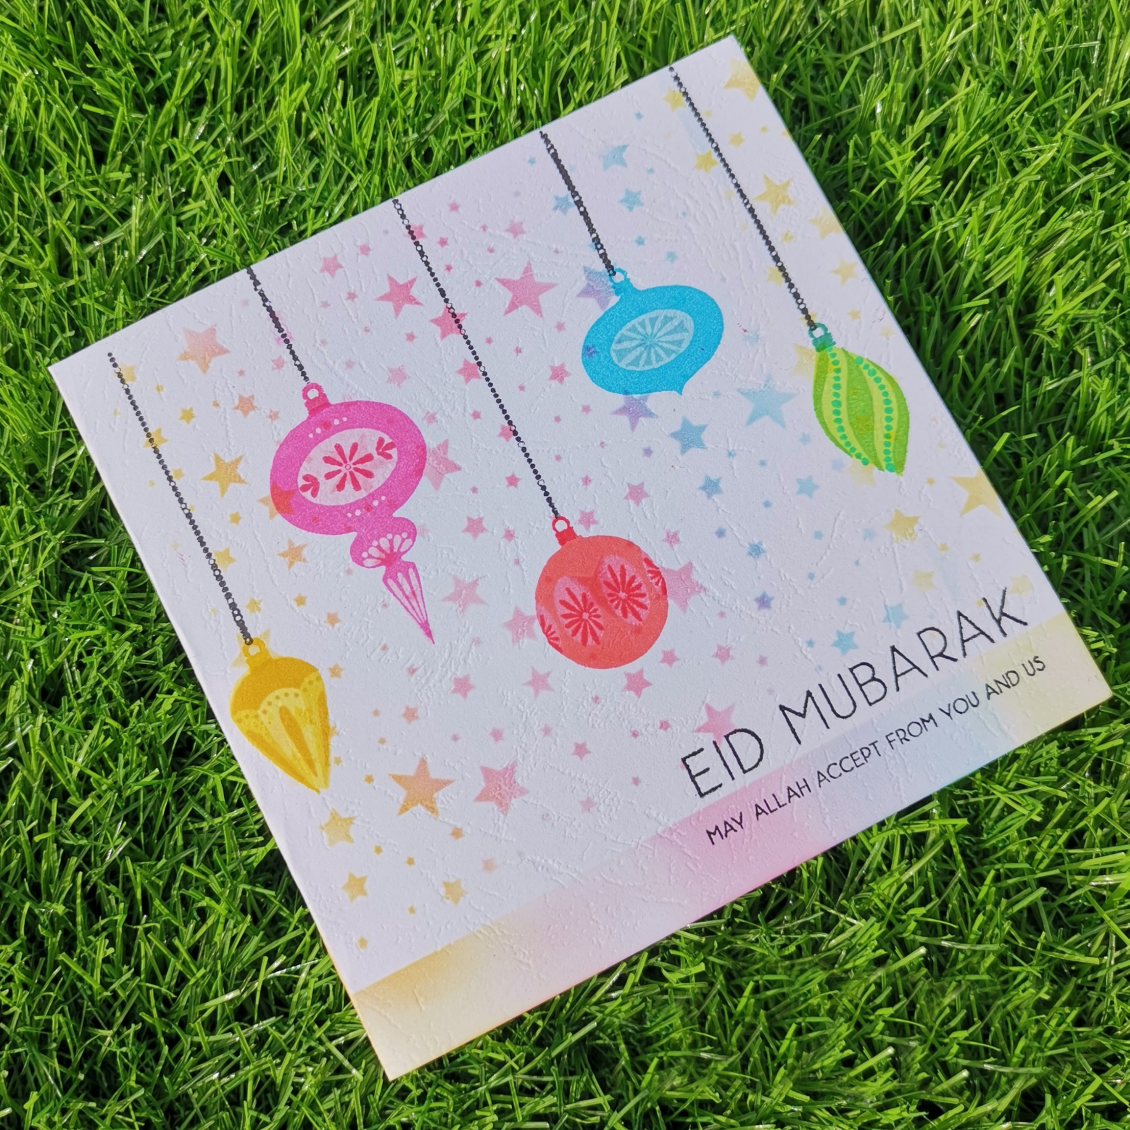
Finally took a 4 1/4* 5 1/2 sized black leather paper and stuck it behind my cardstock. I always like giving a dual-layer to my card. It gives a wall affect to my cards. Isn’t it so simple. I hope this method will turn out to be an inspiration for you too. Do give it a try to learn this lesson at https://altenew.com/products/easy-ink-blending-techniques
I hope to see you all soon with another project from AECP. Until then happy stamping and thanks for stopping by!
-shahi
Seasonal Scene Building
Hi Today, as I got to do a project on creating a Seasonal Scene Building, I was really confused as I didn’t have much stamps on my shelf to help me build a scene. That’s when I decided to take this as a challenge and make a card with the supplies I already have at my craft room.
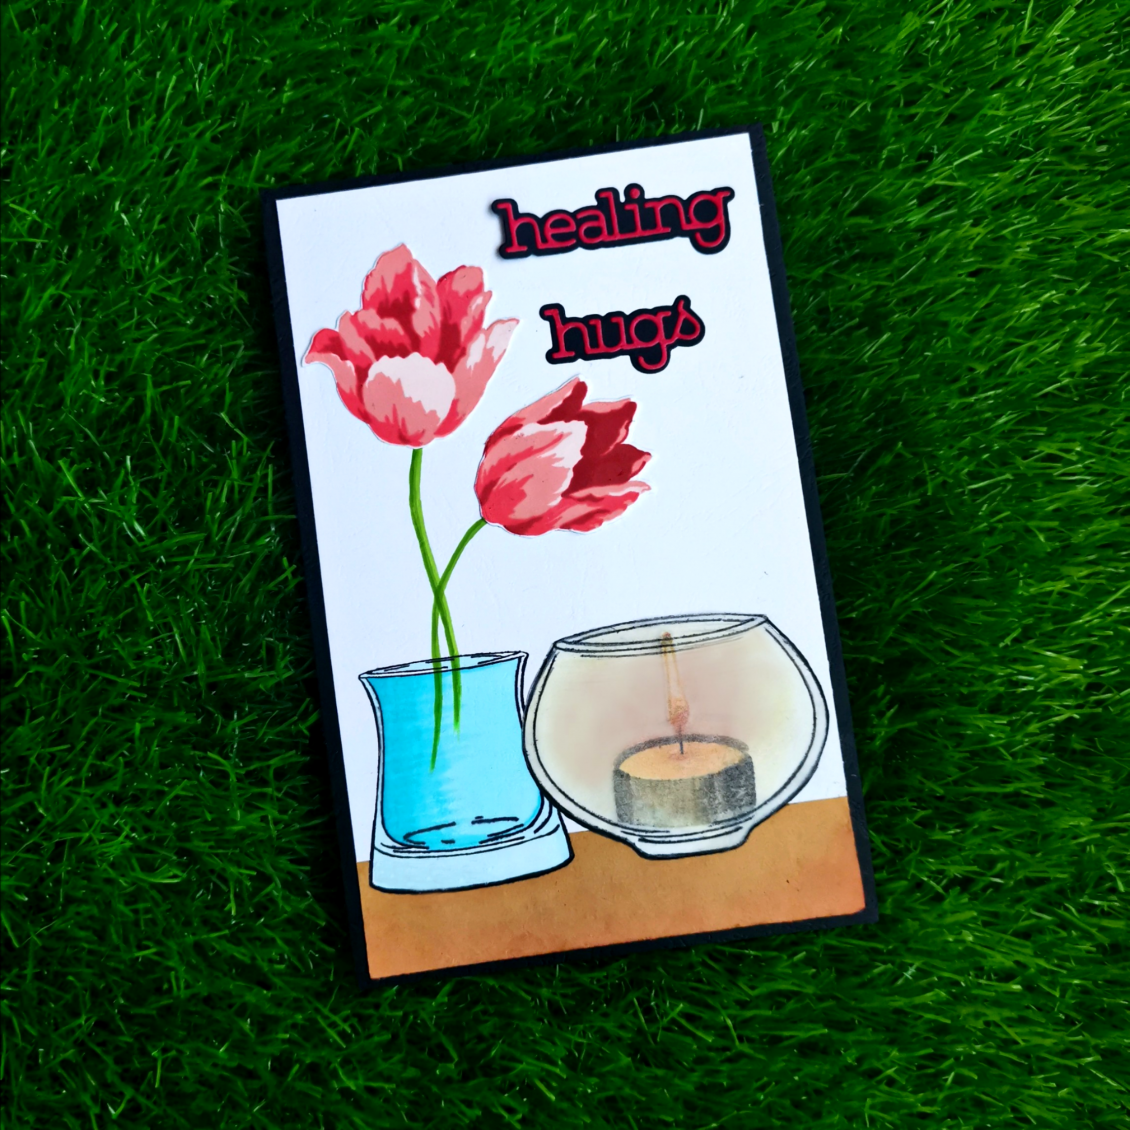
Alhamdulilah, within no time my eyes got stuck with the versatile vases stamp set from Altenew. But how to create a seasonal background with it was my next thought. I didn’t want to create a simple bouquet of flowers in a vase. I wanted to make something creative. The weather was so cold outside and I really loved to lit up a small scented Candle in my craft room. Thinking about it, an idea struck my mind and that’s how I actually ended up making this project.For this project, I used an 8*5 card. I was sure that I should use a longer card because I will have to find space for my vases, flower bouquet, and sentiments.
My first task was to create a base to place my vases in the image. I randomly chose a brown copy paper that was lying down in my cabin. Made it my base. Then I stamped a bowl vase from the versatile vases stamp set. Masking it, towards the left side I stamped a glass vase for my flowers.

I stamped and cropped 2 tulips using the Triumph Tulip- Build a flower stamp set from Altenew. I varied the colors for the tulip using the Red Cosmos Crisp Ink collection from Altenew. (Frosty Pink, Coral Berry, Ruby Red, Grapevine). After drawing the stem using the Frayed Leaf and Forest Glades with the altenew artistic markers, I stuck those tulips to the end of those stems. Then I stamped the candle using the candlelight stamp set from Altenew with their crisp inks ( morning frost, evening Gray, moon rock, lava rock was given for the base and buttercream, honey drizzle, autumn blaze, sunkissed was used for the top part of the light.) inside the bowl vase.
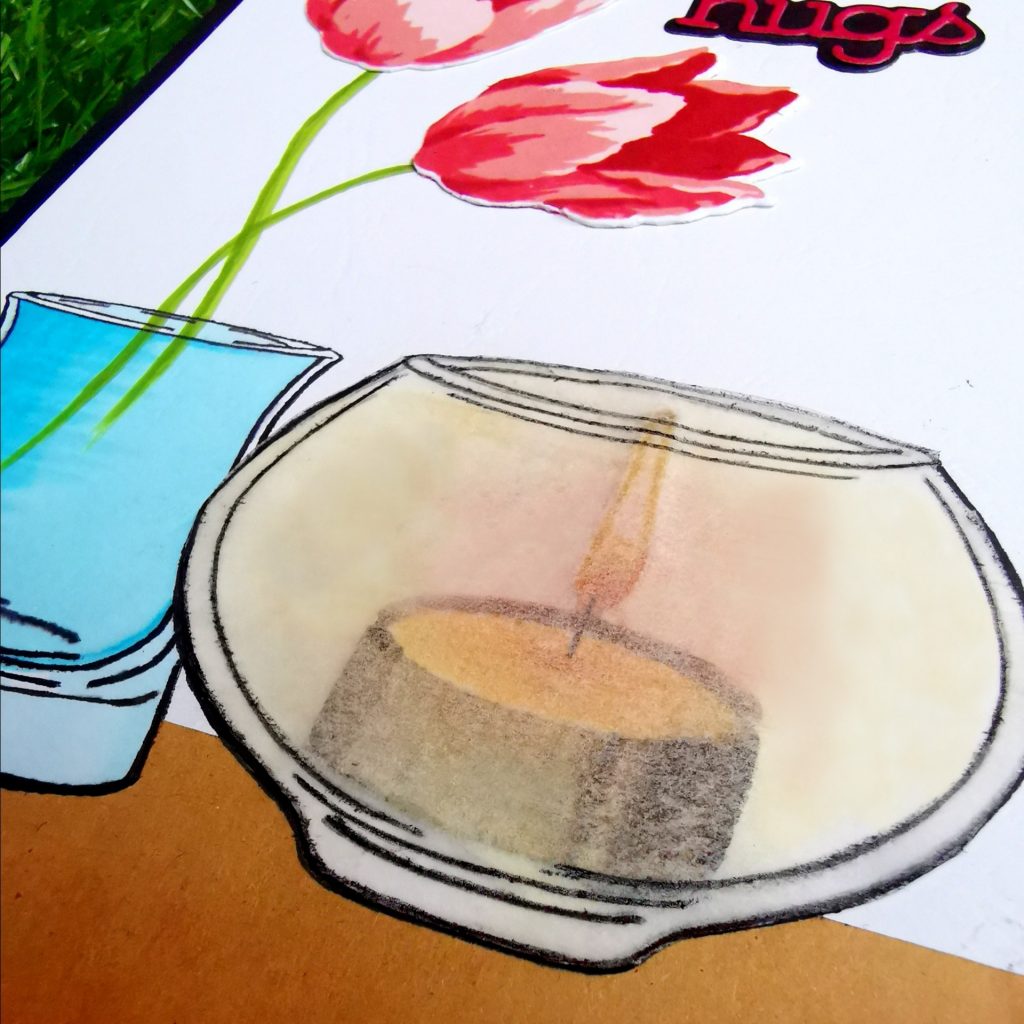
I wanted to have a variation of light rays from the candlelight, so I decided to stamp the bowl vase on vellum. After cropping it through its edges I blended a small shade of orange and red distress ink on it. Placing it on the candlelight and the vase I decided to crop the bottom part of the vases which was stamped on the brown copy paper. Using the same blending brush used on the vellum, I made small blends at the edges of the brown copy paper. Then I colored the glass vase with a blue artistic marker(Ocean Waves). And blended it with a light blue touch five marker.I die-cut my sentiment in a red and black cardstock using the healing hugs wafer dies from Simon says stamp. I stuck it towards the right corner of my cardstock. Adding a 1/4 inch to the card I placed a black cardstock to the base of my white card. It adds to the total gaze of the card.
After doing this course I am confident to face things that are out of my comfort zone in card making. As I said, in the beginning, I was really stuck. But later own I could figure out things in a better way. Such situations make me thank God for making me choose AECP. The tutors at altenew are really such an inspiration ❤
Thanks and I hope to see you at my next post. Until then happy stamping and thanks for stopping by!
-Shahi


 CASE your fellow AECP Crafter
  Clean & Simple Boutique Cards
  Easy Die Cutting Techniques
  Graduation card
  Let it shine
Recent Comments