Category: Personalized Cards
AECP: All About Layering 5
Actually this project was done long back, but unfortunately I was not able to post it. So here it goes…
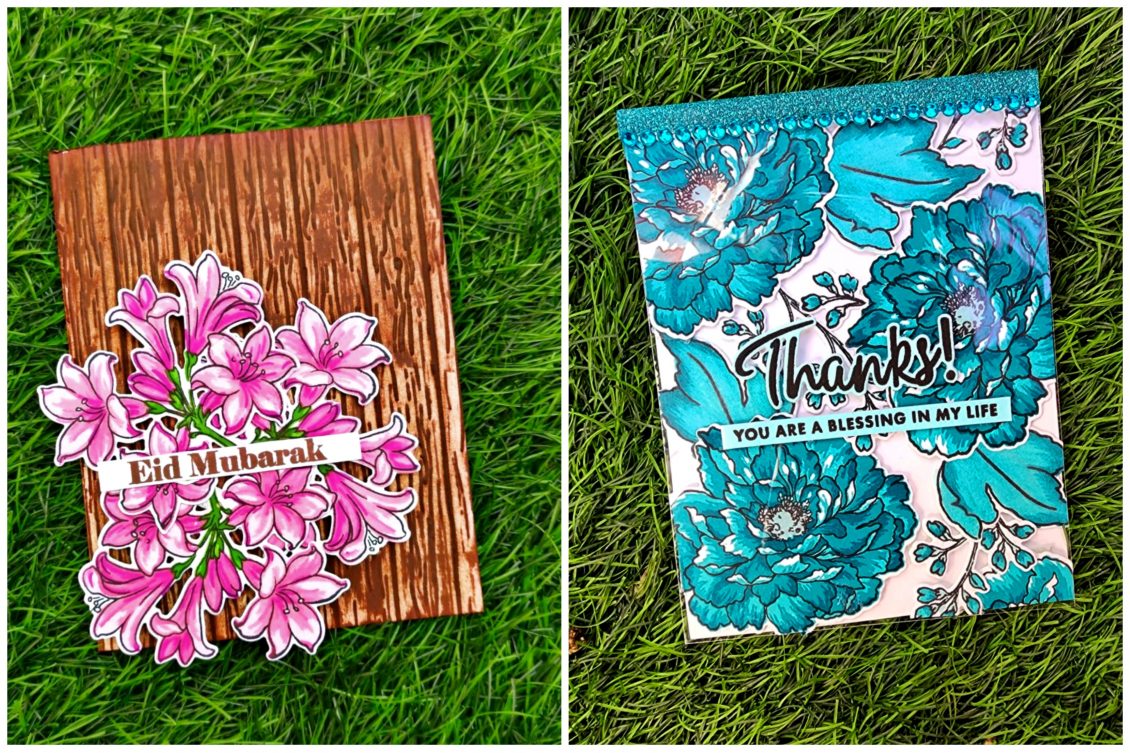
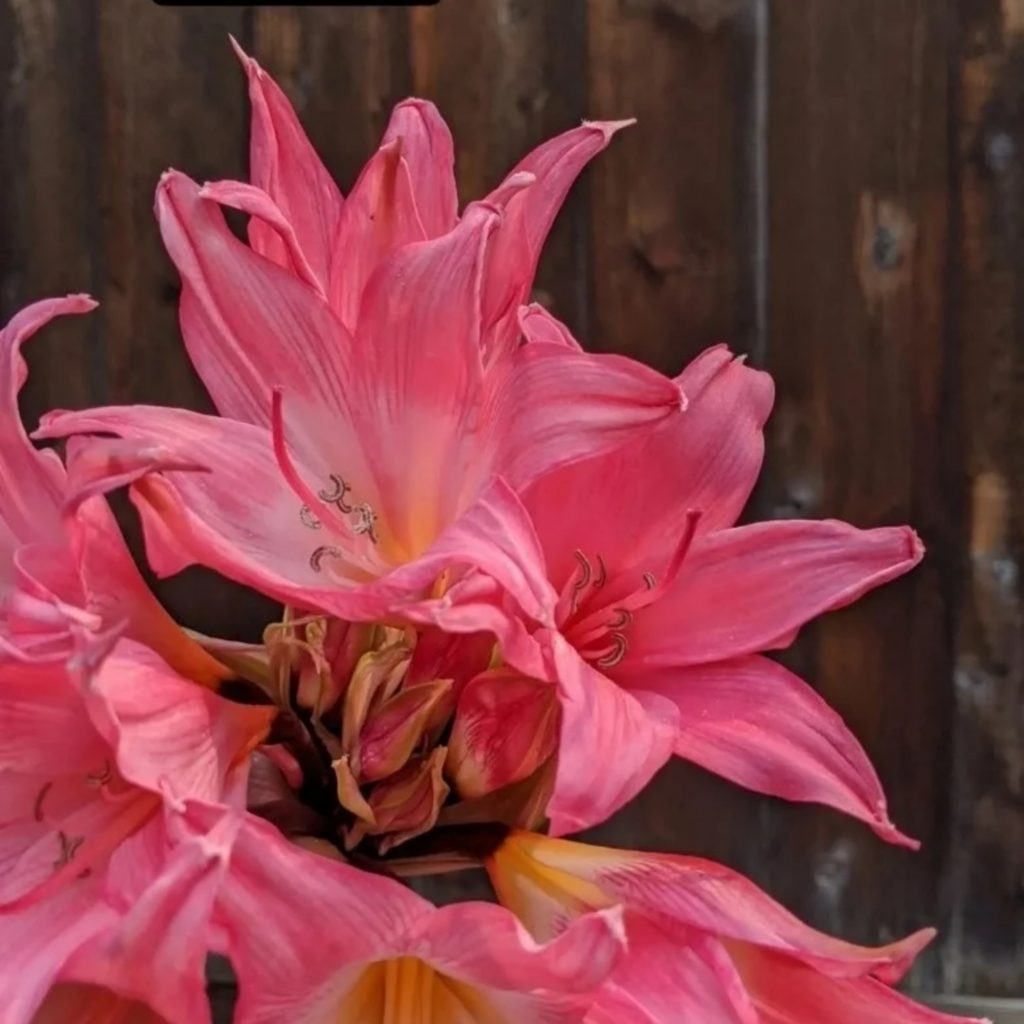
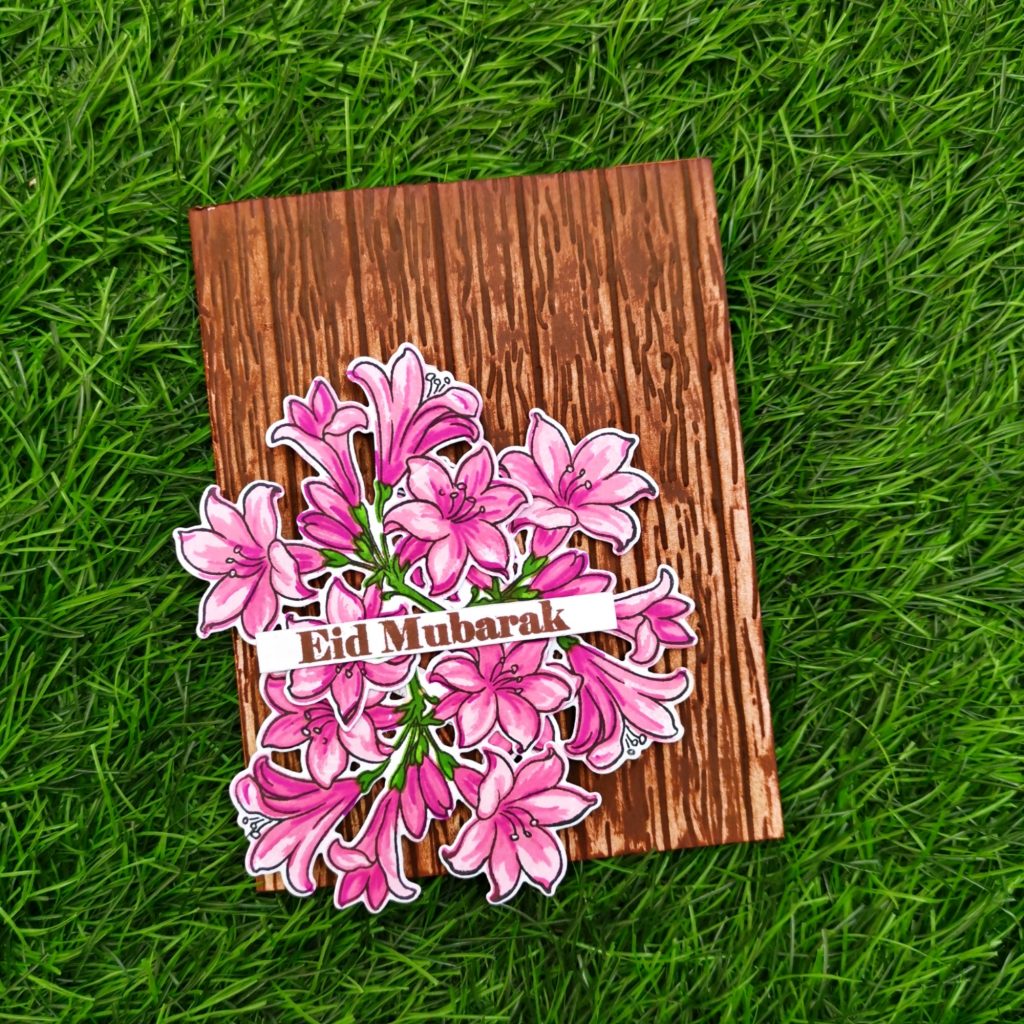
After taking a long break from card making, I am back to do my favorite course, AECP. Few months back, I came across an Instagram story posted by the president and founder of Altenew, Tasneem. She posted a picture of a pink flower and asked the followers to guess the flower. I doubted if it was belladonna lily. Randomly guessed it and she said that it was the correct answer. I was sure that she was working on something special. A special stamp set or an amazing embossing folder, who knows what is going to come up. So I randomly took a screenshot of that story. Months passed by, Ramadan is here and I received my Build a flower subscription for the month of April and it was the same old belladonna lily, I was really excited to hold it as an wonderful stamp set. That’s when I decided to turn my All About Layering card into a dedication to Tasneem. Eid was ahead and belladonna lily being the final BAF stamp set, were the other reason for me to do that. Lydia Evans has done a wonderful job in explaining every detail about layering stamps, methods and techniques etc.
INSTRUCTIONS
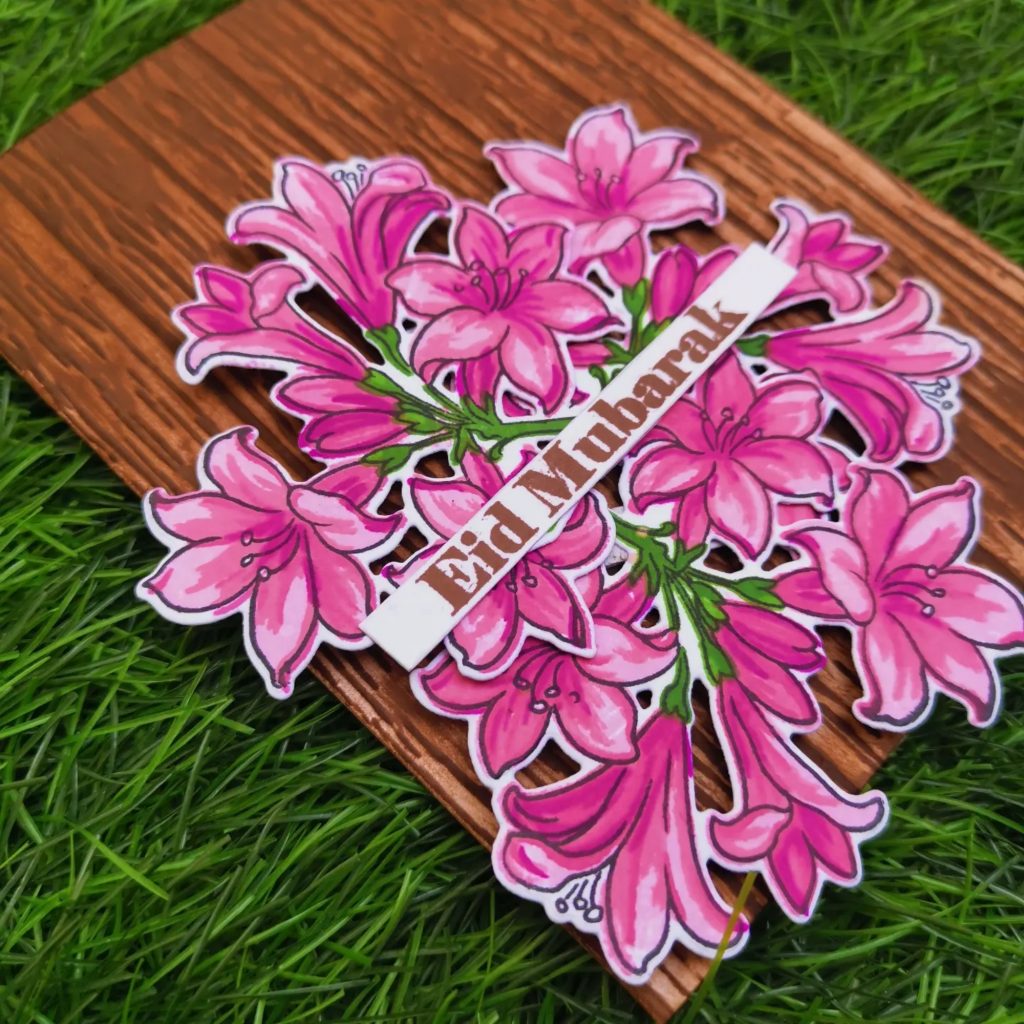
- Take the flower stamp from the Build-a-Flower: belladonna lily Set and stamp the outline layer in black Ink onto a piece of white cardstock.
- Then stamp the base layer with Pink Diamond Crisp dye Ink
- The second layer of the stamp will fit around all of the edges of the previously stamped layer, stamp this in Pinkalicious Crisp dye Ink .
- The third layer will fit around the bottom-right edge of the previously stamped layer, stamp this in Rubellite Crisp dye Ink .
- The fourth layer will fit on the top edge of the previous layer, stamp this in Razzleberry Crisp dye Ink .
- Stamp the stems with Grass Field Crisp dye Ink and Shadow Creek Crisp dye Ink
- Die cut 3 bunches of each flower.
- Create a 4 ¼” x 5 ½” card base from Classic Crest Solar White Cardstock.
- Run it through Deck Planks 3D Embossing Folder and shade it with Vintage Photo Distress Ink .
- Arrange and Stick the flowers according to your liking.
- Stamp the Eid sentiment and stick it at the middle of the flower.
SUPPLIES
- Pink Diamond Crisp dye Ink
- Pinkalicious Crisp dye Ink
- Rubellite Crisp dye Ink
- Razzleberry Crisp dye Ink
- Grass Field Crisp dye Ink
- Shadow Creek Crisp dye Ink
- Vintage Photo Distress Ink
- Versafine black pigment ink
- Eid greetings Stamp Set
- Deck Planks 3D Embossing Folder
- Classic Crest Solar White Cardstock.
- Sizzix big shot die cutting machine
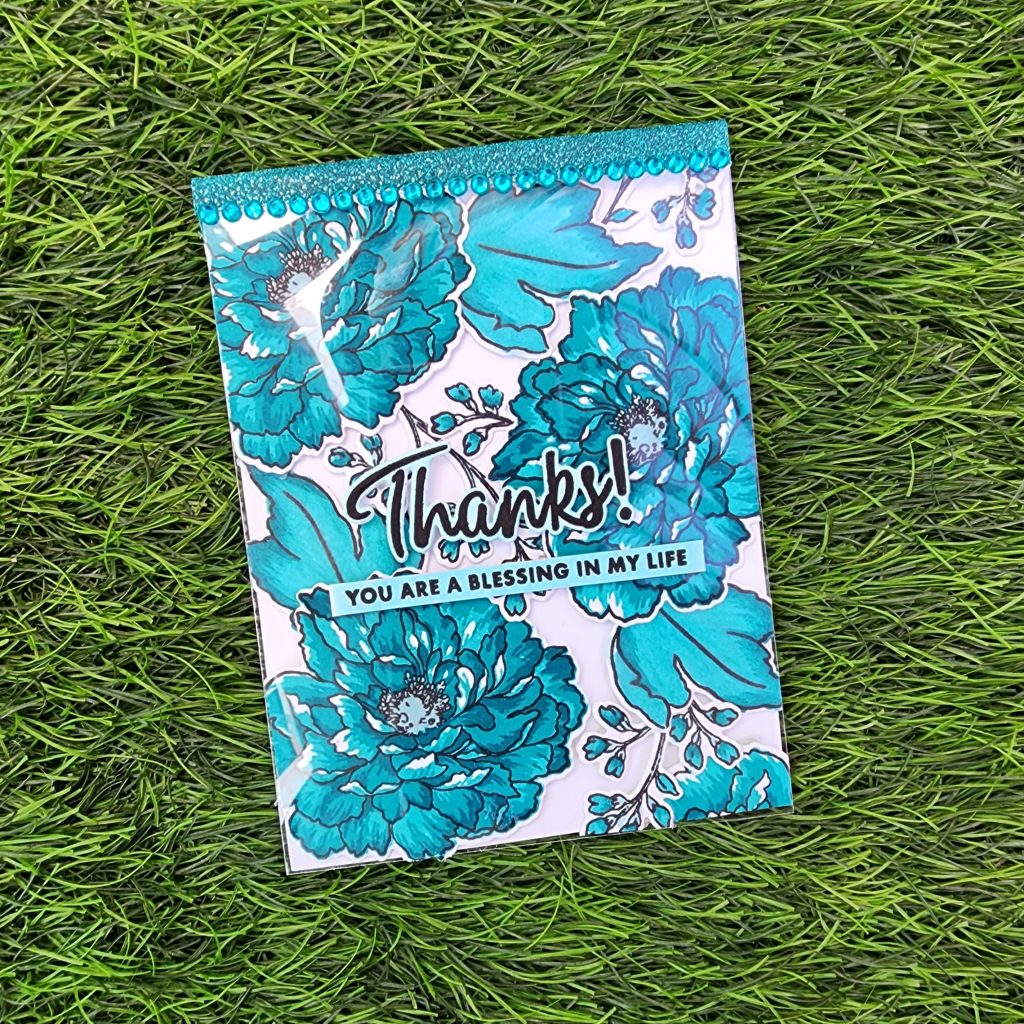
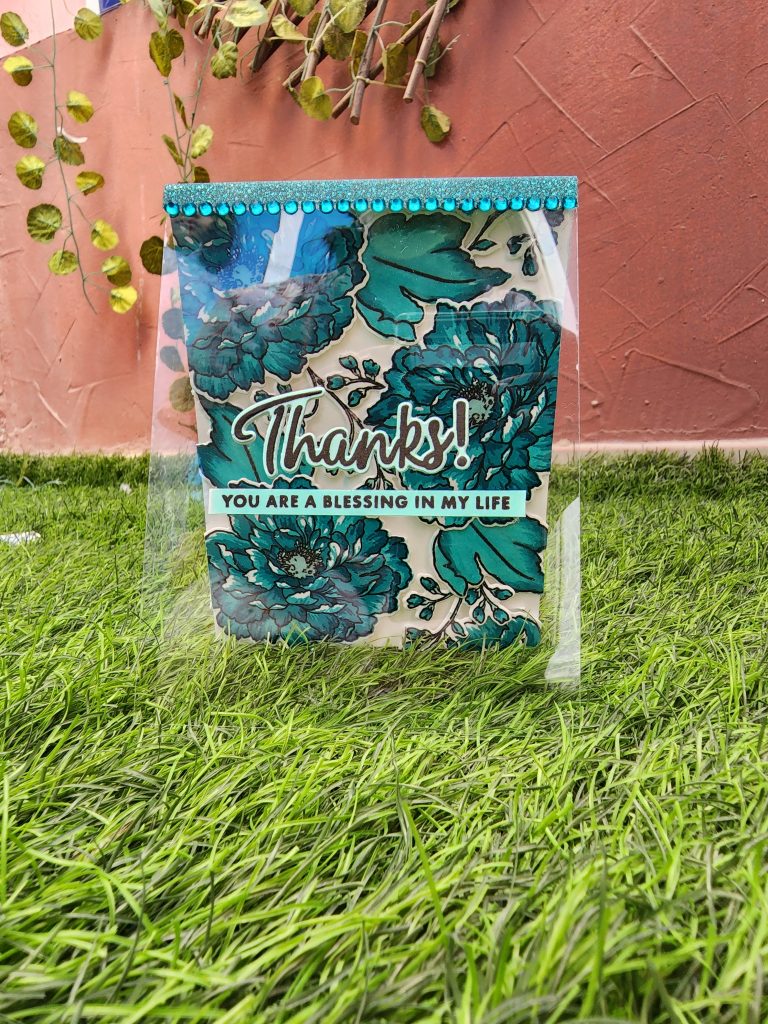
Here is my second take , on this class. I have tried sticking the sentiment to the acetate sheet for this card.
INSTRUCTIONS
- Take the flower stamps from the Build-A-Flower: Tree Peony Layering Stamp Set and stamp the base layer in Dew Drops Crisp dye Ink onto a piece of white cardstock.
- Followed by Aqualicious Crisp dye Ink, Teal Cave Crisp dye Ink ,Galactic Stream Crisp dye Ink respectively.
- Stamp the outline layer of the flower and leaves with versa fine onyx black
- For the leaves, Color it with the similar shades of Artist Alcohol Marker
- Stamp several of these images for the project and use the coordinating dies to die cut them.
- Create a 4 ¼” x 5 ½” card base and set it aside.
- On a 4 ¼” x 5 ½” panel, start arranging the florals and adhere them with foam tape.
- Use glue tape to adhere the leaves.
- Cut off the excess pieces that are going off the edges.
- Take a 4 ¼” x 5 ½” piece of acetate sheet and place it above the card.
- Trim a similar shade of Teal Glitter washi tape and stick it over the Acetate sheet joining the back part of the card.
- Stick a layer of teal gem stones as a border to the washi tape.
- Stamp and Die cut “Thanks” from Halftone Circles Stamp & Die Bundle over a cardstock colored in Dew Drops Crisp dye Ink .
- Stick it on the middle of the acetate sheet.
- Stamp the sentiment from Build a Garden: Tulips & Friends with versa fine onyx black Ink on a thin strip of cardstock colored in Dew Drops Crisp dye Ink. Stick it below the die cut.
SUPPLIES
- Classic Crest Solar White Cardstock.
- Sizzix big shot die cutting machine
- Build-A-Flower: Tree Peony Layering Stamp & Die Set
- Build a Garden: Tulips & Friends
- Halftone Circles Stamp & Die Bundle
- Teal Glitter washi tape
- Acetate sheet
- Versa fine onyx black
- Dew Drops Crisp dye Ink
- Aqualicious Crisp dye Ink
- Teal Cave Crisp dye Ink
- Galactic Stream Crisp dye Ink
- Dew Drops Artist Alcohol Marker
- Aqualicious Artist Alcohol Marker
- Teal Cave Artist Alcohol Marker
- Galactic Stream Artist Alcohol Marker
Thank You!
Hope you liked my card. Have a wonderful day and I hope to see you all soon with another project from AECP. Until then happy stamping and thanks for stopping by! If you like what you’ve seen from me, please give me a follow over on my Instagram (@shahicreationz) and/or subscribing to my vlog and YouTube if you haven’t already.
-shahi

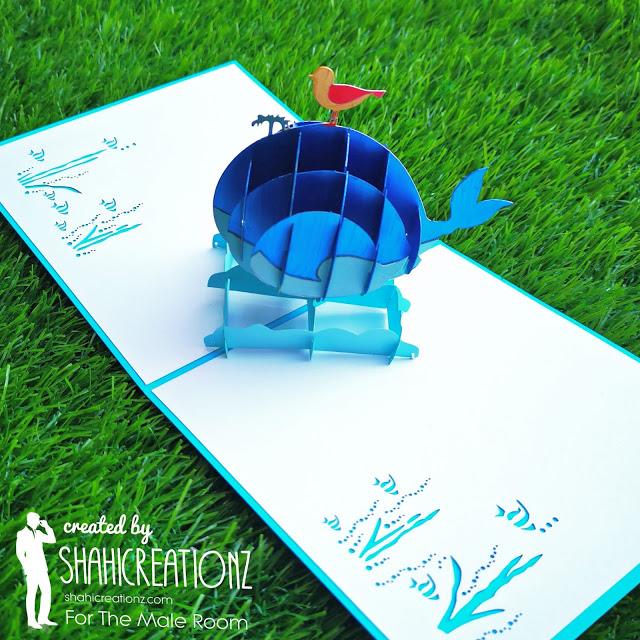
The whale and the bird Pop up card
Hi friends, I’m back with an another pop up card. But this time it’s based on a poem. The whale and the bird. The theme at the male room craft challenge this month is Animals. So I thought this one is perfect for it.
Once there was a bird who fell in love with a whale. And a whale who fell in love with a bird.
The bird loved the whale’s beautiful smile. He loved the way she swam through the water so gracefully.
The whale loved the bird’s handsome white feathers. She loved to watch him soar through the sky.
And they both loved to eat lots of tiny fish.
All summer, the bird and the whale met in the bay. They talked and talked.
They talked about the moon, and the tides, and the ships in the ocean.
The bird told jokes and made the whale laugh. The whale sang beautiful songs that made the bird cry (even though he didn’t know why).
“One day, you could meet my family in the ocean,” said the whale.
“And you could meet my friends on the land,” said the bird.
Everything was perfect.
But the world does not stop turning just because a bird and whale fall in love. Summer turned into autumn, and autumn turned into winter. The ocean turned cold, and all the other whales left for warmer waters.
“Come with me to warmer waters,” said the whale. “It’s a wonderful place. It’s always warm, and there are so many fish to eat.”
“I love to eat fish,” said the bird. “And I love you. I will follow you anywhere. But first, teach me to be a whale?”
“Like this!” said the whale, “follow me!”, and she dived deep into the water.
“OK!” said the bird, and he also dived deep into the water.
Deeper and deeper he went. “I’m swimming!” he laughed. “I’m a whale!” But soon he couldn’t breathe. He returned to the surface, gasping.
He tried and tried and tried again, but he ran out of breath every time.
“I don’t think a bird can become a whale,” said the bird. “Come with me instead. I live up on the cliffs. It is a wonderful place. It’s warm and cosy, and every morning you can watch the sun rise.”
“I love to watch the sun rise,” said the whale. “And I love you. I will follow you anywhere. But first, teach me to be a bird?”
“Like this!” said the bird. “Follow me!”, and he flapped his wings and soared into the sky.
“OK!” said the whale. She squeezed her eyes shut and flapped her fins, just like the bird. She flapped and flapped, up and down. Water splashed everywhere. “I’m flying!” she laughed. “I’m a bird!”
But when she opened her eyes, she wasn’t soaring in the sky. She was still in the water.
She tried and tried and tried again, but she could not fly.
“I don’t think a whale can become a bird,” said the whale.
“But if you can’t fly, and I can’t swim, where can we live together?” said the bird.
“We will stay here — in the waves!” said the whale.
But the bird shook his head sadly.
“You love to swim deep in the ocean,” he said. That is your favourite thing to do. You would never be happy here.”
The whale sighed.
“And you love to fly and soar into the sky,” she said. “That is your favourite thing to do. You would never be happy here either.”
And so, because the bird and whale loved each other so much, they said goodbye.
Have a look at the challenge blog here for all the challenge details and to see the cards from the rest of the Design Team. https://themaleroomchallengeblog.blogspot.com/2021/01/challenge-146-animals-dt-call.html?m=1


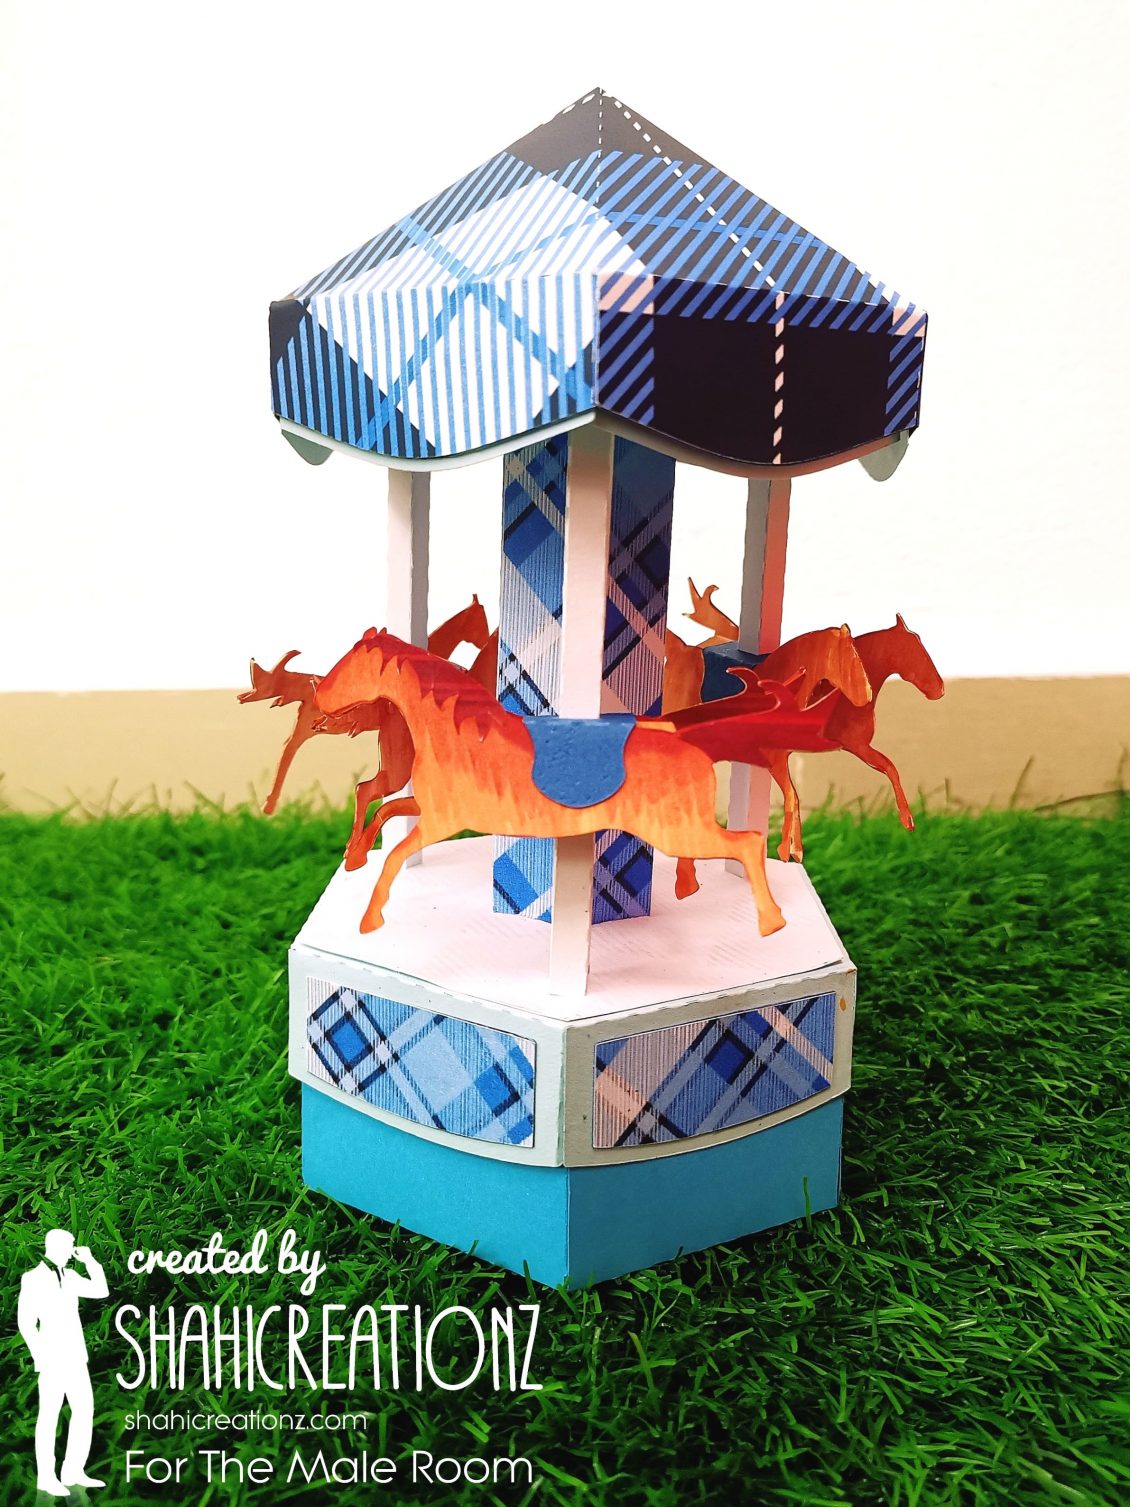
Carousel Box
When you think of masculine Christmas projects tartan or plaid always jump into my head. So that’s what this month’s challenge is all about at the male room craft challenge – tartan or plaid . I thought about doing something special, and here is what I came up with.
To start off, I cut the svg file from creative cuts in my Cricut Maker. This file was easy to cut as I did not alter the size anymore. I just had to ungroup the images to be able to cut the shapes in the color of cardstock that I wanted. This SVG was a pop carousel box. But as I wanted to create my project with the touch of tartan or plaid, I printed down them as pattern papers and glued them over .
What better way to celebrate a special occasion than with this fun Carousel (or Merry Go Round) gift box. The base of the Carousel is a pretty box that you can fill with goodies and treats. You can even make the box by itself for a versatile gift package. The finished Carousel is approximately 8 3/4″ tall by 4 1/2″ wide.
Have a look at the challenge blog here for all the challenge details and to see the cards from the rest of the Design Team. https://themaleroomchallengeblog.blogspot.com/2020/12/challenge-145-tartan-plaid.html

 CASE your fellow AECP Crafter
  Clean & Simple Boutique Cards
  Easy Die Cutting Techniques
  Graduation card
  Let it shine
Recent Comments