Month: August 2021
Altenew : Impressive Heat Embossing Techniques
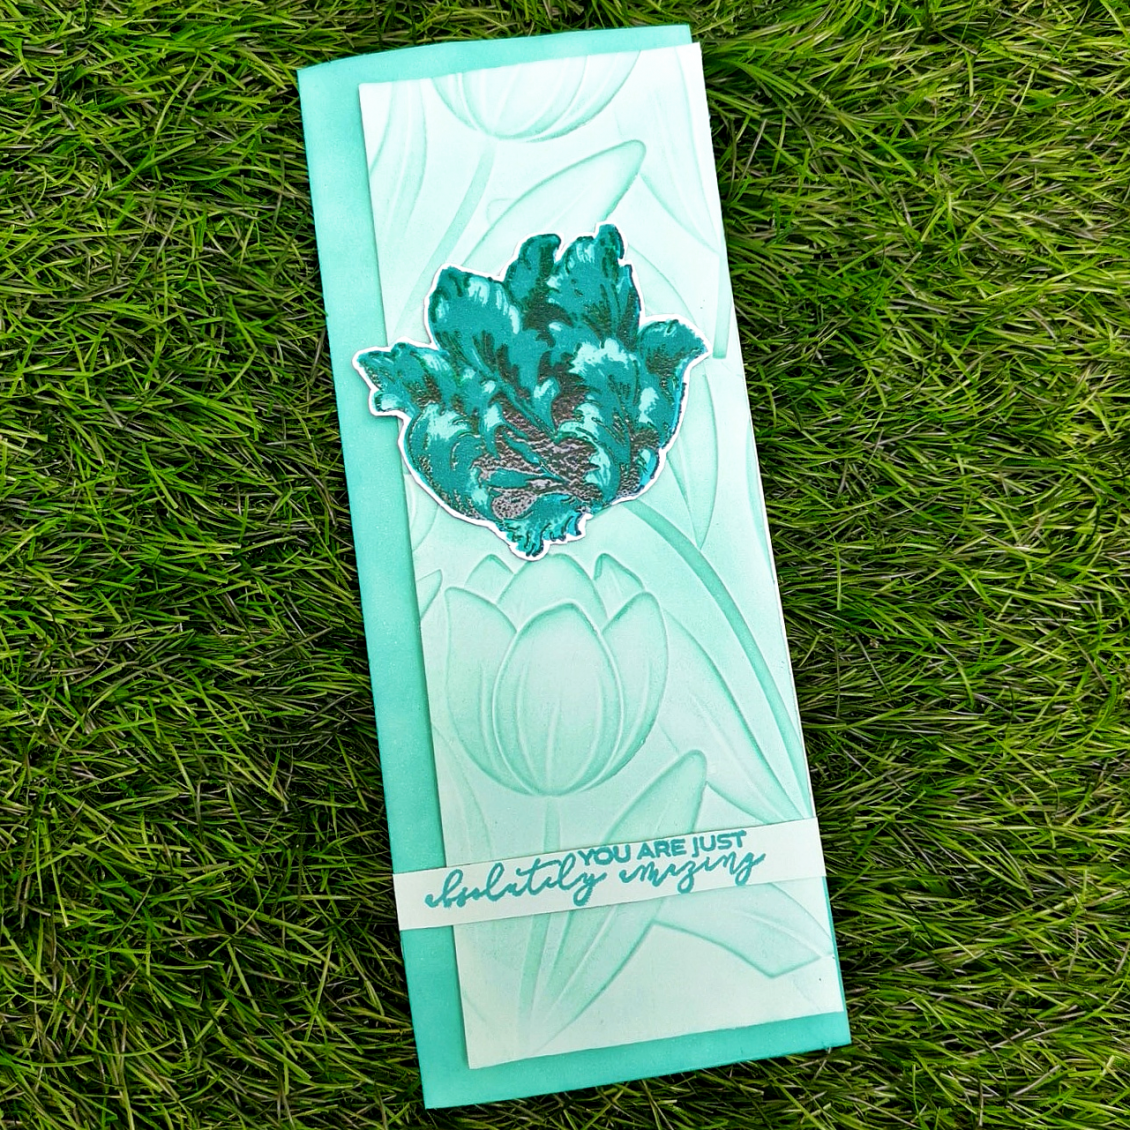
Alhamdullilah , I have successfully completed my 20 th class on AECP. Next step is my Level 2 Final Challenge. Before that, let’s have a look at the Impressive Heat Embossing Techniques taught at the Altenew Academy. In this course, Svetlana Marchenko shares some creative and unique tips on how to use embossing powders to make gorgeous cards, and I absolutely loved the beautiful cards she made using these techniques. For my card, I followed the tips from lesson 4 – Layered heat embossing.
INSTRUCTIONS
- Create a 3.5″ x 8.5″ slimline card base from an aquamarine Cardstock.
- Trim half inch from all the four sides
- And run it through the embossing folder
- Apply Volcano Lake die ink on a blending tool and apply it over the embossed part.
- Stamp Parrot Tulips on a classic crest white cardstock with Sea Shore ink set
- Stamp the last layer with Versa Mark ink and sprinkle some clear embossing powder and heat set it with a heat gun
- Trim the flower and stick it on the 3D embossing folder design
- Apply foam tape in-between the layers to get dimensions
- Stamp the sentiment on a strip of aquamarine Cardstock and stick it over the card.
TIPS
- Before stamping, use an Anti-Static Pouch tool to remove static from your paper so the powder doesn’t stick where you don’t want it.
- Make at least one layer of your flower heat embossed to make it shine
- There are different types of embossing powders, and they have different textures. Some, for example, the fine or detail embossing powders have a smoother finish while others, for example, the glitter or chunky embossing powders have a textured finish. So, it is always helpful to create swatches.
- Use various ink colors with clear embossing powder if you do not have needed embossing powder color
SUPPLIES
- Sizzix Bigshot die cutting Machine
- Neenah Paper 4456 Neenah 110lb Classic Crest Cardstock
- Misti stamping tool
- Aquamarine Cardstock
- Tulip 3D embossing folder
- Build-A-Flower: Parrot Tulips
- Build-A-Flower: Hawaiian Coral
- Tsukineko Versamark EMBOSS INK PAD Watermark VM-001
- Ranger Sf Clear-Embossing Powder
- Sea Shore Crisp Dye Ink Mini Cube Set
Thank You!
Hope you liked my card. Have a wonderful day and I hope to see you all soon with another project from AECP. Until then happy stamping and thanks for stopping by! If you like what you’ve seen from me, please give me a follow over on my Instagram (@shahicreationz) and/or subscribing to my vlog and YouTube if you haven’t already.
-shahi
Altenew : Polychromatic
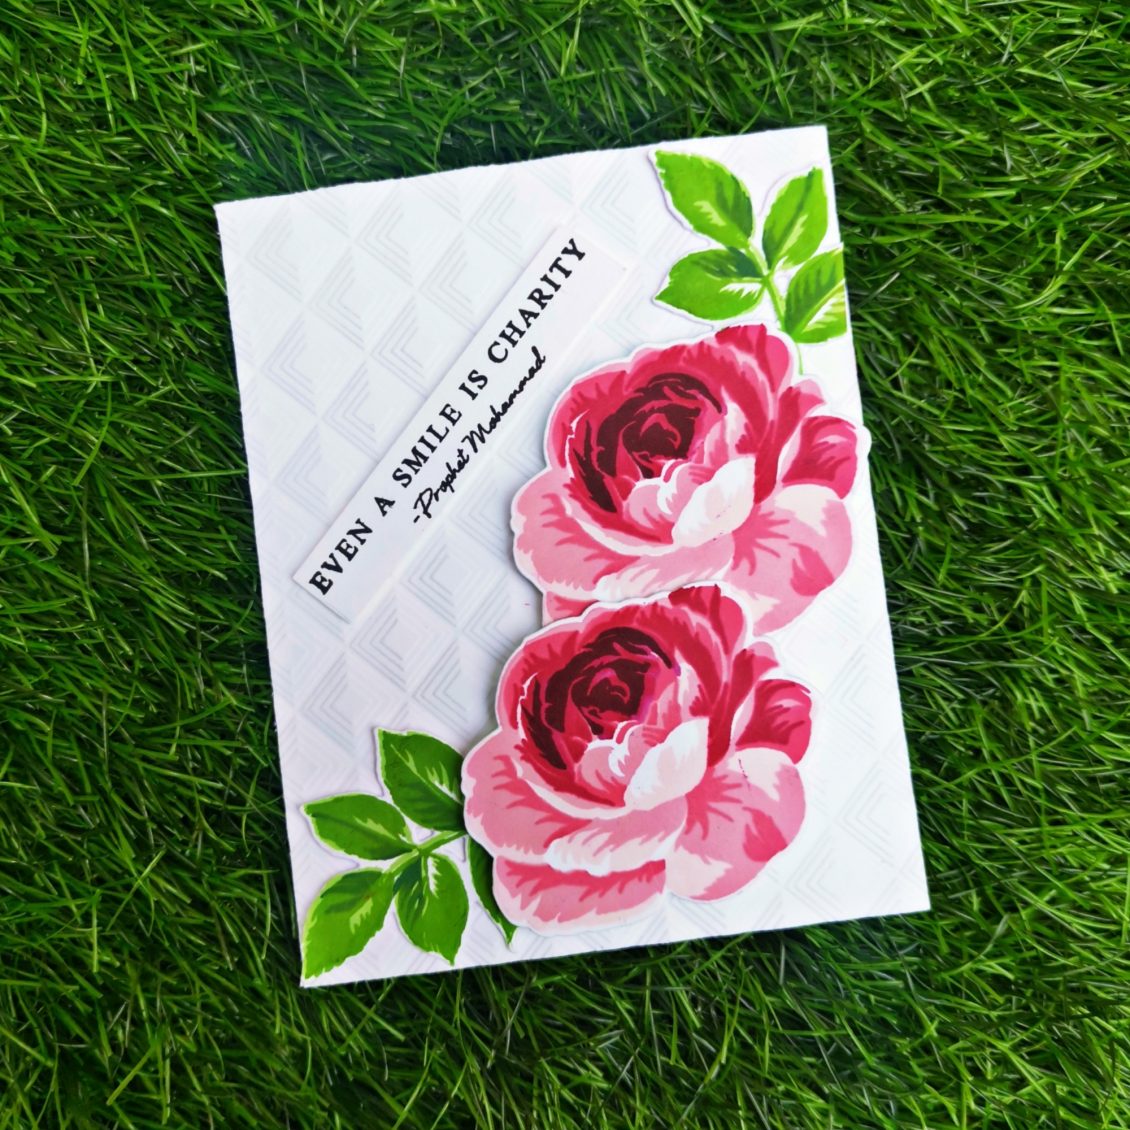
Playing with the colors red and green Today, I am sharing a card project that I created for the Altenew Academy Polychromatic class taught by Nina-Marie Trapani. In this class, Nina discussed tips and tricks to effectively use multi-colors and color combinations to make cards that pop. One of the simplest, and one of my most favorite ways to add color, is to have a crisp white background to balance out the bright hues and allow them to take center stage. So, I chose a simple layering stamp set to play with a color combo of red and green popping up in the white background.
INSTRUCTIONS
- Create a “4 1/4 x 5 1/2 ” card base from Classic Crest Solar White Cardstock.
- Run it through the 3D embossing folder
- Stamp the floral image on a Classic Crest Solar White Cardstock
- Stamp different layers of rose and the leaf in different variations of the same color
- Stick them on the main cardstock using double sided foam tapes
- Stamp the sentiment on a thin strip of cardstock and stick it on the base card

SUPPLIES
- Sizzix Bigshot die cutting Machine
- Neenah Paper 4456 Neenah 110lb Classic Crest Cardstock
- Misti stamping tool
- Modern Squares 3D embossing folder
- Build-A-Flower: Rose
- Frosty Pink Crisp dye ink
- Cotton Candy Crisp dye ink
- Coral Berry Crisp dye ink
- Ruby Red Crisp dye ink
- Purple Wine Crisp dye ink
- Cosmic Berry Crisp dye ink
- Grass filed Crisp dye ink
- Mountain pine Crisp dye ink
- Shadow creek Crisp dye ink
Thank You!
Hope you liked my card. Have a wonderful day and I hope to see you all soon with another project from AECP. Until then happy stamping and thanks for stopping by! If you like what you’ve seen from me, please give me a follow over on my Instagram (@shahicreationz) and/or subscribing to my vlog and YouTube if you haven’t already.
-shahi
 CASE your fellow AECP Crafter
  Clean & Simple Boutique Cards
  Easy Die Cutting Techniques
  Graduation card
  Let it shine
Recent Comments