Month: March 2021
Altenew: Beyond Basic Background
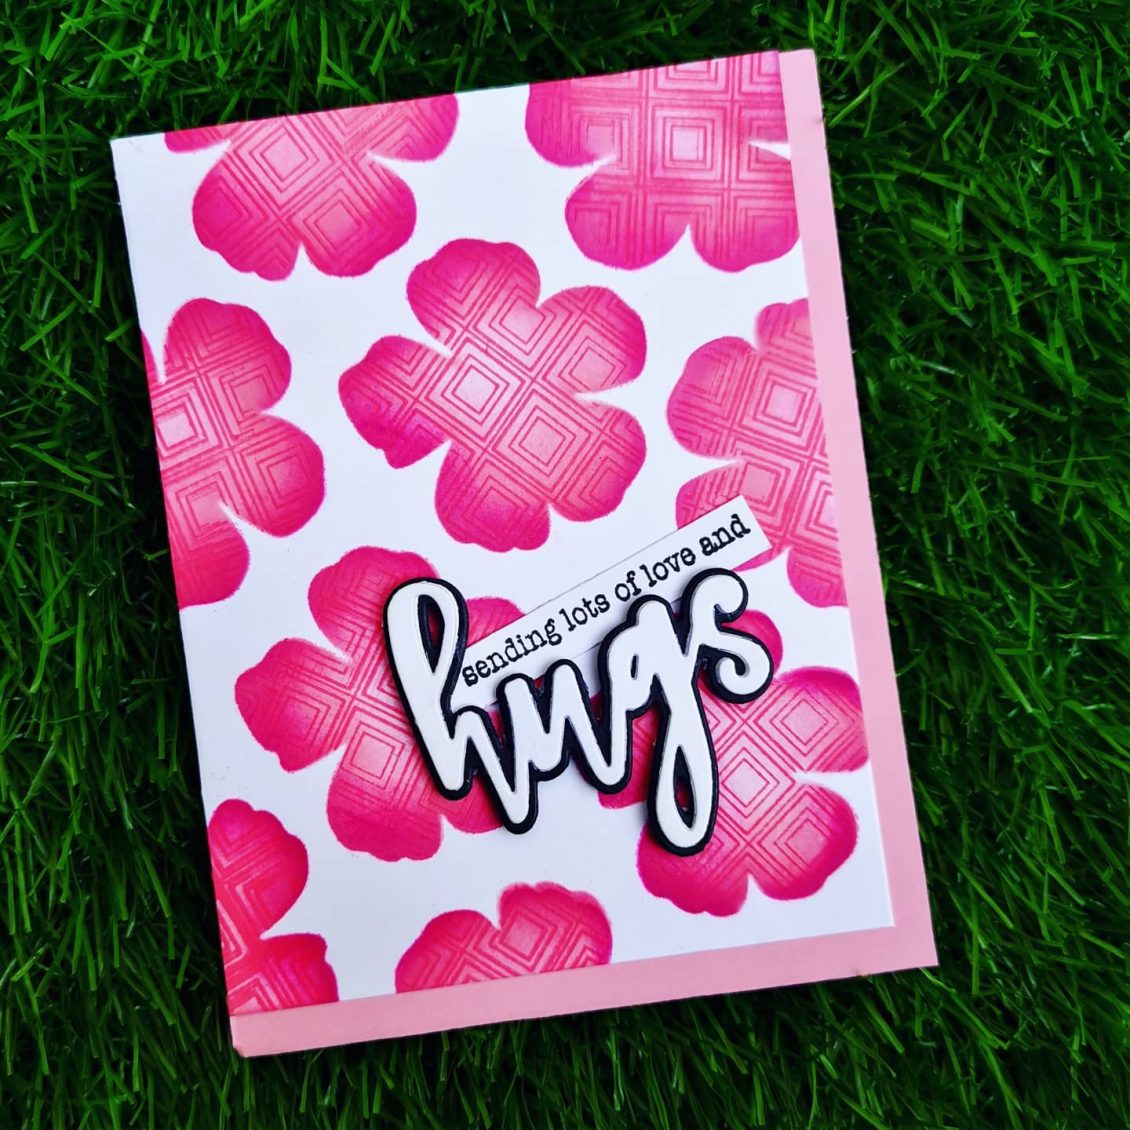
Today I would like to share a card I made for the Beyond Basic Backgrounds by Altenew Academy. I loved the gorgeous cards and the amazing tips that Lydia Evans shared in this course. I found the Beyond Basics Background class really interesting. There are so many interesting ways to create backgrounds on cards that you just don’t think of! This is something which I have never tried doing it before. And I loved how it came out. I have dedicated this cards to all the strong and inspiring women on women’s day on my IG page.
Once again.. Here I am…Sending out lot of love and hugs to all the wonderful women out there 💖
INSTRUCTIONS
- Create a “5 x 6 ” card base from Classic Crest Solar White Cardstock.
- Place the die over the card and die-cut it
- Cut numerous pieces and create a DIY stencil.
- Create a “4 x 5 1⁄4 ” card base from Classic Crest Solar White Cardstock.
- Place the DIY stencil over the blank card stock and stick the sides with masking tape.
- Blend the Die ink over each flowers
- The ink should be lighter towards the center thus giving an Ombre look to the flowers
- Then ink the large background stamp with the darker ink and stamp it over the stencil.
- Then remove the DIY stencil
- Then die cut the sentiment various times to create a thinker dimension
- Stamp the other sentiment on a thin strip of cardstock
- Stick both the die cut sentiment and the sentence sentiment towards the bottom right corner of the card.
- Trim a pink cardstock into 4 1/4 * 5 1/2 and place it behind the cardstock.
- Place the main card towards the top left of the pink card.
TIPS
- Cutting the piece for your stencil larger than your card blank will help you cover the whole area you want covering
- Tack the stencil down with masking tape on either sides, so that it would keep the stencil intact.
- Choose the same shade of color, start blending with the darkest color on the edges, blend this out and then blend the lighter color over the middle
- Try creating an Ombre effect it makes the flowers stands out as it is the slow melting effect of a lighter shade gradually getting darker towards the ends .
- Die cut the sentiment various times to create a thinker dimension
SUPPLIES
- Jet Black Crisp Dye Ink
- Cherry Blossom Crisp Dye Ink Set
- Hello and Hugs Dies Set
- Flowering Cistus Stamp Set
- Shine Like a Diamond Stamp Set
Hope you liked my card. Have a wonderful day and I hope to see you all soon with another project from AECP. Until then happy stamping and thanks for stopping by!
-shahi
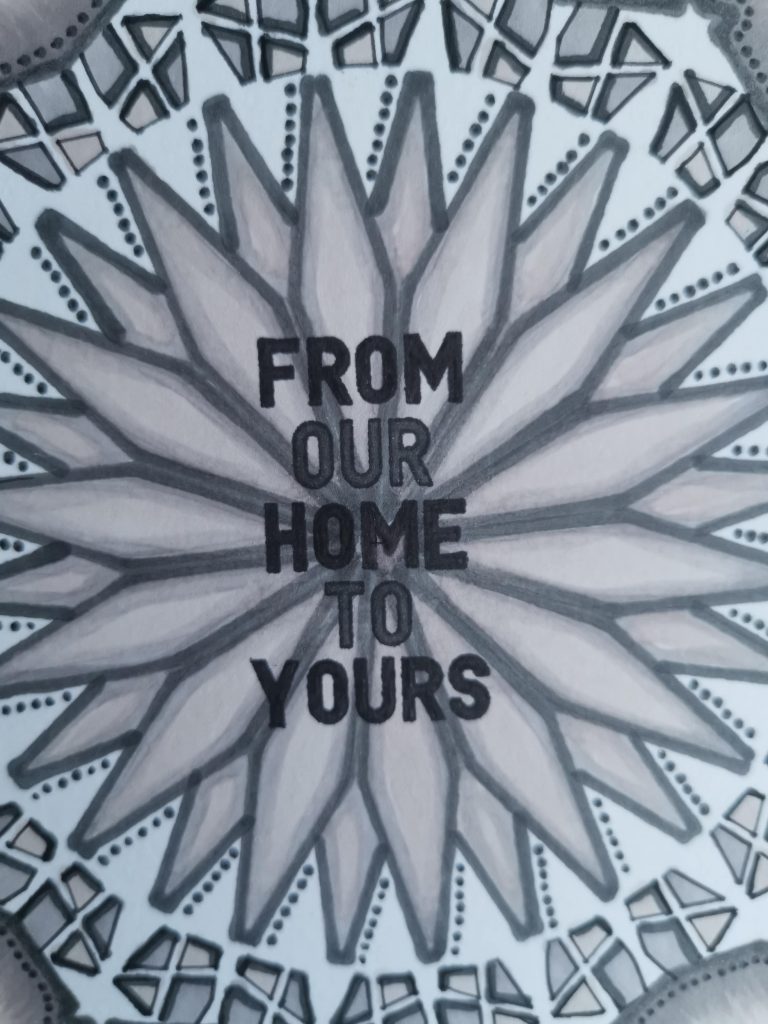
Altenew: Magic Marker Techniques
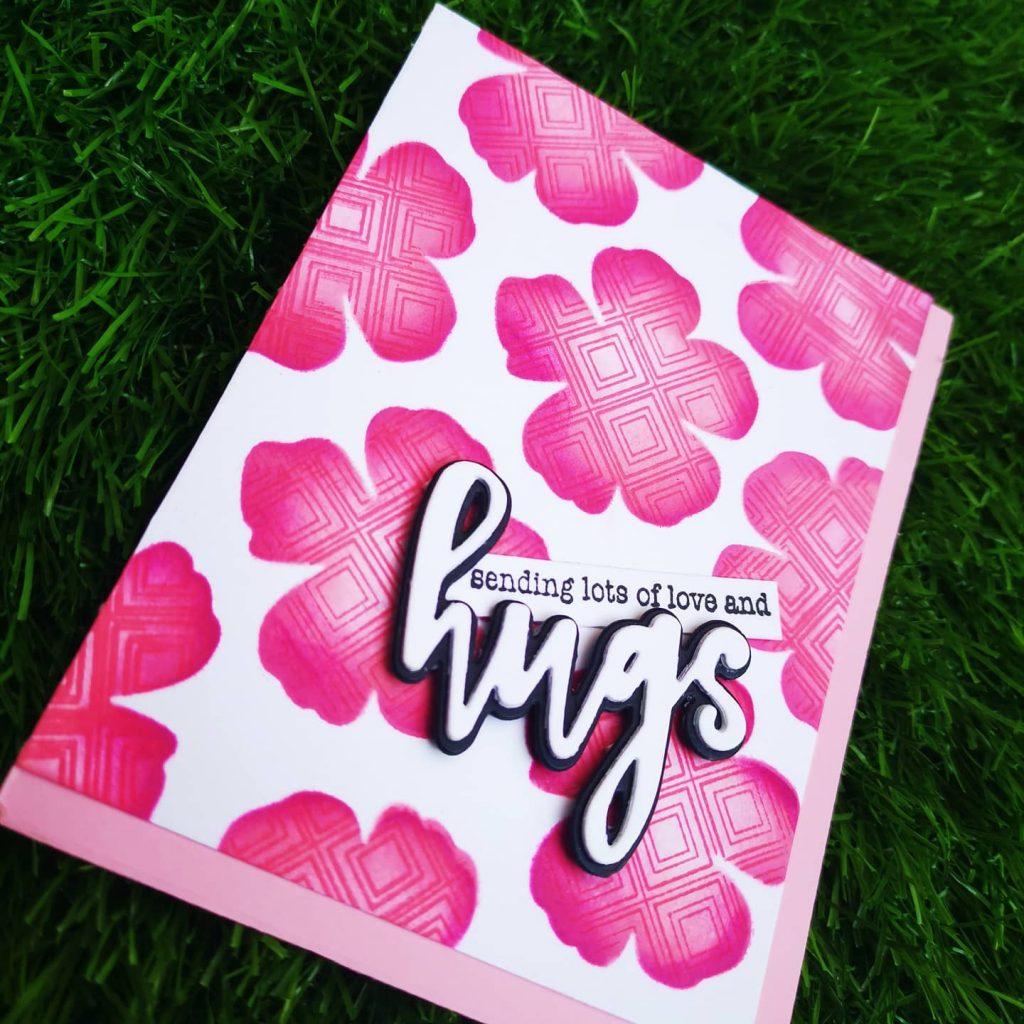
The next AECP class I tackled was “Magical Marker Techniques”, by Sara Naumann. I enjoyed the fact that Sara uses her markers for more than just coloring in stamped images, in fact, I liked that a lot. I would recommend this class to anyone who is looking for ideas on how to stretch their supplies . I used my artistic markers just for coloring, but through this class, I did explored a new way of using it.
INSTRUCTIONS
- Create a “4 1⁄4 x 5 1⁄2 ” card base from Classic Crest Solar White Cardstock.
- Place linear Stencil over card base and position it to the center of the card.
- Tack it down with masking tape.
- Remove the stencil and retrace the diamonds so they’re heavily outlined, then color in the diamond shapes
- Draw the outline using darker shade of artistic marker and fill them with lighter shades.
- Slightly rotate the stencil and move over to the second layer.
- Fill in the smaller parts according to your creativity and color choice
- Add small dots using the fine tip of the artistic marker
- You’ll have a cool dimensional effect by darkening the outline of the small parts of the stencil.
- Stamp a sentiment from the Holiday Tag sentiment.
- Fill in the sentiment with artistic marker
TIPS
- Tack the stencil down with masking tape on either sides, so that it would keep the stencil flat.
- Choose a color theme to bring up a mandala effect.
- Draw the outline using fine tip of the marker
- Slightly rotate the stencil and move over to the next layers.
- Take advantage of the fine tip of the marker to add dots and dimensions to the card
SUPPLIES
- Jet Black Crisp Dye Ink
- Morning Frost Artistic Marker
- Evening Gray Artistic Marker
- Industrial Diamond Artistic Marker
- Linear Stencil
- Holiday Tag Sentiments
For my card, I followed the techniques from lesson 6 of this course – using Markers with Stencils. I really encourage you taking this class taught by Sara Naumann, it will help you a lot more to understand color and color usage on projects. Hope you liked my card.
Have a wonderful day and I hope to see you all soon with another project from AECP. Until then happy stamping and thanks for stopping by!
-shahi
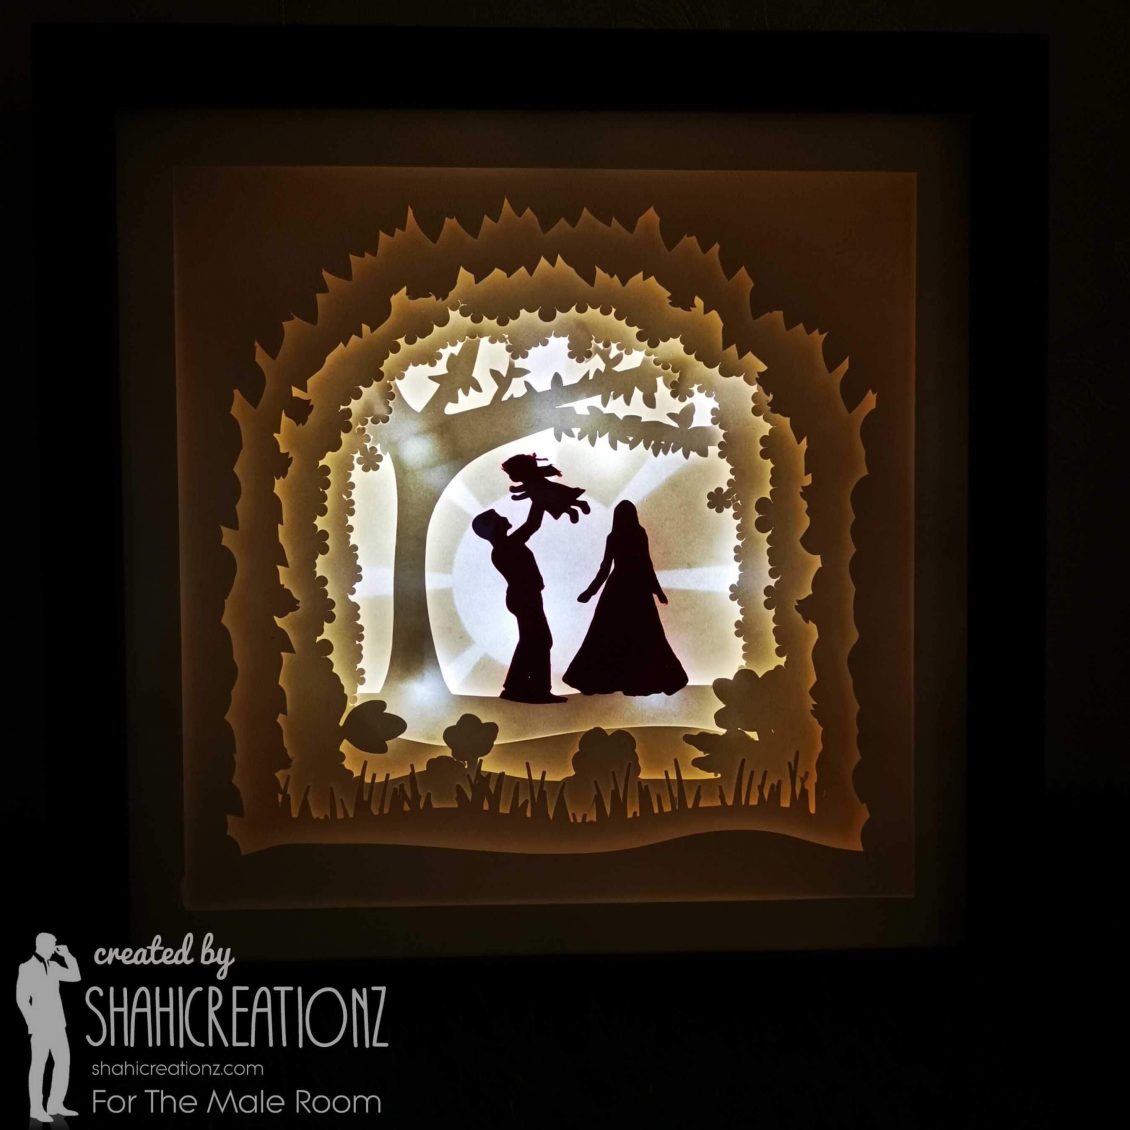
3D Paper Cut Light Box
A new month and therefore a new task to begin with. For The Male room challenge, this month we have an interesting task ahead of us., But this month we’re shaking things up a bit and asking you to forget about cards and show us your creativity in a different way. So scrapbook layouts, tags, art journal pages, 3D, ATCs will be the order of the day. Inspired by the artist, Jennifer Maker and her beautiful artwork I decided to create a 3D paper cut light box this month.
A lightbox can be used as a wonderful home décor, or a unique birthday or wedding gift. You can mount it on a wall, or place it on a desk and enjoy its charming beauty. Basically, this light box consists of paper cut outs layered on each other in a box with a glass panel. LED lights are placed behind all the layers, which makes each layer glow, giving this 3D look.
After referring to Jenifer Maker’s videos , I created my custom design for this light box on Cricut space. And cut them I using 130 grams white card stock, because it’s stiff enough to stand up and thin enough to let the light pass through. The layers are reassembled with foam spacers in between each one. This gives the image the appearance of depth and creates a 3D effect. It was placed inside a shadow box frame sized 9*9 .
If you put your custom shadow box design in a display frame, you can add LED lights to the back to light it up and see all of those layers and shadows so much better! I prefer to use LED light strips, but some people just use fairy lights. Either way, they go behind your layers of cardstock. I usually put my LED light strips around the edge of the frame for a nice even glow. You’ll want to position the lights so your cord can hang out one corner — if necessary, cut a small notch in the corner of the frame for the cord. Now just replace the back of your display frame, plug in your light, and enjoy the magic!
Hope you liked my 3D Paper Cut Light Box. Now have a look at the challenge blog here for all the challenge details and to see the cards from the rest of the Design Team. https://themaleroomchallengeblog.blogspot.com/2021/03/challenge-148-not-card.html.

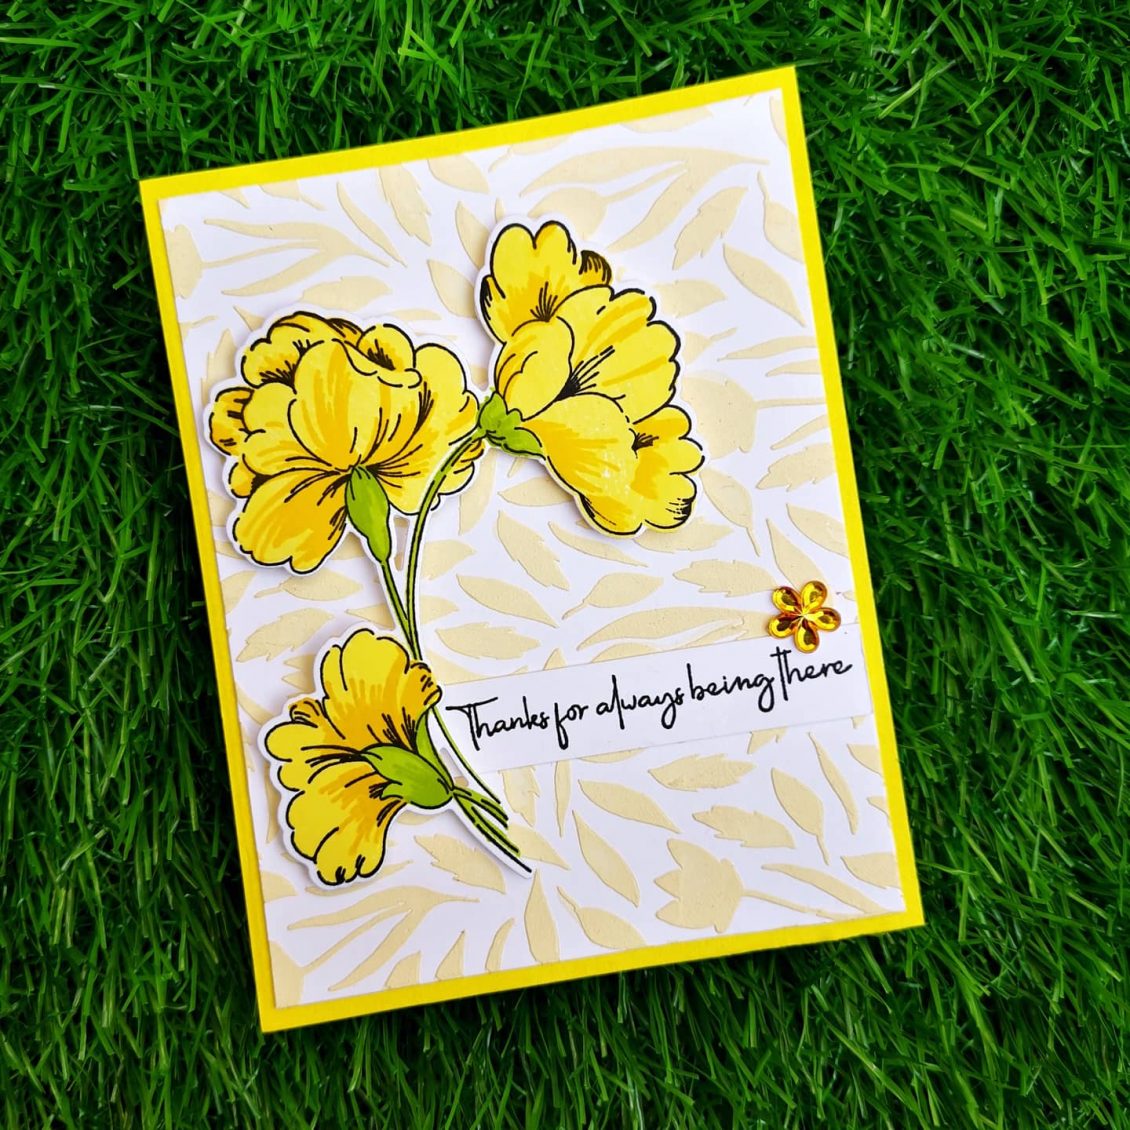
Altenew: In The Mood For Color
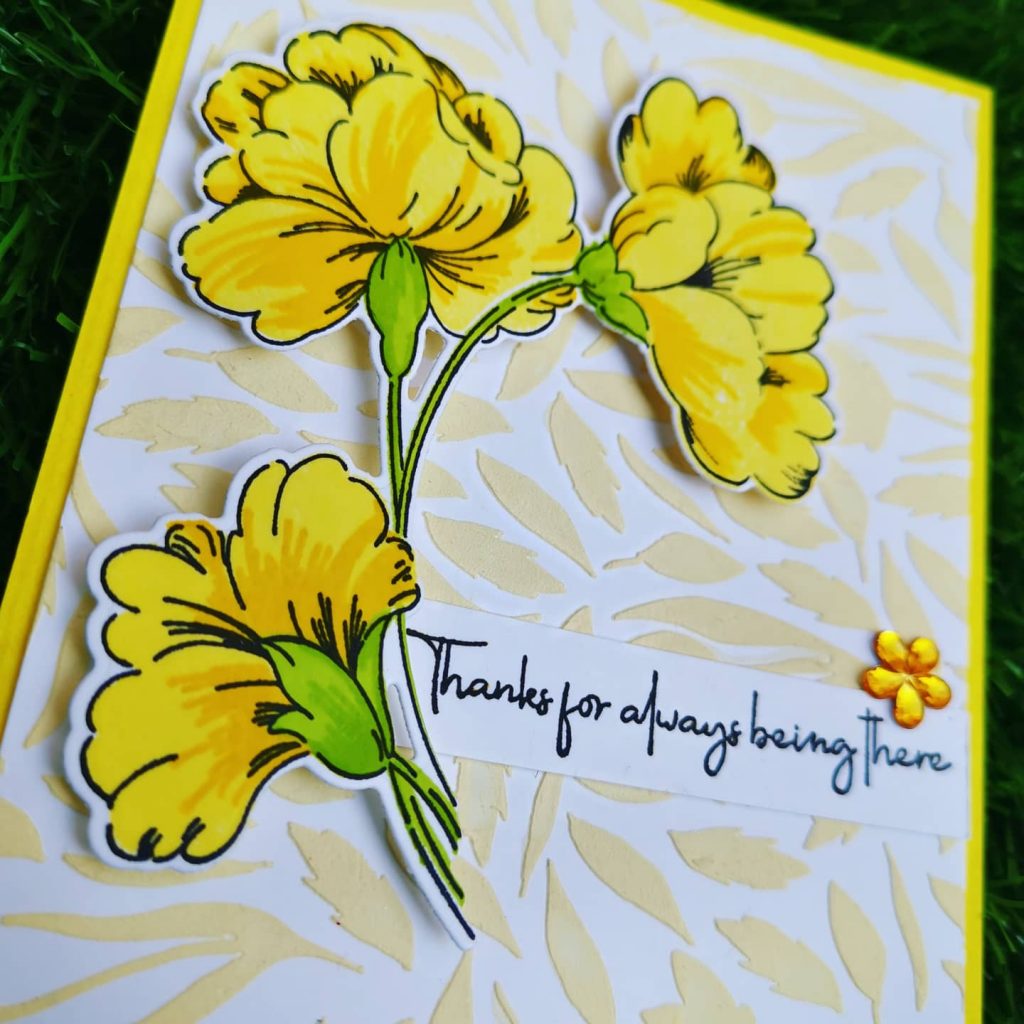
Hi, Thanks for stopping by… It’s so great to see you here! I was very excited to have graduated from Level 1 of the AECP program! That last project was HUGE and took me forever to get completed. After a long gap, I’m now onto my next level of the program. The first class I choose in level 2 is “In The Mood For Color” . In this class Stephnie Klauck shares the impact of colors on ones mood. Here I have focused on the color Yellow . It is the most luminous of all the colors of the spectrum. It’s the color that captures our attention more than any other color. It’s the color of happiness, and optimism, of enlightenment and creativity, sunshine and spring.
INSTRUCTIONS
- Create a 4 ” x 5 1⁄4 ” card base from Classic Crest Solar White Cardstock.
- Place Spring Garden Stencil over card base and mask outlines with masking tape.
- Take some embossing paste on the watercolor palette and add few drops of Buttercream Alcohol Ink and blend it well
- Apply the paste on the cardstock over the stencil.
- Wait until the paste dries
- Stamp the biggest stamp from Sweet Flowers Stamp Set using Obsidian Pigment Ink on a Classic Crest Solar White Cardstock
- Then, stamp in the layers of the flowers with Fresh Lemon and Maple Yellow.
- Then, stamp the floral stem details using Bamboo and Parrot
- Finally, die cut and adhere the florals onto your card base using double sided foam tape.
- Stamp a sentiment from Friends Forever Stamp Set onto a white cardstock strip using Obsidian Pigment Ink
- Stick it near to the floral die cut
- Add your favorite embellishment to enhance the look of the card.
- Finally, add this panel to your yellow card base
TIPS
- Choose the right colors , it allows you to let the sentiment say what you’re feeling, and help the person you’re giving the card to, feel what your feeling.
- Use a stamping tool to stamp your florals. It makes stamping large solid images so much easier since you can double and triple stamp. the included bar magnet can be used to quickly and easily position your cardstock, and the included grid paper makes it easy for you to lay out and align your card’s design.
- Before stamping, use an Anti-Static Pouch tool to remove static from your paper so the powder doesn’t stick where you don’t want it.
- When doing stamp layering, start with the lightest ink color first and then build up to the darkest.
- Add your favorite embellishment to enhance the look of the card.
SUPPLIES
- Obsidian Pigment Ink
- Fresh Lemon Crisp Dye Ink
- Maple Yellow Crisp Dye Ink
- Bamboo Crisp Dye Ink
- Parrot Crisp Dye Ink
- Friends Forever Stamp Set
- Sweet Flowers Stamp & Die Bundle
- Spring Garden Stencil
- Embossing Paste
- Buttercream Alcohol Ink (Artistic marker refill)
- Watercolor palette
I really encourage you taking this class taught by Therese, it will help you a lot more to understand color and color usage on projects. Have a wonderful day and I hope to see you all soon with another project from AECP. Until then happy stamping and thanks for stopping by!
-shahi

 CASE your fellow AECP Crafter
  Clean & Simple Boutique Cards
  Easy Die Cutting Techniques
  Graduation card
  Let it shine
Recent Comments