Month: June 2022
AECP :Creative coloring with artistic markers
My today’s card is based on the class, Creative coloring with artistic markers by Mindy Baxter.
In this class, you will learn creative tips and techniques to add stunning colors to your stamped images and create gorgeous cards.
INSTRUCTIONS
- Create a 4 ¼” x 5 ½” card base from Classic Crest Solar White Cardstock.
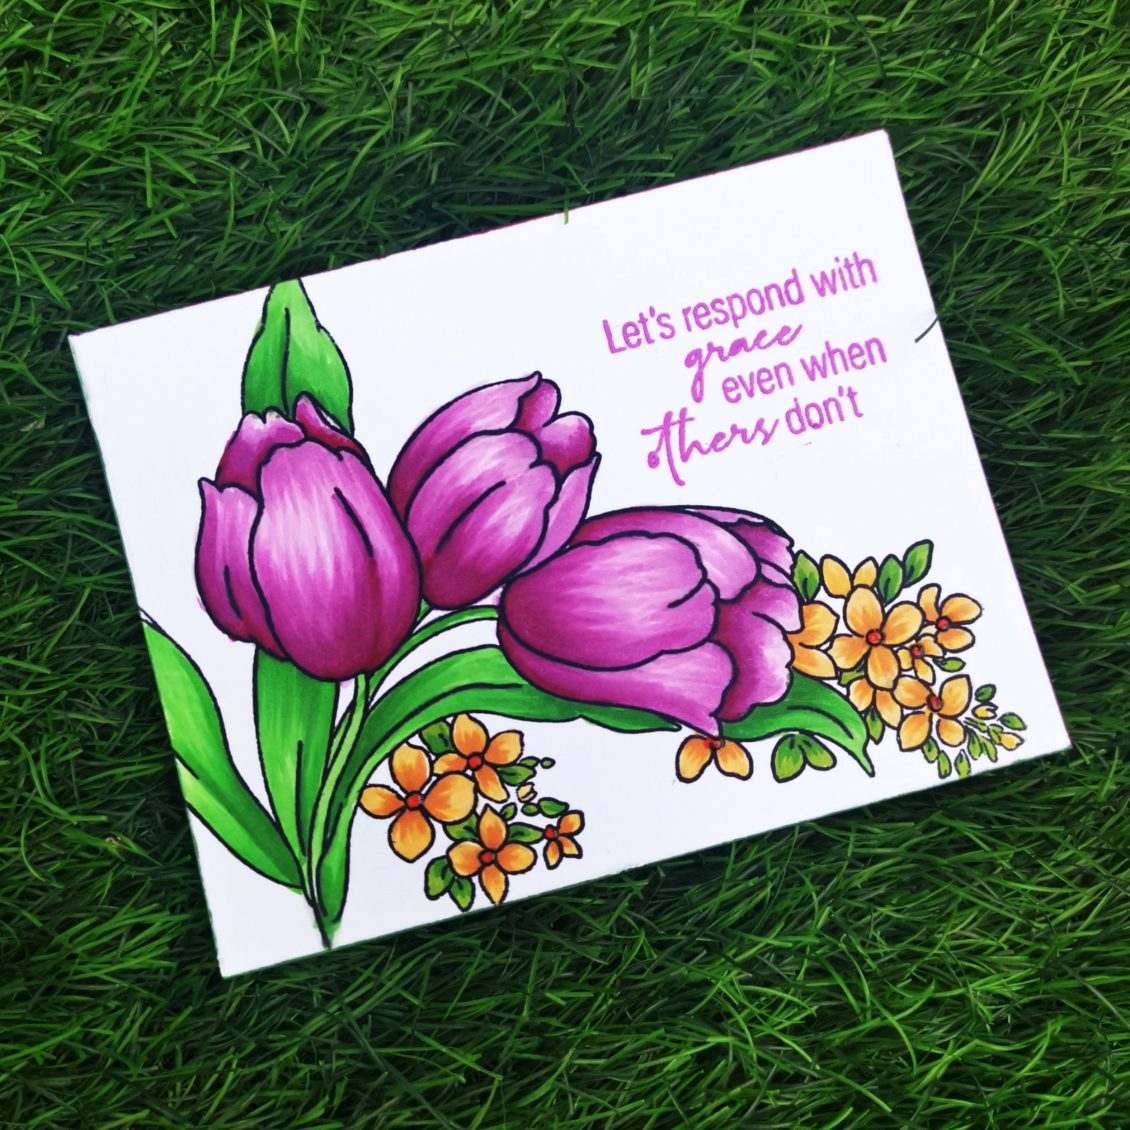
- Stamp image from Build-A-Garden: Tulips & Friends Stamp set onto a piece of Classic Crest Solar White Cardstock using Obsidian Ink.
- Color stamped image using Artistic Markers.
- The tulips are colored using Rose Quartz Artist Alcohol Marker, Puffy Heart Artist Alcohol Marker, Purple Wine Artist Alcohol Marker and Pinkalicious Artist Alcohol Marker.
- The leaves are colored using Grass Field Artist Alcohol Markers , Shadow Creek Artist Alcohol Markers and Firebrick Artist Alcohol Marker
- Stamp the sentiment from Build-A-Garden: Magnificent Branch Outline Stamp Set with Coral Berry Crisp Dye Ink
SUPPLIES
- Rose Quartz Artist Alcohol Markers R601
- Puffy Heart Artist Alcohol Markers R603
- Purple Wine Artist Alcohol Markers R614
- Pinkalicious Artist Alcohol Markers R504
- Firefly Artist Alcohol Markers G503
- Grass Field Artist Alcohol Markers G515
- Shadow Creek Artist Alcohol Markers G425
- Caramel Toffee Artist Alcohol Markers Y612
- Forest Glades Artist Alcohol Markers G715
- Warm Sunshine Artist Alcohol Markers Y205
- Firebrick Artist Alcohol Markers Y817
- Coral Berry Crisp Dye Ink
Thank You!
Hope you liked my card. Have a wonderful day and I hope to see you all soon with another project from AECP. Until then happy stamping and thanks for stopping by! If you like what you’ve seen from me, please give me a follow over on my Instagram (@shahicreationz) and/or subscribing to my vlog and YouTube if you haven’t already.
-shahi

AECP: All About Layering 5
Actually this project was done long back, but unfortunately I was not able to post it. So here it goes…
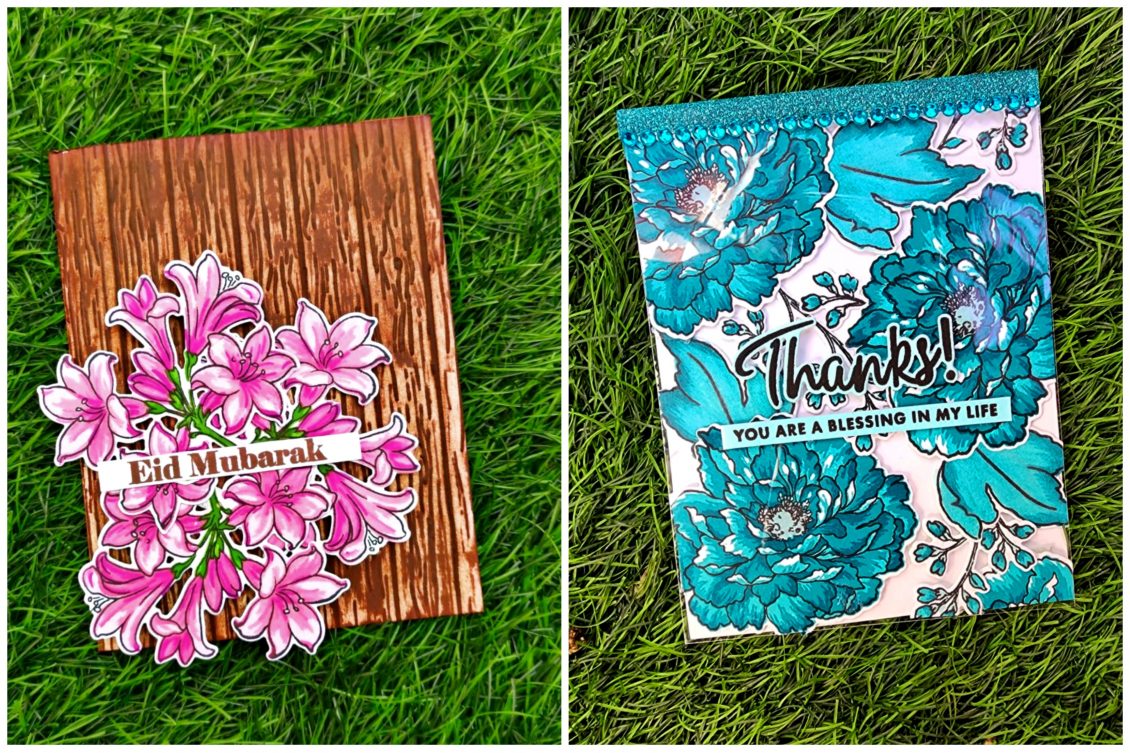
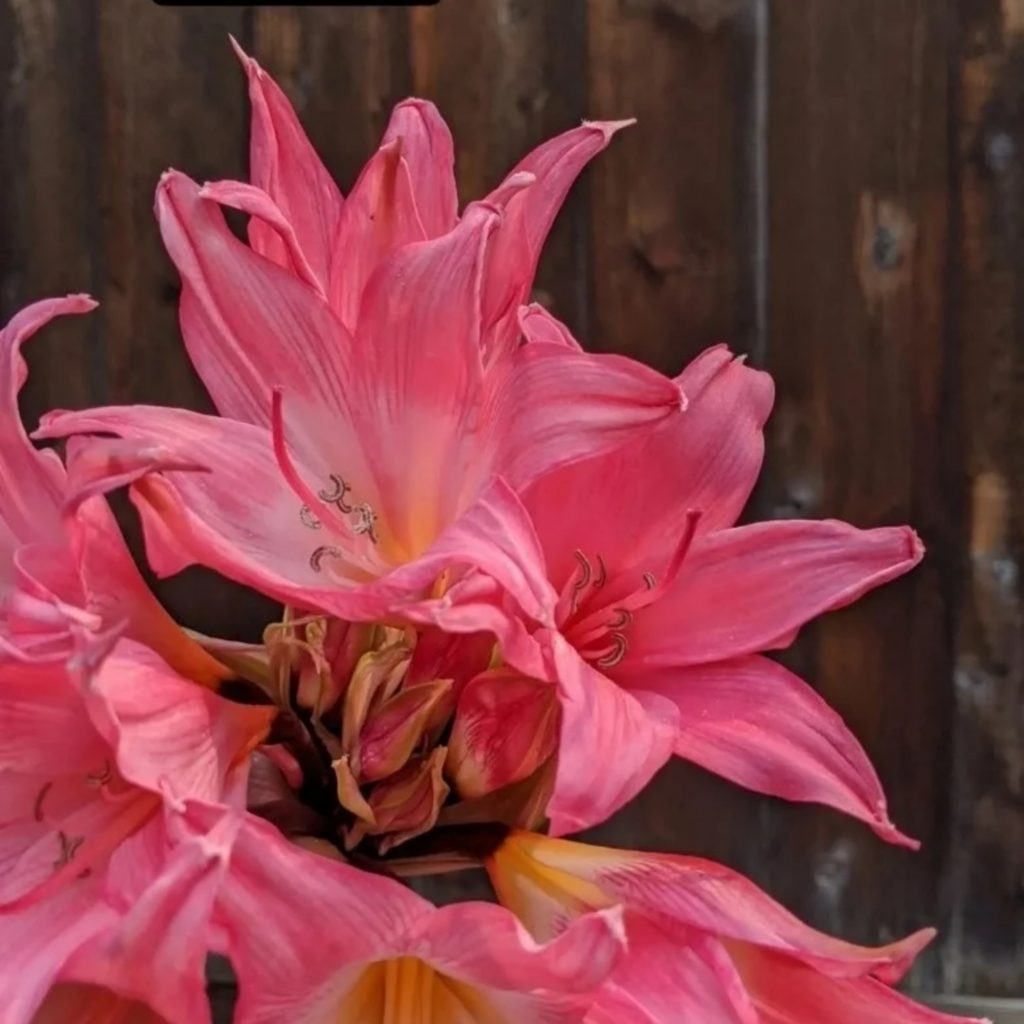
After taking a long break from card making, I am back to do my favorite course, AECP. Few months back, I came across an Instagram story posted by the president and founder of Altenew, Tasneem. She posted a picture of a pink flower and asked the followers to guess the flower. I doubted if it was belladonna lily. Randomly guessed it and she said that it was the correct answer. I was sure that she was working on something special. A special stamp set or an amazing embossing folder, who knows what is going to come up. So I randomly took a screenshot of that story. Months passed by, Ramadan is here and I received my Build a flower subscription for the month of April and it was the same old belladonna lily, I was really excited to hold it as an wonderful stamp set. That’s when I decided to turn my All About Layering card into a dedication to Tasneem. Eid was ahead and belladonna lily being the final BAF stamp set, were the other reason for me to do that. Lydia Evans has done a wonderful job in explaining every detail about layering stamps, methods and techniques etc.
INSTRUCTIONS
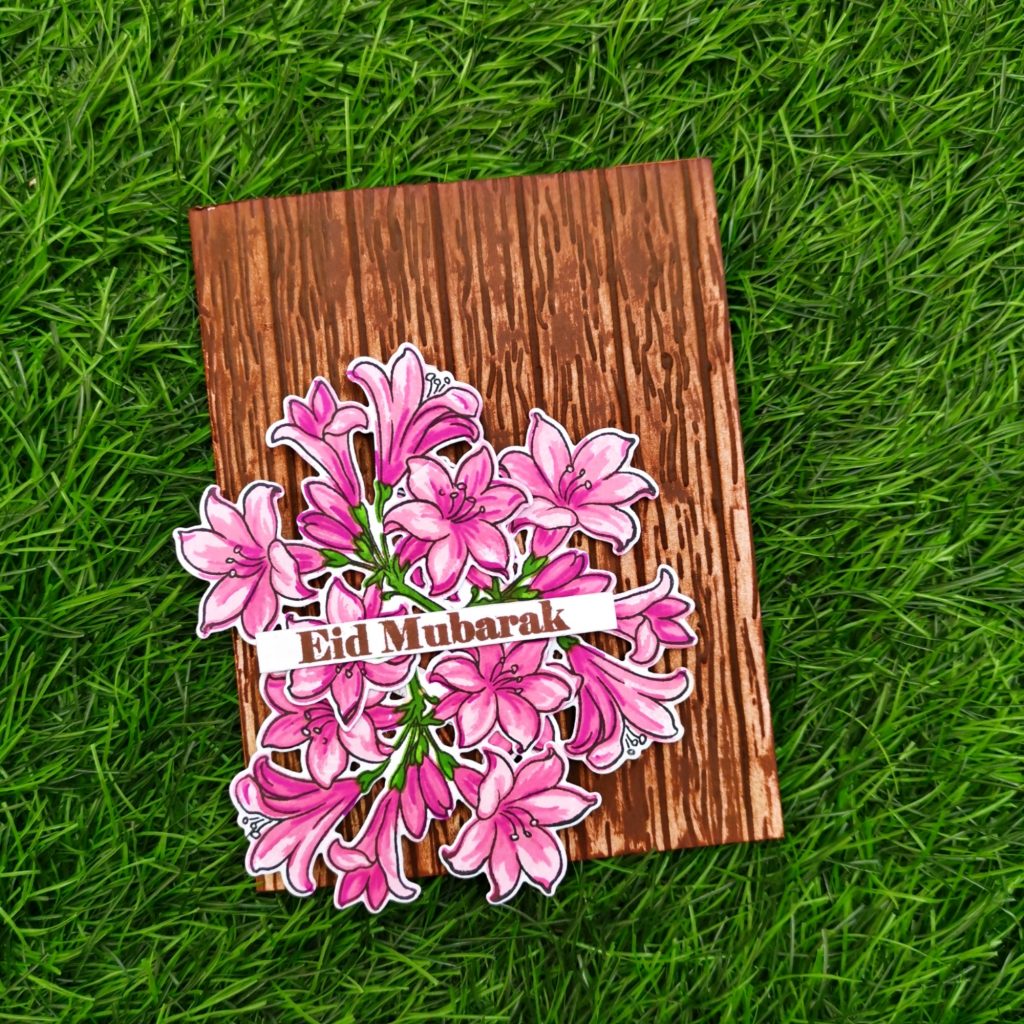
- Take the flower stamp from the Build-a-Flower: belladonna lily Set and stamp the outline layer in black Ink onto a piece of white cardstock.
- Then stamp the base layer with Pink Diamond Crisp dye Ink
- The second layer of the stamp will fit around all of the edges of the previously stamped layer, stamp this in Pinkalicious Crisp dye Ink .
- The third layer will fit around the bottom-right edge of the previously stamped layer, stamp this in Rubellite Crisp dye Ink .
- The fourth layer will fit on the top edge of the previous layer, stamp this in Razzleberry Crisp dye Ink .
- Stamp the stems with Grass Field Crisp dye Ink and Shadow Creek Crisp dye Ink
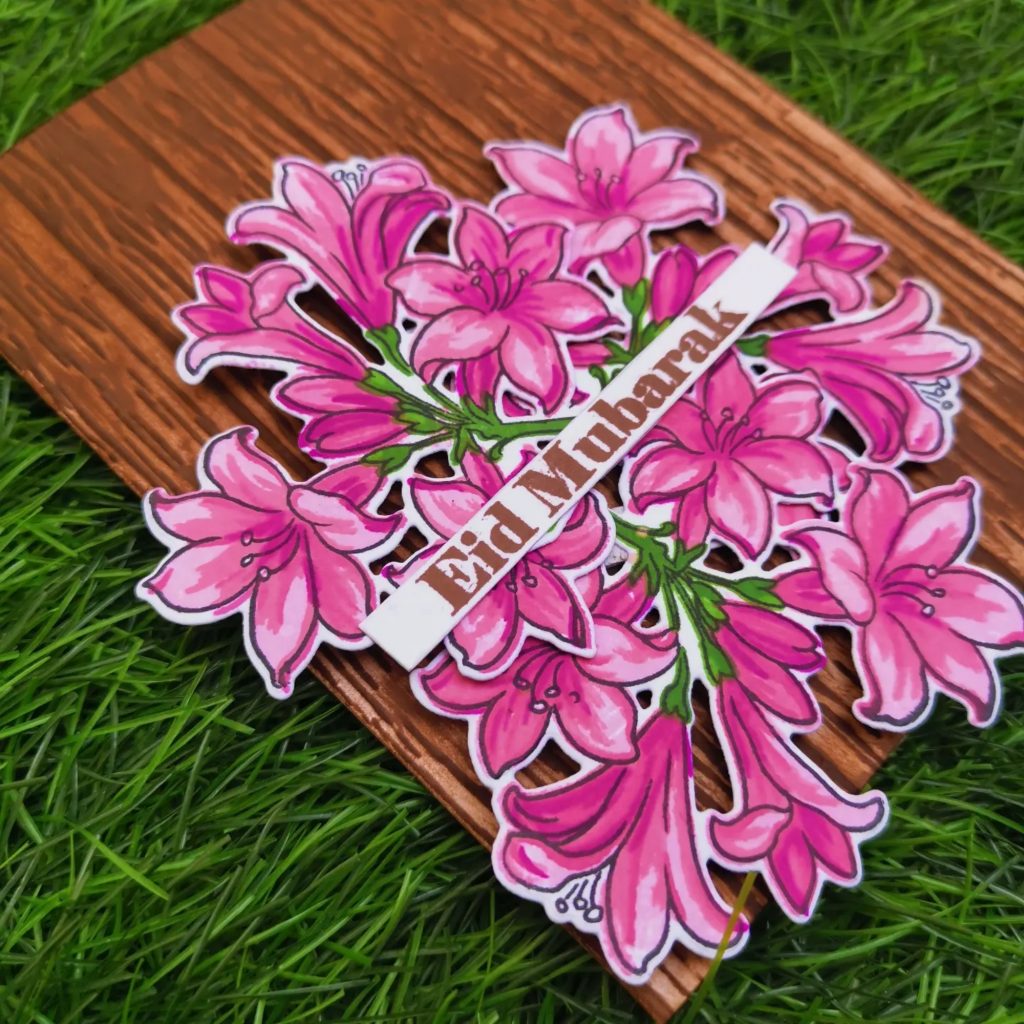
- Die cut 3 bunches of each flower.
- Create a 4 ¼” x 5 ½” card base from Classic Crest Solar White Cardstock.
- Run it through Deck Planks 3D Embossing Folder and shade it with Vintage Photo Distress Ink .
- Arrange and Stick the flowers according to your liking.
- Stamp the Eid sentiment and stick it at the middle of the flower.
SUPPLIES
- Pink Diamond Crisp dye Ink
- Pinkalicious Crisp dye Ink
- Rubellite Crisp dye Ink
- Razzleberry Crisp dye Ink
- Grass Field Crisp dye Ink
- Shadow Creek Crisp dye Ink
- Vintage Photo Distress Ink
- Versafine black pigment ink
- Eid greetings Stamp Set
- Deck Planks 3D Embossing Folder
- Classic Crest Solar White Cardstock.
- Sizzix big shot die cutting machine
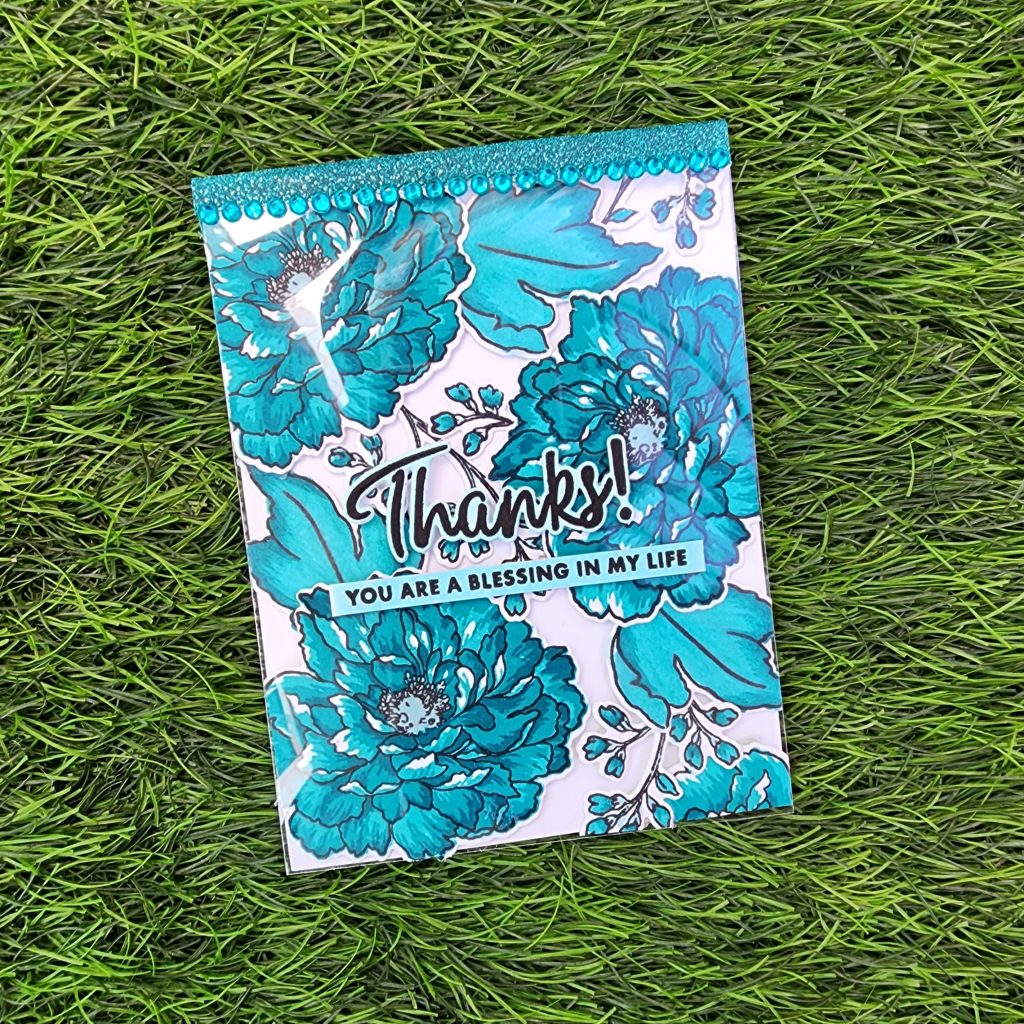
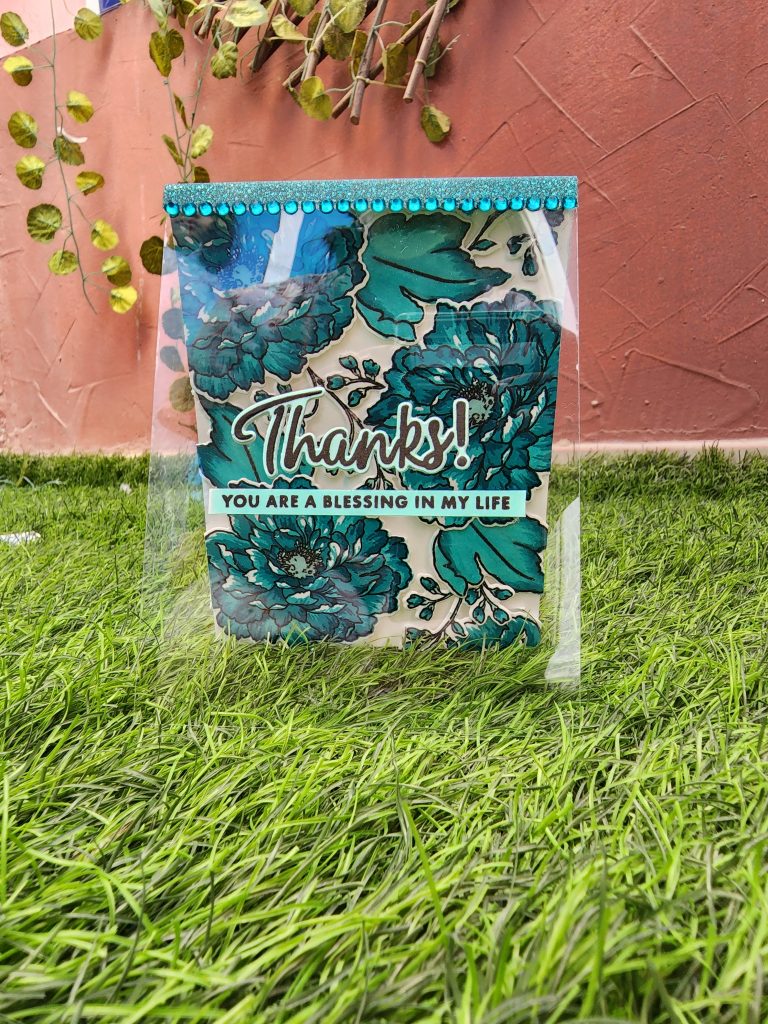
Here is my second take , on this class. I have tried sticking the sentiment to the acetate sheet for this card.
INSTRUCTIONS
- Take the flower stamps from the Build-A-Flower: Tree Peony Layering Stamp Set and stamp the base layer in Dew Drops Crisp dye Ink onto a piece of white cardstock.
- Followed by Aqualicious Crisp dye Ink, Teal Cave Crisp dye Ink ,Galactic Stream Crisp dye Ink respectively.
- Stamp the outline layer of the flower and leaves with versa fine onyx black
- For the leaves, Color it with the similar shades of Artist Alcohol Marker
- Stamp several of these images for the project and use the coordinating dies to die cut them.
- Create a 4 ¼” x 5 ½” card base and set it aside.
- On a 4 ¼” x 5 ½” panel, start arranging the florals and adhere them with foam tape.
- Use glue tape to adhere the leaves.
- Cut off the excess pieces that are going off the edges.
- Take a 4 ¼” x 5 ½” piece of acetate sheet and place it above the card.
- Trim a similar shade of Teal Glitter washi tape and stick it over the Acetate sheet joining the back part of the card.
- Stick a layer of teal gem stones as a border to the washi tape.
- Stamp and Die cut “Thanks” from Halftone Circles Stamp & Die Bundle over a cardstock colored in Dew Drops Crisp dye Ink .
- Stick it on the middle of the acetate sheet.
- Stamp the sentiment from Build a Garden: Tulips & Friends with versa fine onyx black Ink on a thin strip of cardstock colored in Dew Drops Crisp dye Ink. Stick it below the die cut.
SUPPLIES
- Classic Crest Solar White Cardstock.
- Sizzix big shot die cutting machine
- Build-A-Flower: Tree Peony Layering Stamp & Die Set
- Build a Garden: Tulips & Friends
- Halftone Circles Stamp & Die Bundle
- Teal Glitter washi tape
- Acetate sheet
- Versa fine onyx black
- Dew Drops Crisp dye Ink
- Aqualicious Crisp dye Ink
- Teal Cave Crisp dye Ink
- Galactic Stream Crisp dye Ink
- Dew Drops Artist Alcohol Marker
- Aqualicious Artist Alcohol Marker
- Teal Cave Artist Alcohol Marker
- Galactic Stream Artist Alcohol Marker
Thank You!
Hope you liked my card. Have a wonderful day and I hope to see you all soon with another project from AECP. Until then happy stamping and thanks for stopping by! If you like what you’ve seen from me, please give me a follow over on my Instagram (@shahicreationz) and/or subscribing to my vlog and YouTube if you haven’t already.
-shahi
 CASE your fellow AECP Crafter
  Clean & Simple Boutique Cards
  Easy Die Cutting Techniques
  Graduation card
  Let it shine
Recent Comments