Tag: AECP
Altenew: With A Twist
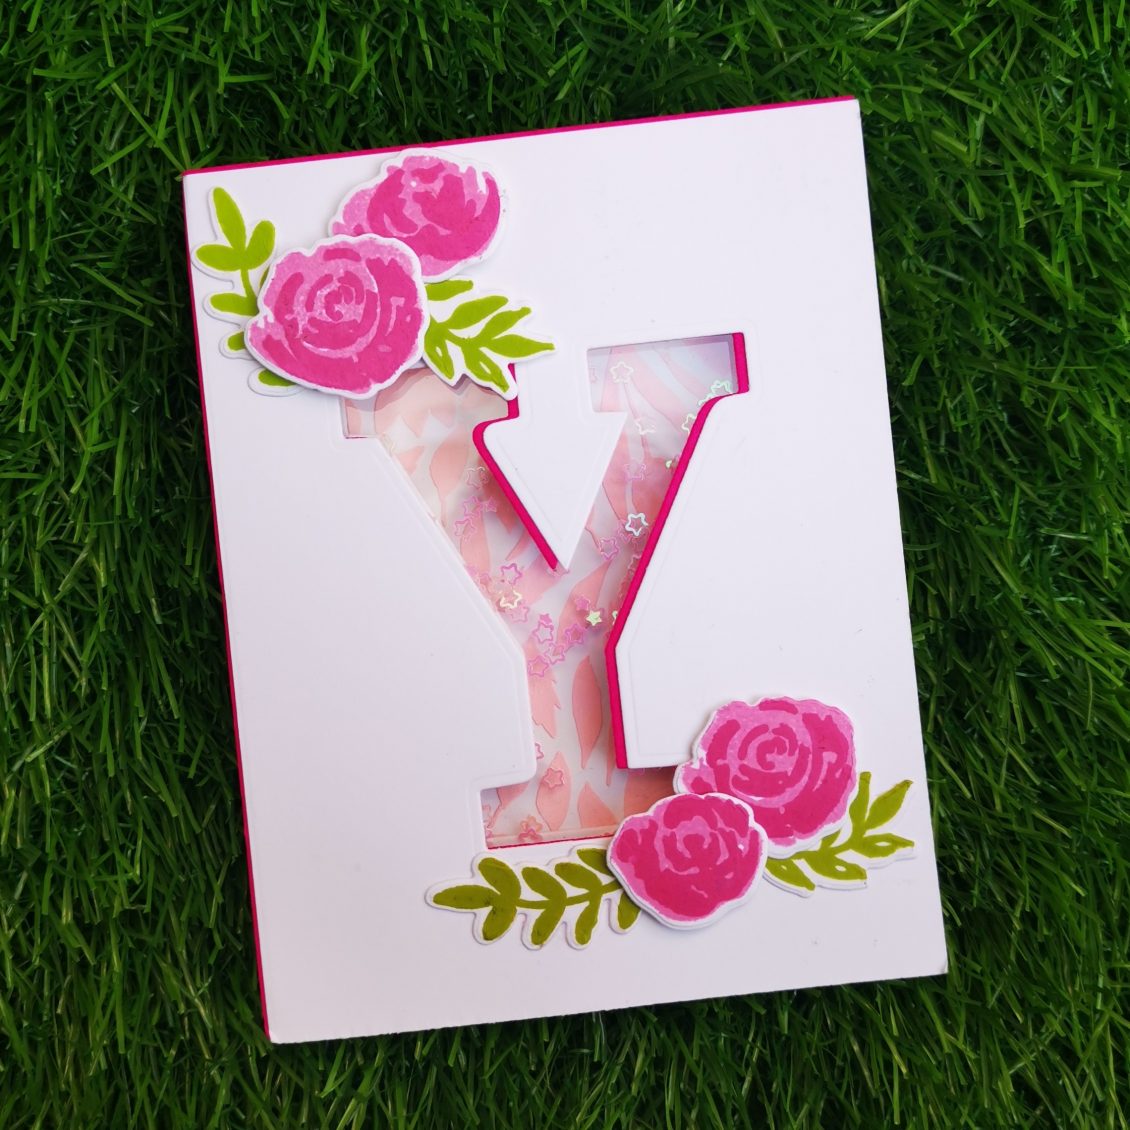
Hi, my dear crafty friends, and welcome to my blog. I made today’s card for the With a twist Course by Altenew Academy. I’m someone who is in love with interactive card. We all love a bit of acetate on our cards and there are so many wonderful ways that we can use this fabulous product to create some WOW. Shaker card is just one among it. I truly loved making this card. If you are someone like me who is passionate about various new methods to use on your card, then don’t hesitate . This course is definitely for you. Therese Calvird has really done a great job by explaining us the things in detail. Here she is taking us one step further and shaking it right through to the inside of the card.
INSTRUCTIONS
- Create a “4 1/4 x 5 1/2 ” card base from Classic Crest Solar White Cardstock (layer 1) and a pink cardstock (layer 2)
- Place the mega alphabet die over both the cards and die-cut it
- Hold the die in place with washi tape and die cut it.
- Create a “4 1/4 x 5 1/2 ” top folding card base from Classic Crest Solar White Cardstock (layer 3)
- Trace out the previous die cut image into this card stock.
- Place the die on this panel and die cut the shape.
- Open the card right up and place it on the die cutting machine so that it only cuts the front side.
- Slightly trim down the front panel of the white cardstock (layer 1) from 2 adjacent sides
- Place and stick the pink cardstock paper below the front panel of the Classic Crest Solar White Cardstock (layer 1)
- Position the White cardstock towards the right corner over the pink .
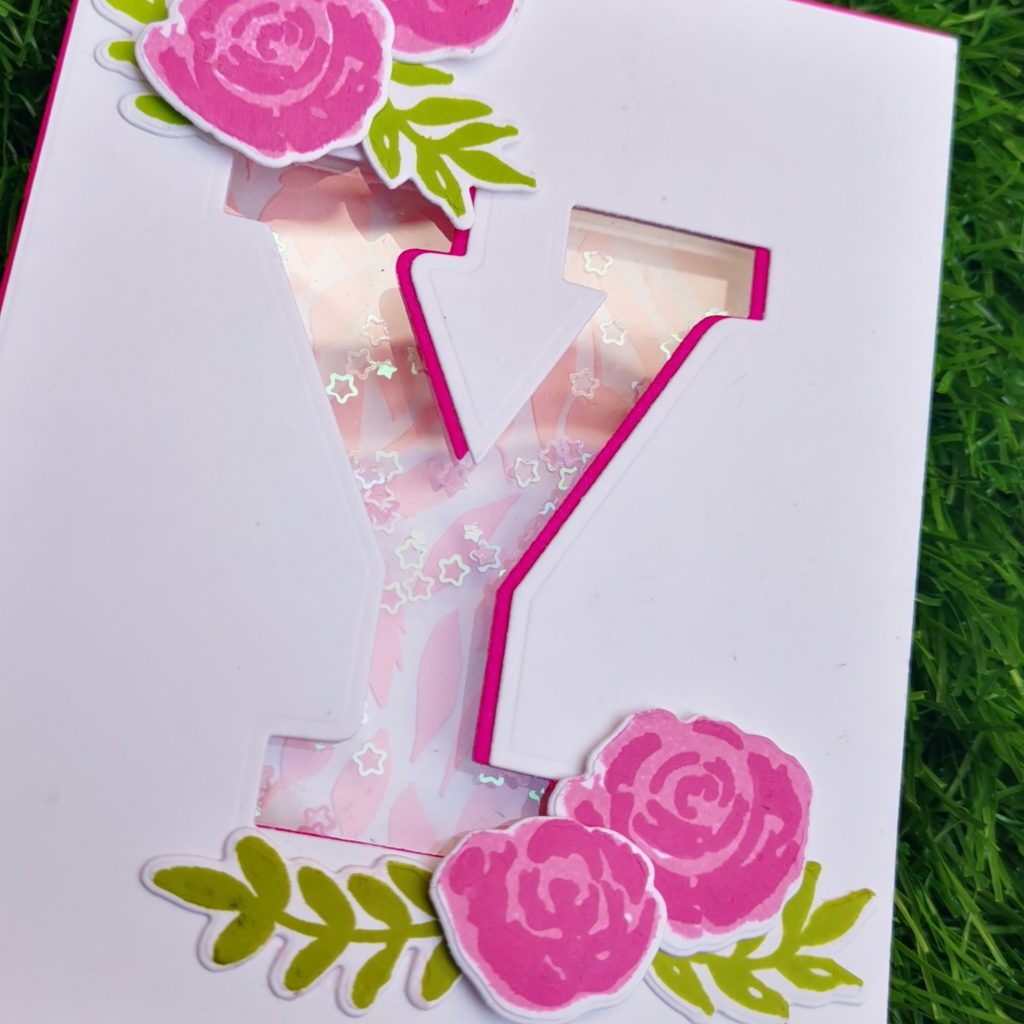
- Stamp watercolor flowers and leaves on another Classic Crest Solar White Cardstock and die cut them out.
- Using double sided tape stick them on the corner of the alphabet.
- The inside part of the Main card (layer 3) can be used for our custom design or background.
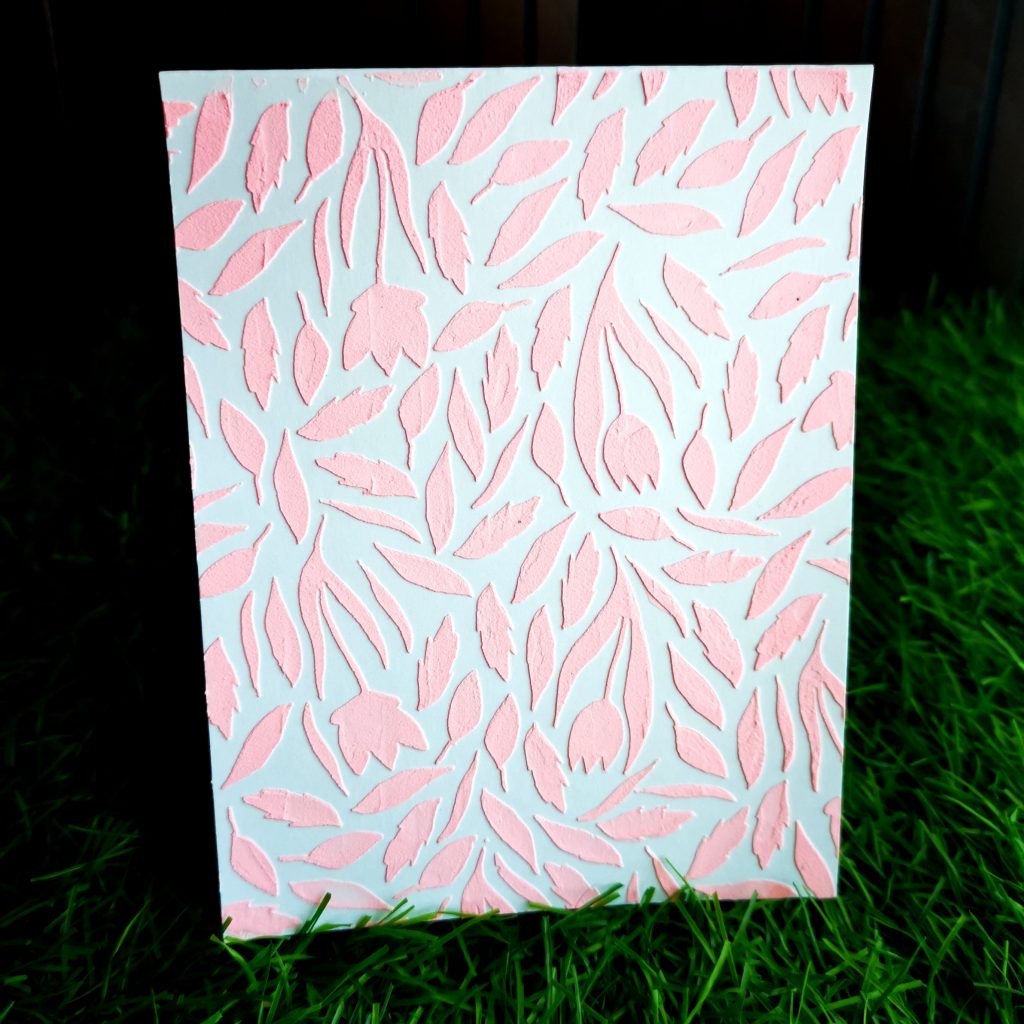
- Place Spring Garden Stencil over card base and mask outlines with masking tape.
- Take some embossing paste on the watercolor palette and add few drops of Cotton candy Alcohol Ink and blend it well
- Apply the paste on the cardstock over the stencil.
- Wait until the paste dries
- Now Reverse the front card (layer 1) facing the pink card up.
- Take a clear acetate sheet and stick it over the pink cardstock.
- Trim the excess.
- Stick the double sided tape around the border of the mega die cut ,leaving the center space empty.
- Create a well using the double sided foam tape to pour in your shaker elements.
- Make sure that there is no open edges.
- Pour in your fun shaker elements that you have on hand, sequins or even small die cut shapes look fabulous. I have used pink stars here.
- Tape down the acetate sheet over the foam tape.
- Stick this over the Main cardstock.
- Position it according to the die cut.
- Thus the inner background can be visible from the front
TIPS
- Trimming and positioning the front panel card pops up the color panel card . This highlights the alphabet die.
- Tack the stencil down with masking tape on either sides, so that it would keep the stencil intact.
- Before stamping, use an Anti-Static Pouch tool to remove static from your paper so the powder doesn’t stick where you don’t want it.
- The inside part of the card can be used for our custom design or background.
- Stick the flowers in various heights using double sided tape to create a better dimension
- Make sure that there is no open edges. If not sealed properly the pop up elements might go out.
- If you are in a hurry you may use, design paper on the inside of the card to make it easier and faster to create.
- Use any fun shaker elements that you have on hand, sequins or even small die cut shapes look fabulous.
SUPPLIES
- Bamboo Crisp Dye Ink
- Parrot Crisp Dye Ink
- Pinkalicious Crisp Dye Ink
- Rubellite Crisp Dye Ink
- Cotton candy Alcohol Ink (Artistic marker refill)
- Y mega alphabet dies
- Watercolor stamp
Altenew: Beyond Basic Background
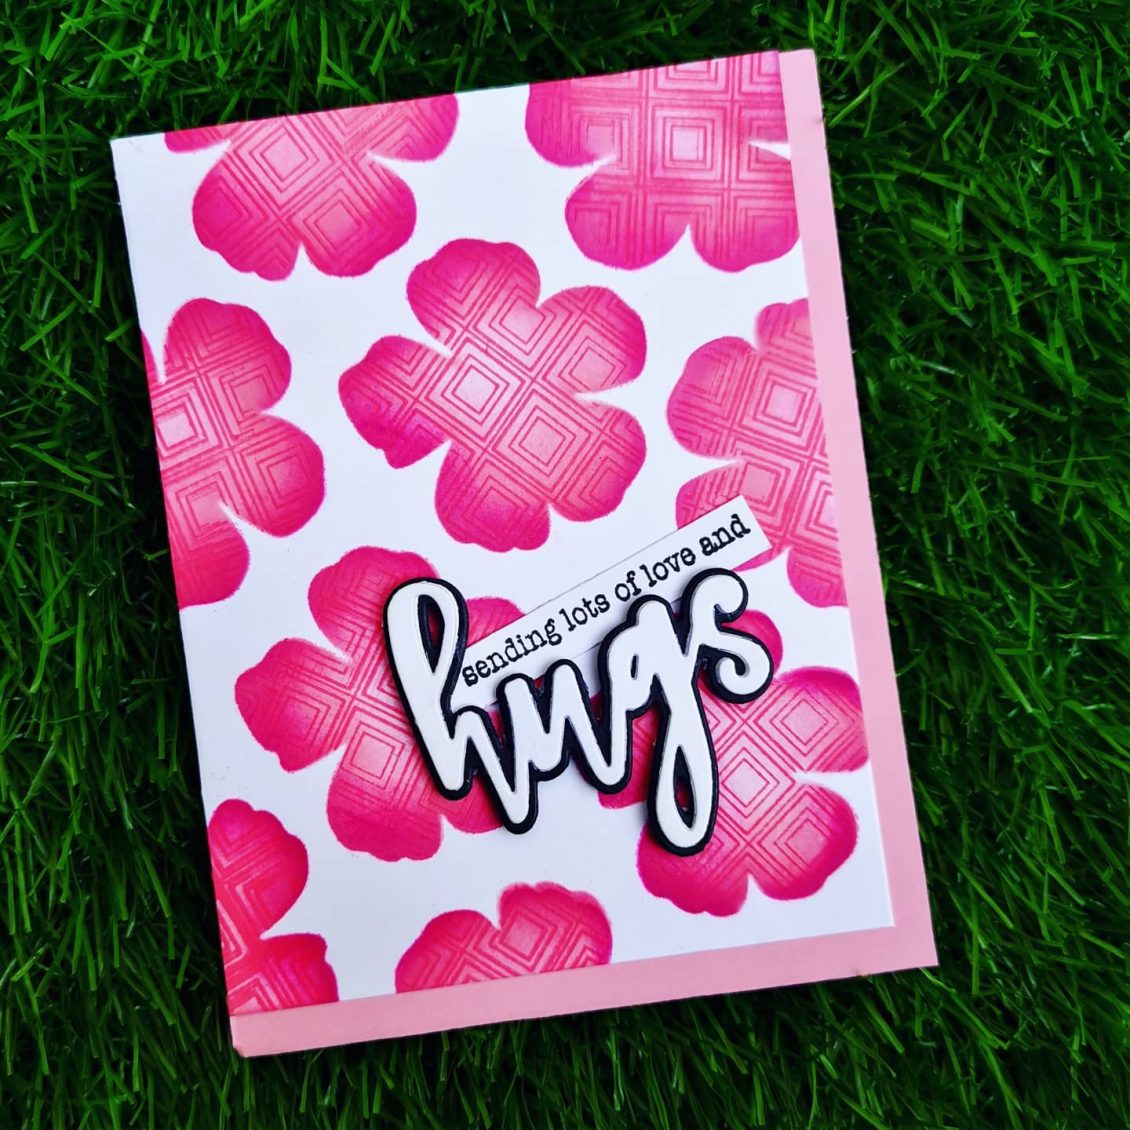
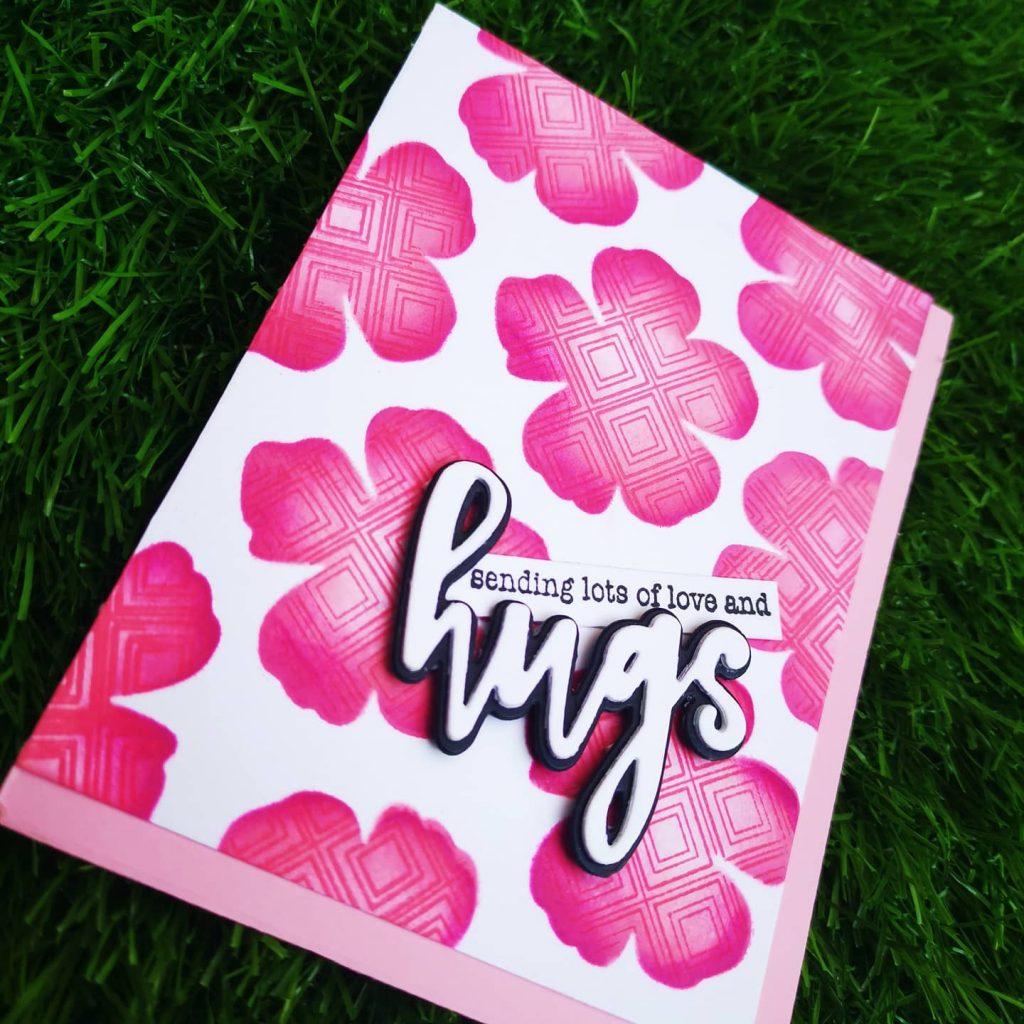
Today I would like to share a card I made for the Beyond Basic Backgrounds by Altenew Academy. I loved the gorgeous cards and the amazing tips that Lydia Evans shared in this course. I found the Beyond Basics Background class really interesting. There are so many interesting ways to create backgrounds on cards that you just don’t think of! This is something which I have never tried doing it before. And I loved how it came out. I have dedicated this cards to all the strong and inspiring women on women’s day on my IG page.
Once again.. Here I am…Sending out lot of love and hugs to all the wonderful women out there 💖
INSTRUCTIONS
- Create a “5 x 6 ” card base from Classic Crest Solar White Cardstock.
- Place the die over the card and die-cut it
- Cut numerous pieces and create a DIY stencil.
- Create a “4 x 5 1⁄4 ” card base from Classic Crest Solar White Cardstock.
- Place the DIY stencil over the blank card stock and stick the sides with masking tape.
- Blend the Die ink over each flowers
- The ink should be lighter towards the center thus giving an Ombre look to the flowers
- Then ink the large background stamp with the darker ink and stamp it over the stencil.
- Then remove the DIY stencil
- Then die cut the sentiment various times to create a thinker dimension
- Stamp the other sentiment on a thin strip of cardstock
- Stick both the die cut sentiment and the sentence sentiment towards the bottom right corner of the card.
- Trim a pink cardstock into 4 1/4 * 5 1/2 and place it behind the cardstock.
- Place the main card towards the top left of the pink card.
TIPS
- Cutting the piece for your stencil larger than your card blank will help you cover the whole area you want covering
- Tack the stencil down with masking tape on either sides, so that it would keep the stencil intact.
- Choose the same shade of color, start blending with the darkest color on the edges, blend this out and then blend the lighter color over the middle
- Try creating an Ombre effect it makes the flowers stands out as it is the slow melting effect of a lighter shade gradually getting darker towards the ends .
- Die cut the sentiment various times to create a thinker dimension
SUPPLIES
- Jet Black Crisp Dye Ink
- Cherry Blossom Crisp Dye Ink Set
- Hello and Hugs Dies Set
- Flowering Cistus Stamp Set
- Shine Like a Diamond Stamp Set
Hope you liked my card. Have a wonderful day and I hope to see you all soon with another project from AECP. Until then happy stamping and thanks for stopping by!
-shahi
Altenew: Magic Marker Techniques
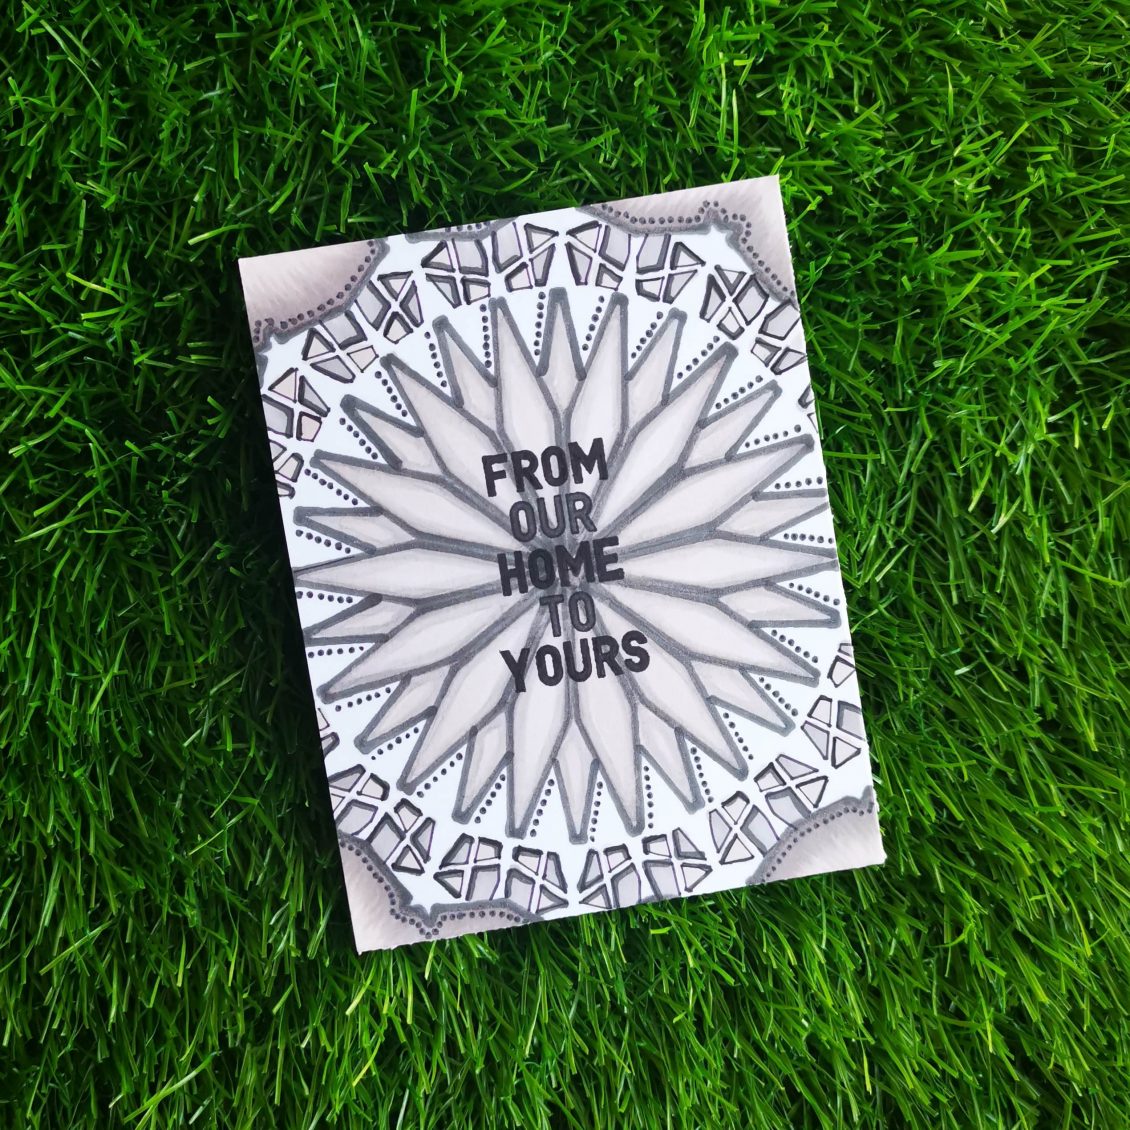
The next AECP class I tackled was “Magical Marker Techniques”, by Sara Naumann. I enjoyed the fact that Sara uses her markers for more than just coloring in stamped images, in fact, I liked that a lot. I would recommend this class to anyone who is looking for ideas on how to stretch their supplies . I used my artistic markers just for coloring, but through this class, I did explored a new way of using it.
INSTRUCTIONS
- Create a “4 1⁄4 x 5 1⁄2 ” card base from Classic Crest Solar White Cardstock.
- Place linear Stencil over card base and position it to the center of the card.
- Tack it down with masking tape.
- Remove the stencil and retrace the diamonds so they’re heavily outlined, then color in the diamond shapes
- Draw the outline using darker shade of artistic marker and fill them with lighter shades.
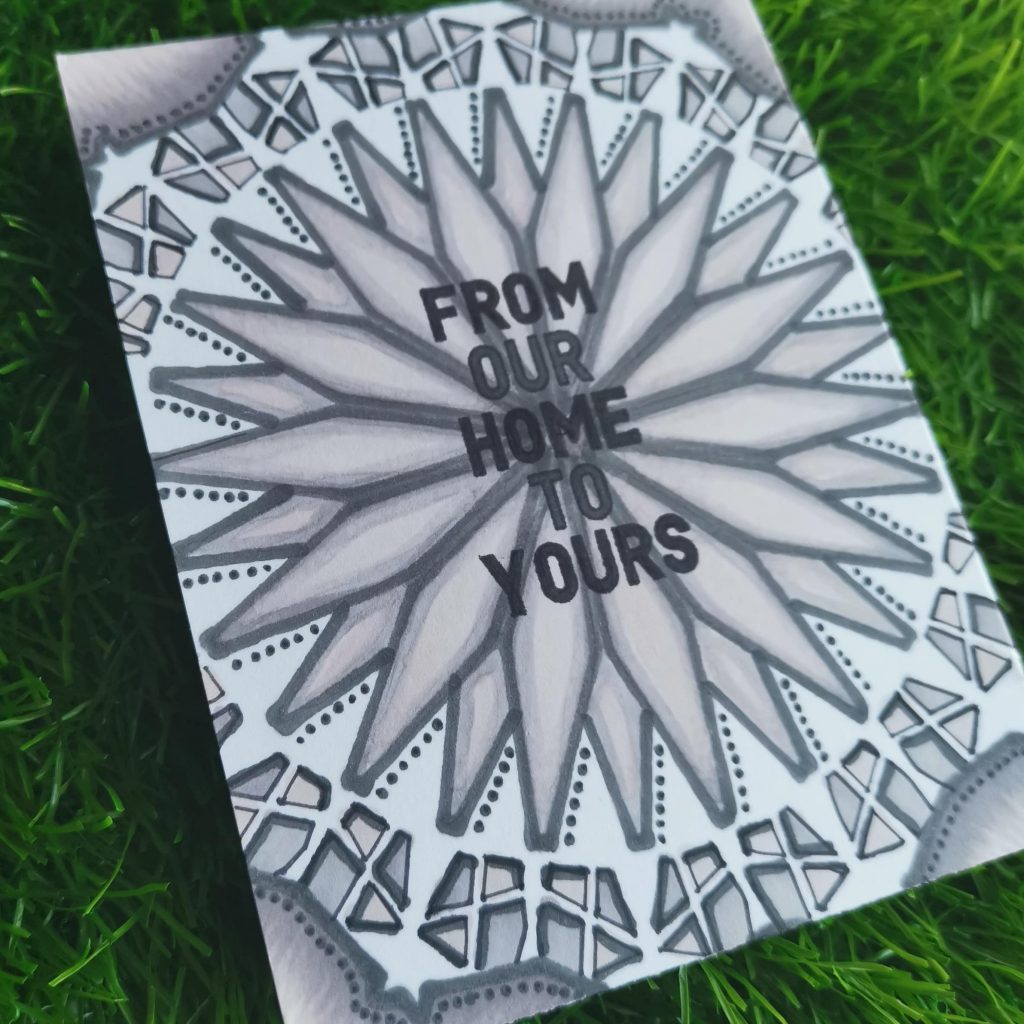
- Slightly rotate the stencil and move over to the second layer.
- Fill in the smaller parts according to your creativity and color choice
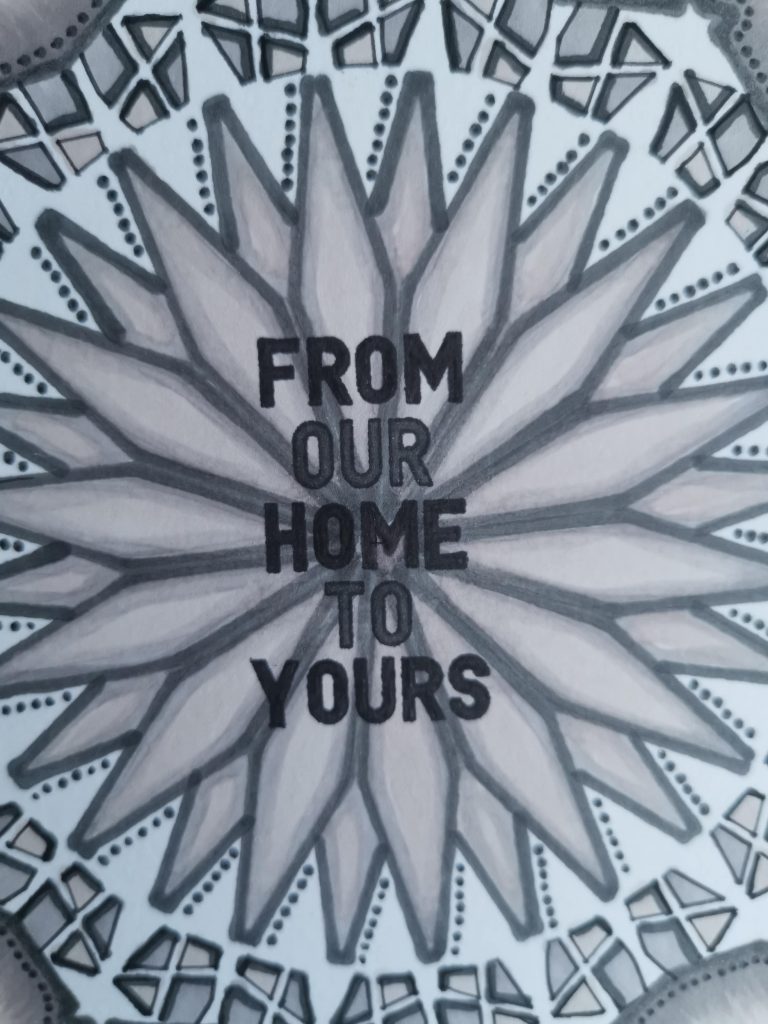
- Add small dots using the fine tip of the artistic marker
- You’ll have a cool dimensional effect by darkening the outline of the small parts of the stencil.
- Stamp a sentiment from the Holiday Tag sentiment.
- Fill in the sentiment with artistic marker
TIPS
- Tack the stencil down with masking tape on either sides, so that it would keep the stencil flat.
- Choose a color theme to bring up a mandala effect.
- Draw the outline using fine tip of the marker
- Slightly rotate the stencil and move over to the next layers.
- Take advantage of the fine tip of the marker to add dots and dimensions to the card
SUPPLIES
- Jet Black Crisp Dye Ink
- Morning Frost Artistic Marker
- Evening Gray Artistic Marker
- Industrial Diamond Artistic Marker
- Linear Stencil
- Holiday Tag Sentiments
For my card, I followed the techniques from lesson 6 of this course – using Markers with Stencils. I really encourage you taking this class taught by Sara Naumann, it will help you a lot more to understand color and color usage on projects. Hope you liked my card.
Have a wonderful day and I hope to see you all soon with another project from AECP. Until then happy stamping and thanks for stopping by!
-shahi
Celebration: Stencil Techniques
Hi friends, I hope you all are doing good. Stay home. Stay safe.
Like many others, even I’m stuck out of my country. Wondering when I can go back. I’m definitely missing my craft room and my private crafty space. I just came done to meet my parents and got stuck here. But there is always good about getting stuck in your parents’ house, especially after marriage. I used to miss this place so badly.
Alhamdulilah somehow I could manage to get some of my basic craft items from my apartment. ( It was a real tough job. But I couldn’t stop myself from crafting.)
So coming to the point, today’s blog post is exclusively about how I ended up making a stencil of my own to make a beautiful card. Celebration: Stencil Techniques, is something which I learned from my Altenew educators certification program. Laurel Beard has explained things very well.
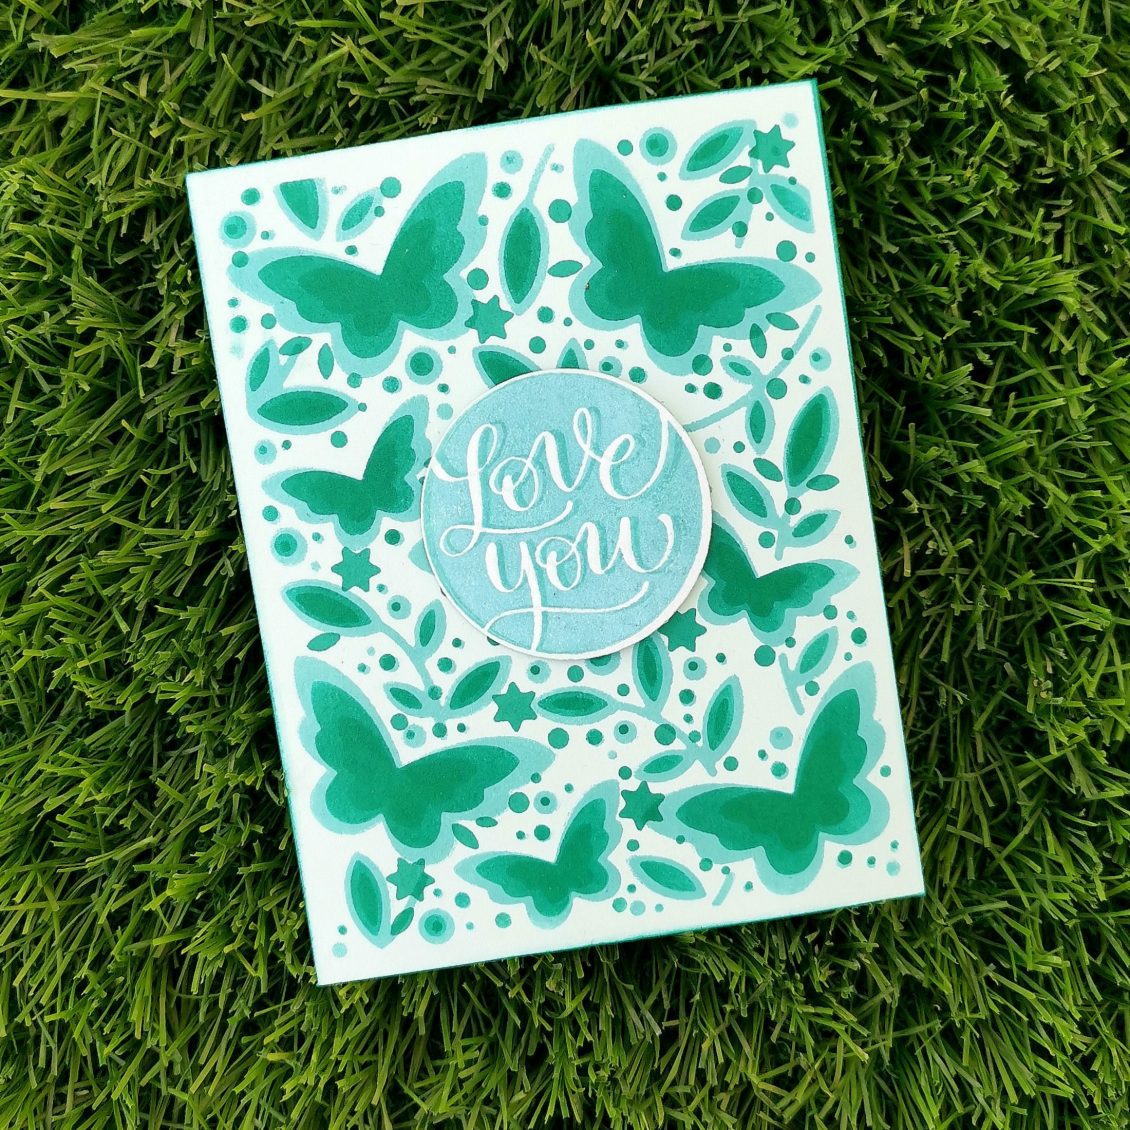
For this project, I decided to make a DIY stencil using Birch press butterfly garden layering dies.
This layering set consists of Layers A, B, and C. I die cut all the 3 layers on different cardstocks and used them as my stencils. I used thicker card stock paper while creating my own stencil so that it could be used multiple times.
After placing each die-cut layer on my cardstock, I did my first layer with Lagoon crisp die ink from Altenew and the second one with emerald. I didn’t want my third layer to stand out much from the other two shades. Instead, I wanted a soft color which is just a bit darker than my second shade. That’s how I ended up with my emerald crisp die ink again for my final layer.
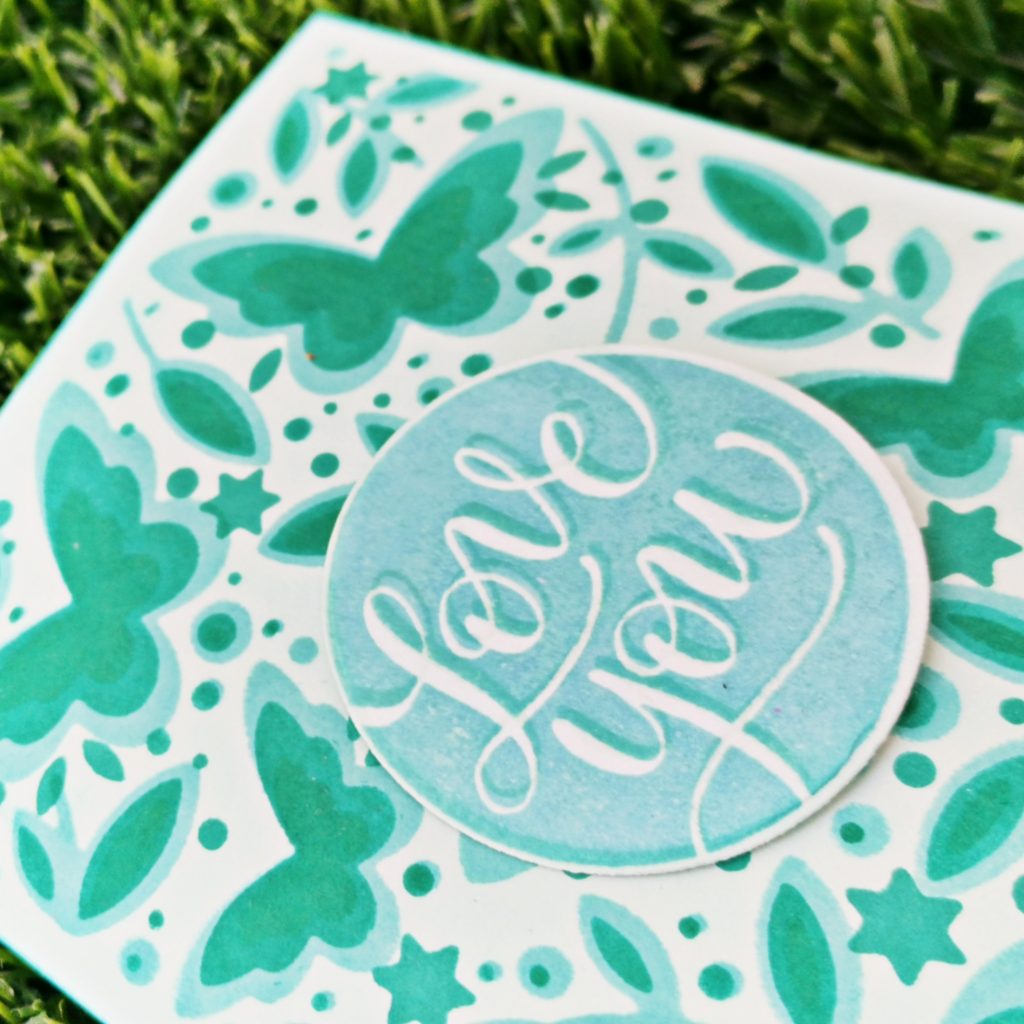
The layers by themselves looked really cool but it makes our card incomplete. So I added a sentiment “Love you” from Simon Says Stamps Love and valentines word mix set. I stamped it with altenew volcano lake crisp die ink and unicorn white pigment ink from hero arts. I just slightly changed the position when I stamped the second layer. Even though it was a small one, it brings a lot of difference to the look of the card. I was wondering if I ended up making a monochromic card. But I am fine. Because it is not something which I do often. I die cut the sentiment with its coordinating dies and stuck it with a piece of foam tape at the center of the card.
And here it goes…
The card is ready. Isn’t it so simple?
I hope this method will turn out to be an inspiration for you too. Do give it a try to learn this course at https://altenew.com/products/celebration-stencil-techniques?_pos=1&_sid=a8928335c&_ss=r
I hope to see you all soon with another project from AECP. Until then happy stamping and thanks for stopping by!
-shahi
Seasonal Scene Building
Hi Today, as I got to do a project on creating a Seasonal Scene Building, I was really confused as I didn’t have much stamps on my shelf to help me build a scene. That’s when I decided to take this as a challenge and make a card with the supplies I already have at my craft room.
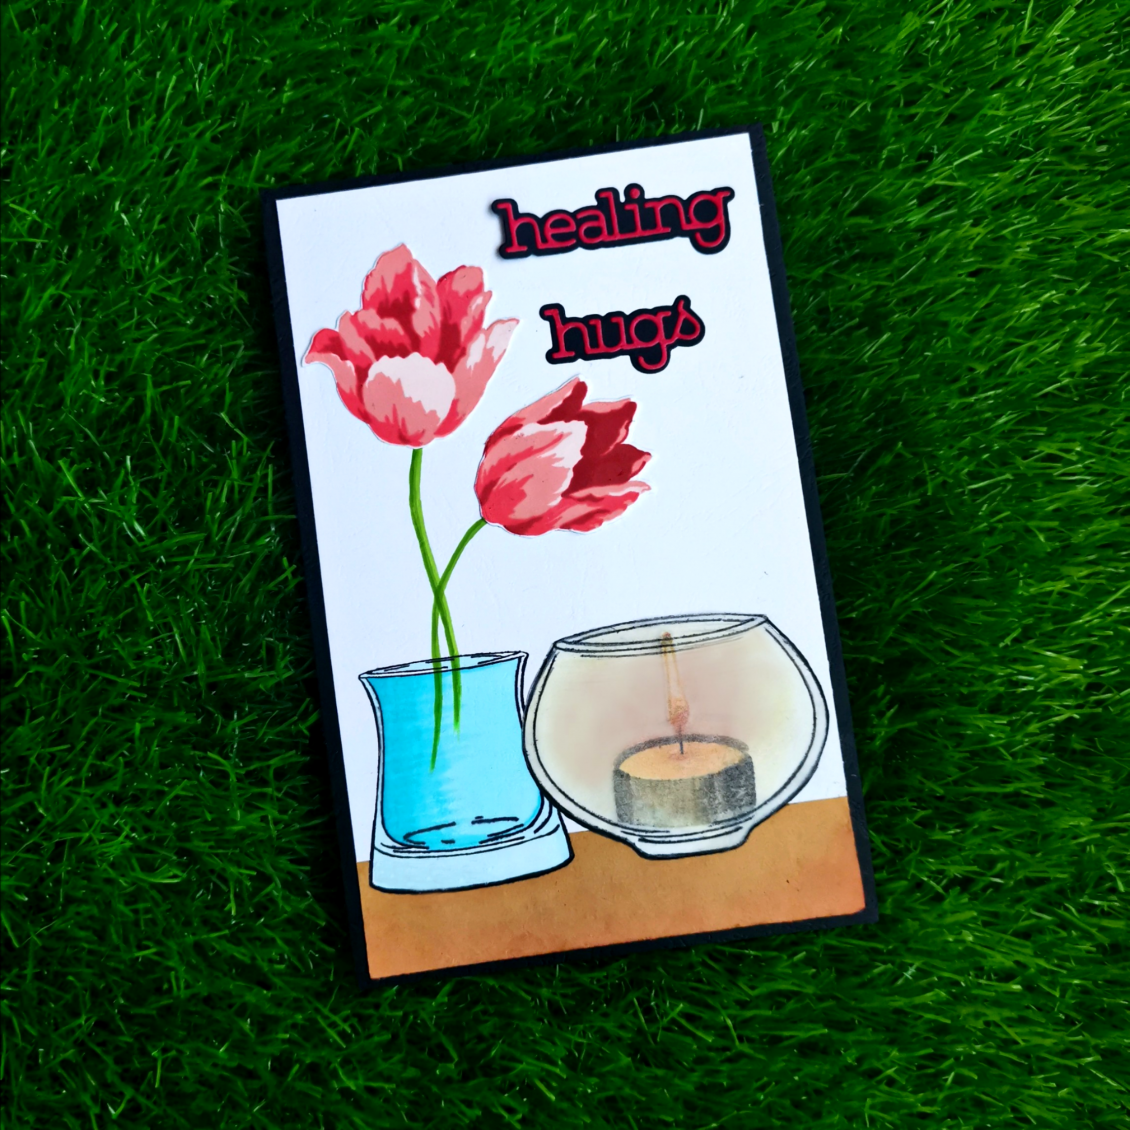
Alhamdulilah, within no time my eyes got stuck with the versatile vases stamp set from Altenew. But how to create a seasonal background with it was my next thought. I didn’t want to create a simple bouquet of flowers in a vase. I wanted to make something creative. The weather was so cold outside and I really loved to lit up a small scented Candle in my craft room. Thinking about it, an idea struck my mind and that’s how I actually ended up making this project.For this project, I used an 8*5 card. I was sure that I should use a longer card because I will have to find space for my vases, flower bouquet, and sentiments.
My first task was to create a base to place my vases in the image. I randomly chose a brown copy paper that was lying down in my cabin. Made it my base. Then I stamped a bowl vase from the versatile vases stamp set. Masking it, towards the left side I stamped a glass vase for my flowers.

I stamped and cropped 2 tulips using the Triumph Tulip- Build a flower stamp set from Altenew. I varied the colors for the tulip using the Red Cosmos Crisp Ink collection from Altenew. (Frosty Pink, Coral Berry, Ruby Red, Grapevine). After drawing the stem using the Frayed Leaf and Forest Glades with the altenew artistic markers, I stuck those tulips to the end of those stems. Then I stamped the candle using the candlelight stamp set from Altenew with their crisp inks ( morning frost, evening Gray, moon rock, lava rock was given for the base and buttercream, honey drizzle, autumn blaze, sunkissed was used for the top part of the light.) inside the bowl vase.
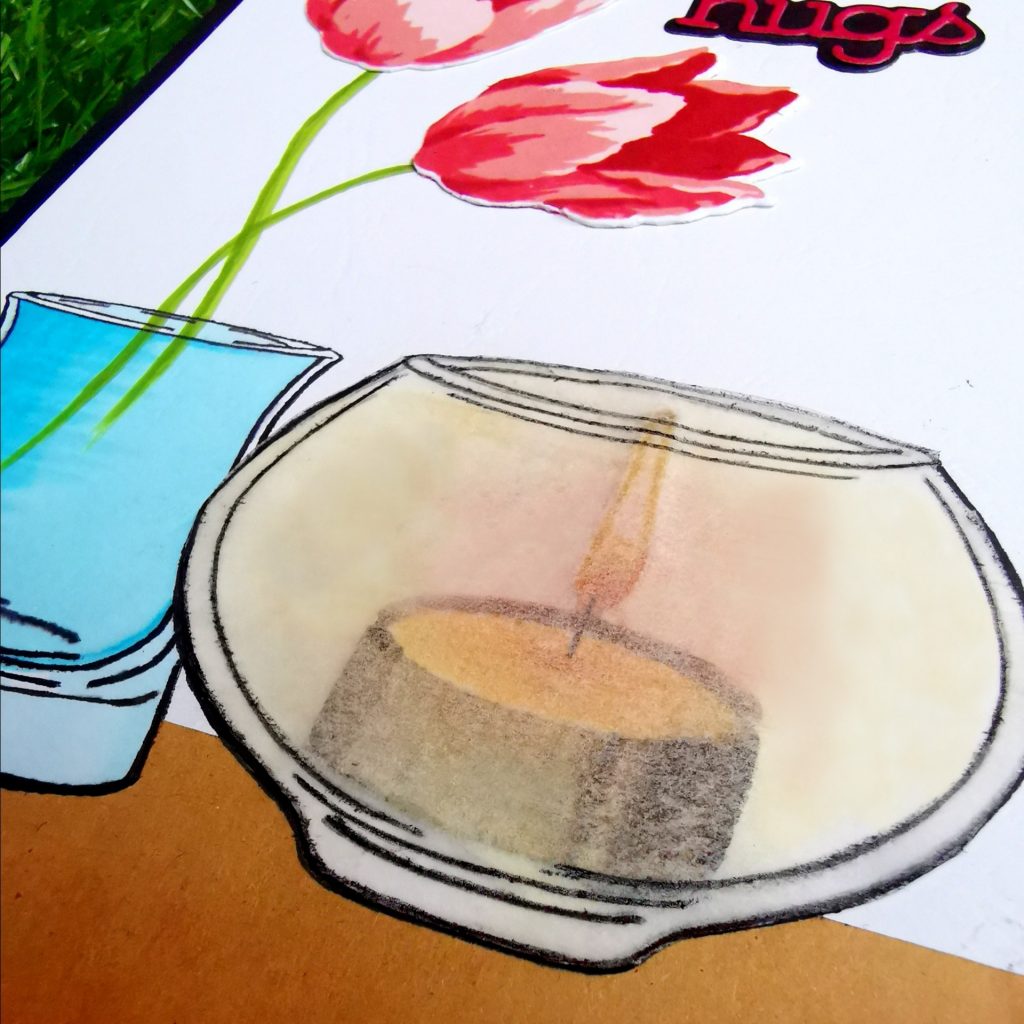
I wanted to have a variation of light rays from the candlelight, so I decided to stamp the bowl vase on vellum. After cropping it through its edges I blended a small shade of orange and red distress ink on it. Placing it on the candlelight and the vase I decided to crop the bottom part of the vases which was stamped on the brown copy paper. Using the same blending brush used on the vellum, I made small blends at the edges of the brown copy paper. Then I colored the glass vase with a blue artistic marker(Ocean Waves). And blended it with a light blue touch five marker.I die-cut my sentiment in a red and black cardstock using the healing hugs wafer dies from Simon says stamp. I stuck it towards the right corner of my cardstock. Adding a 1/4 inch to the card I placed a black cardstock to the base of my white card. It adds to the total gaze of the card.
After doing this course I am confident to face things that are out of my comfort zone in card making. As I said, in the beginning, I was really stuck. But later own I could figure out things in a better way. Such situations make me thank God for making me choose AECP. The tutors at altenew are really such an inspiration ❤
Thanks and I hope to see you at my next post. Until then happy stamping and thanks for stopping by!
-Shahi
Easy Die Cutting Techniques
Hi there,
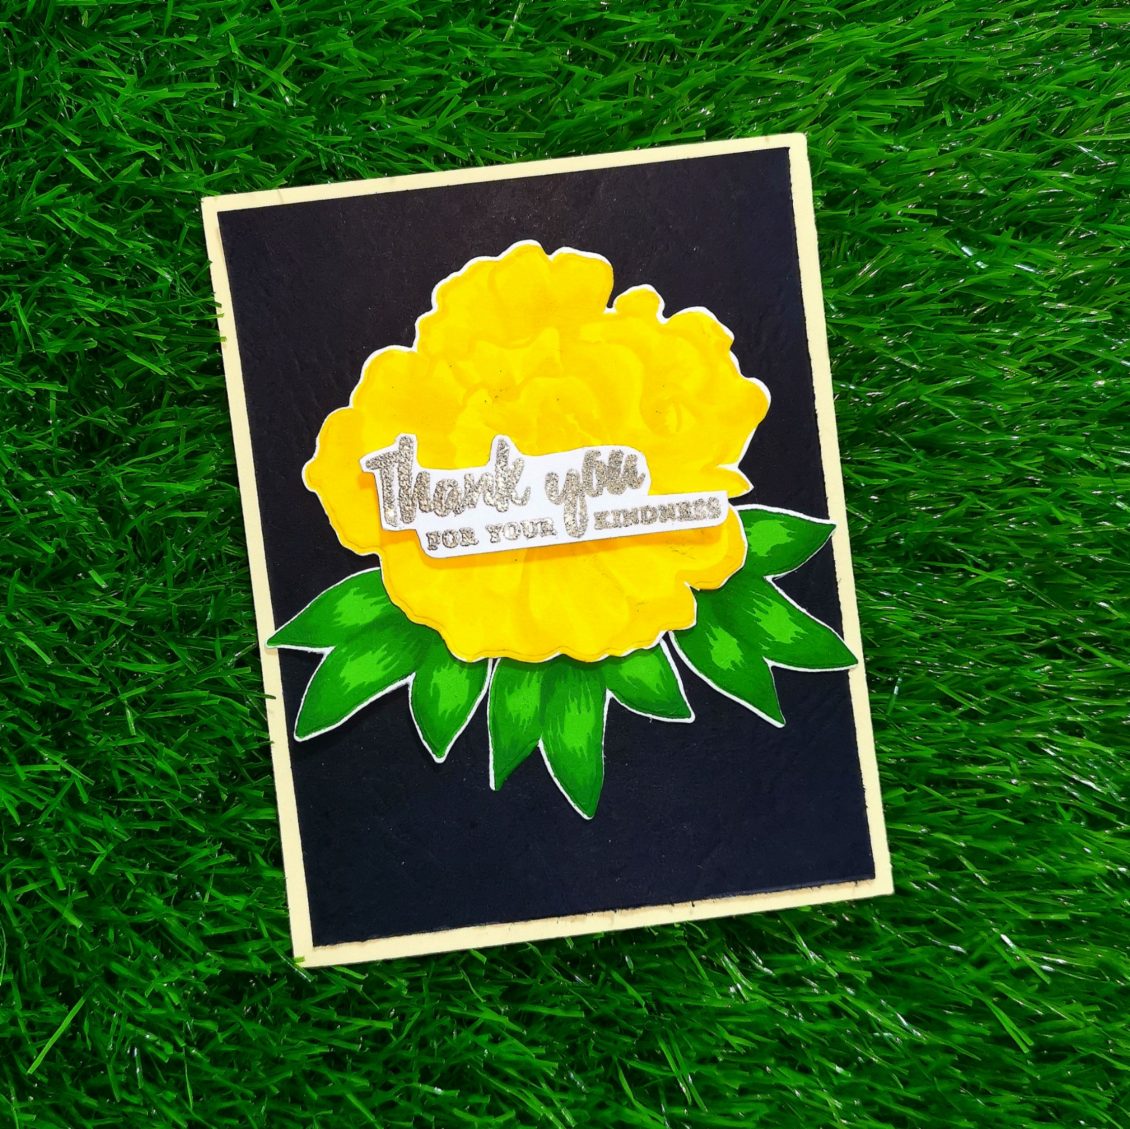
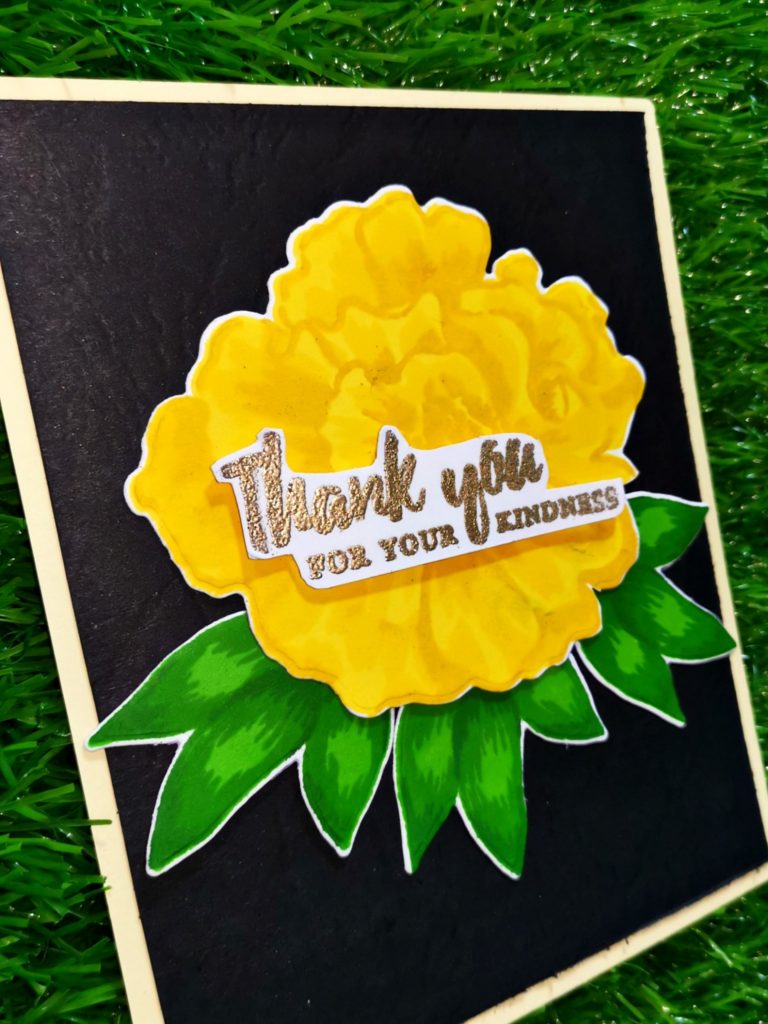
I hope you all are doing great. This post is on behalf of my lesson on Easy die Cutting Techniques learned at Altenew’s Educator certification program. Today’s card features Altenew’s Build-A-Flower: Camellia. Camellia–Queens of the winter flowers are highly prized for the beauty of their exquisite Blooms. The colors of the flowers vary, from white through pink colors to red; truly yellow flowers are found only in South China and Vietnam. Yellow Camellias are known as My Golden Dream. So here I’m planning to make a cute and simple card using My Golden Dream. I’m glad that this can suit the theme of the altenew inspiration challenge for the month of February too.
Check out their inspiration challenge at http://altenewblog.com/February-2020-Inspiration-Challenge

As I began my card, I stamped my camellias with Pocketful of Sunshine collection from the Altenew crisp die ink on Neenah classic crest solar white cardstock. I stamped my base layer with Fresh Lemon ink. The second one with Maple Yellow ink and the final layer with Honey Drizzle ink. Altenew’s crisp die inks are fast-drying dye inks which gives uniform coverage and a crisp impression every single time we use it. I made sure that each ink dries before stamping the next layer, this gives the crisper impression if each layer is dry before stamping the next.
Similarly, I stamped the leaves too. i used Green Valley collection from Altenew crisp die inks. The first layer was stamped with Grass Field ink . The second one and third one with Shadow Creek ink and Mountain Pine ink respectively. I decided to stamp 3 of them for my card, which will help to give a greenery to the base of my flower. Once I completed my stamping, I ran them through my sizzix bigshot machine to die cut them.
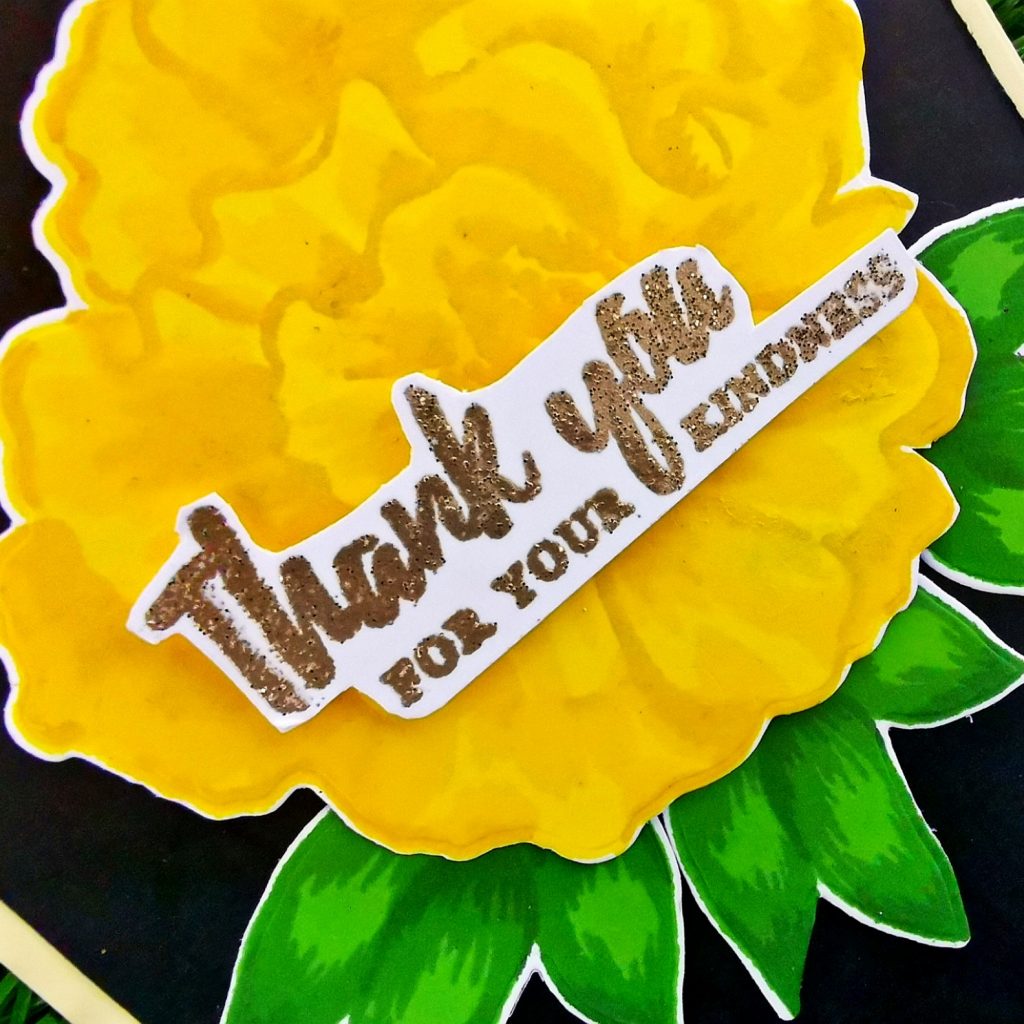
I then decided to stamp one of the sentiments from the set on white cardstock with gold embossing powder from the ranger. I took my stamp and dipped it in the versa mark stamp pad and stamped it on the paper. I dumped the embossing powder on its top and gave rid of the excess. Later on, heat it up with my heat gun. I then trimmed the cardstock with scissors along the edges of the sentiment. To add the dimensional look of the card, I stuck a piece of foam tape under the sentiment. A black leather paper measured 4* 5 1/4 was used as my card base. I stuck the flower with 3 leaves on the bottom. The sentiment was stuck in the middle of the card on top of the flower. To give a finishing touch I stuck a yellow craft cardstock brought from the local store below the black card base. which ended up giving a thin yellow border at its first look over the completed card. Thus creating a 4 1/4*5 1/2 card.
I hope to see you all soon with another project from AECP. Until then happy stamping and thanks for stopping by!
-shahi
Clean & Simple Boutique Cards
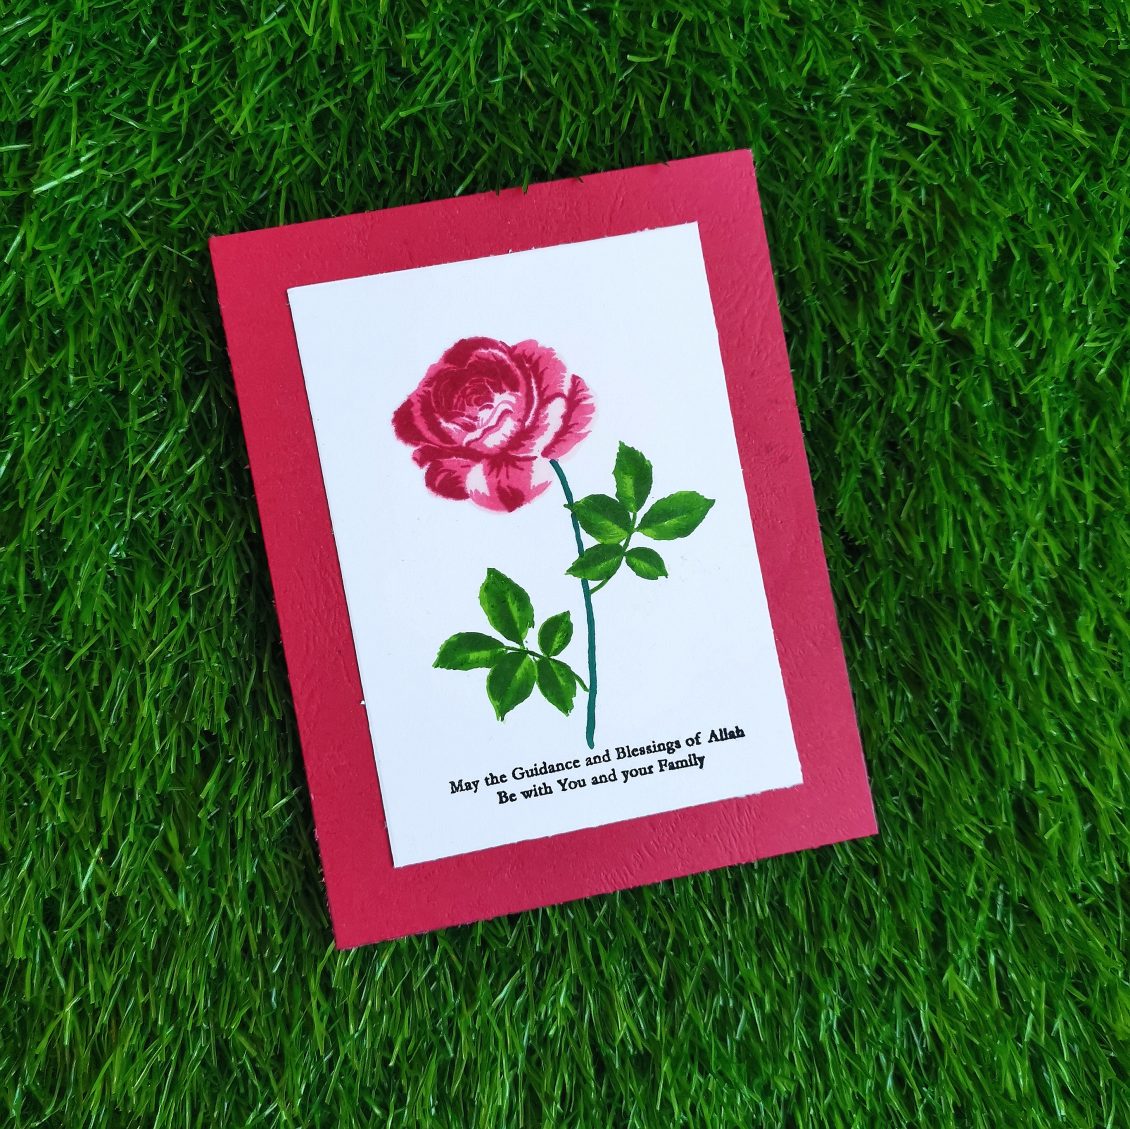
This is going to be my second project on the altenew educator certification program. Today’s task is to make a clean and simple card. I’m planning to stamp a rose with few leaves then add a sentiment to my card.
I stamped my rose using Layered stamp from studio light with the Red Cosmos Crisp Ink collection from Altenew. (Frosty Pink, Coral Berry, Ruby Red, Grapevine) The leaves were stamped with the Green Valley Crisp Ink collection. Mountain Pine, Shadow Creek, Grass Field, Firefly) from Altenew. These inks stamp solid with smooth coverage and great colors. What’s even better is that they are grouped into color families and this makes layered stamping much easier even for beginners!
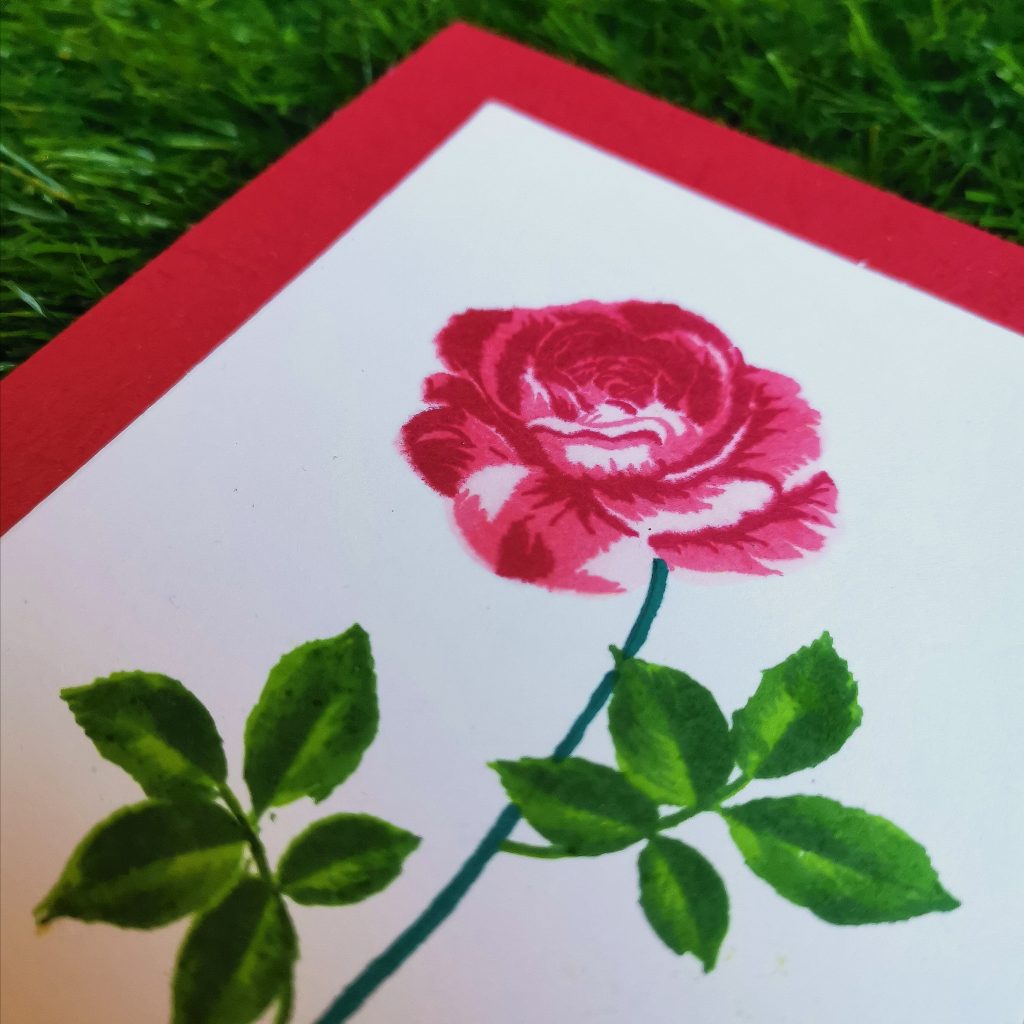
I decided to draw the stem of my rose by hand with a green sharpie marker. I choose a sentiment from Altenew Eid greetings which says ” May the guidance and blessings of Allah be with you and your family”. It’s one of my favorite sentiment from Altenew. I use them wherever possible while card making. Finally, the card is being trimmed to add space to the red cardstock at the base. The large area given to the red cardstock highlights the card and makes it even more beautiful. This is one of the easiest and simplest ways to make a CAS card. Make sure to give it a try.
By attending this section, I realised that card making isn’t a difficult task. Even a small flower and a sentiment can do a lot. I hope to see you at my next blog post. Until then happy stamping and thanks for stopping by!
-Shahi
All about Layering 1
Alhamdulilah.. (Praise be to God)
So this is officially my first blog post and I’m so thrilled and excited to be participating in the Altenew Educator Certification Program!! This is my first submission after completing All About Layering 1 & 2 hosted by Nicole Picadura.
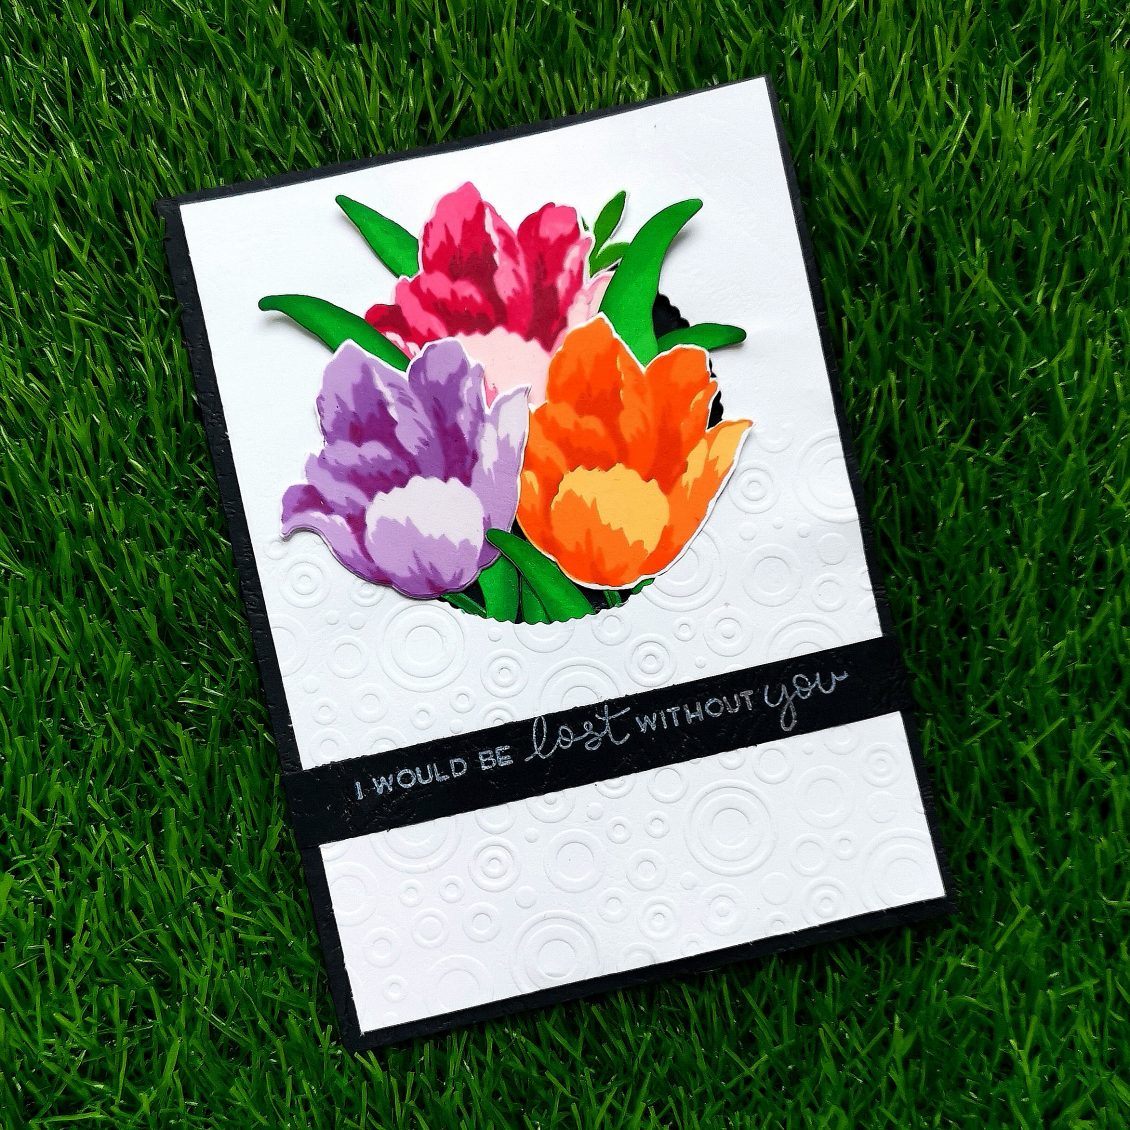
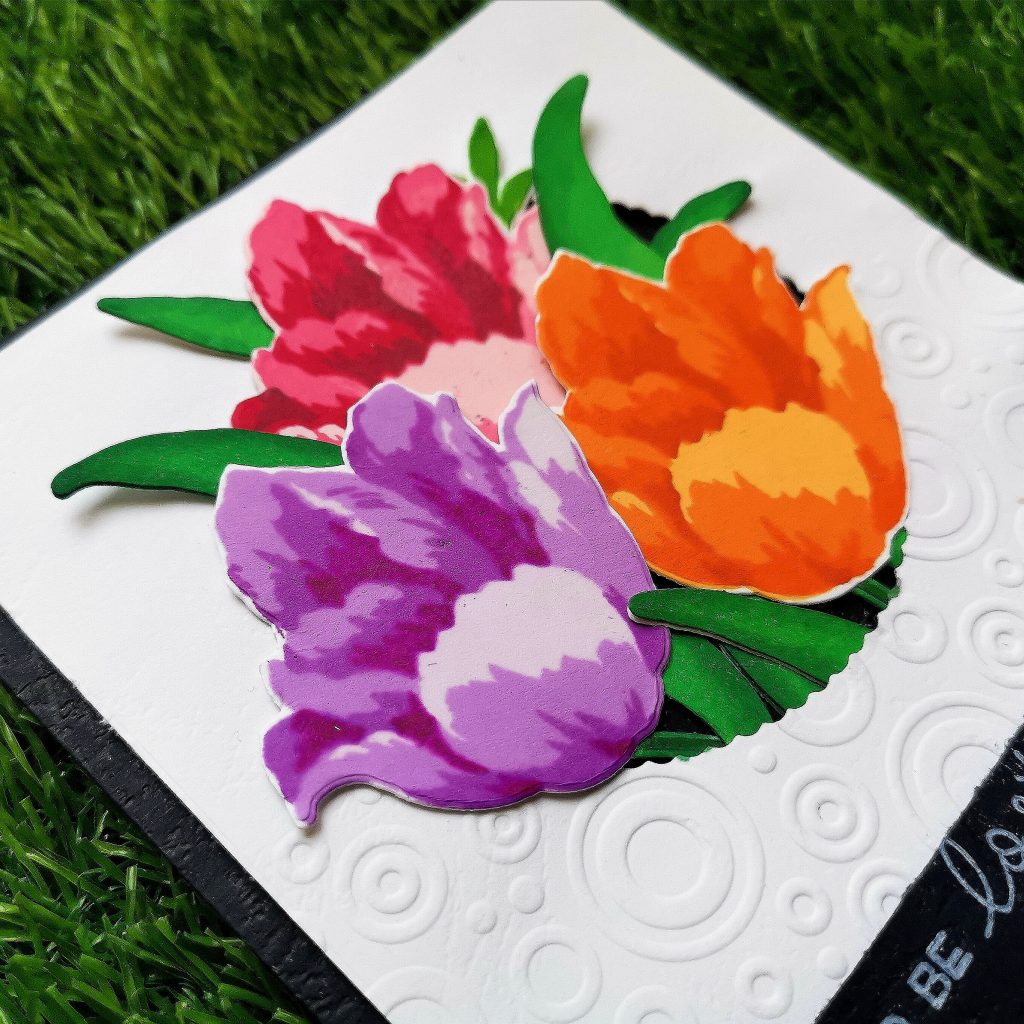
For this project, I have decided to stamp 3 flowers using the Triumph Tulip- Build a flower stamp set from Altenew. I varied the colours for my first tulip using the Red Cosmos Crisp Ink collection from Altenew. (Frosty Pink, Coral Berry, Ruby Red, Grapevine). The second triumph tulip was stamped using Warm & Cozy Crisp Ink collection from Altenew. (Sun-kissed, Orangecream, Autumn Blaze, Firebrick) For my third pair, I choose Shades of Purple Crisp Ink collection from Altenew. (Soft Lilac, Lavender Fields, Deep Iris, Midnight Violet)
Then I stamped my leaves with Grass field from Green Valley Crisp Ink collection from Altenew.I wanted to give my leaves a blended look so I coloured them with touch five green markers, 45, 55 and 59. Then I placed triumph tulip coordinating dies upon the stamped images and ran it through my sizzix big shot machine. I like to have elements popped on my card. So I stuck some foam tape at the back of my die-cut images. I wanted a bigger card as compared to the standard card, so I trimmed my white cardstock to a 5*7 inch card.
For adding a different look to my background, I decided to use an embossing folder. The one I used here was from Rungao. Its circle dimensions create a 3d effect to the card. Placing it halfway along the through the card, I ran it through my die cutting machine.Then using a circle die, I decided to cut down a circle window through the center of the panel.Then I played a bit with the card deciding where to place the flowers and sorted it out where to go. I stamped some more extra leaves as per my requirement for the card.
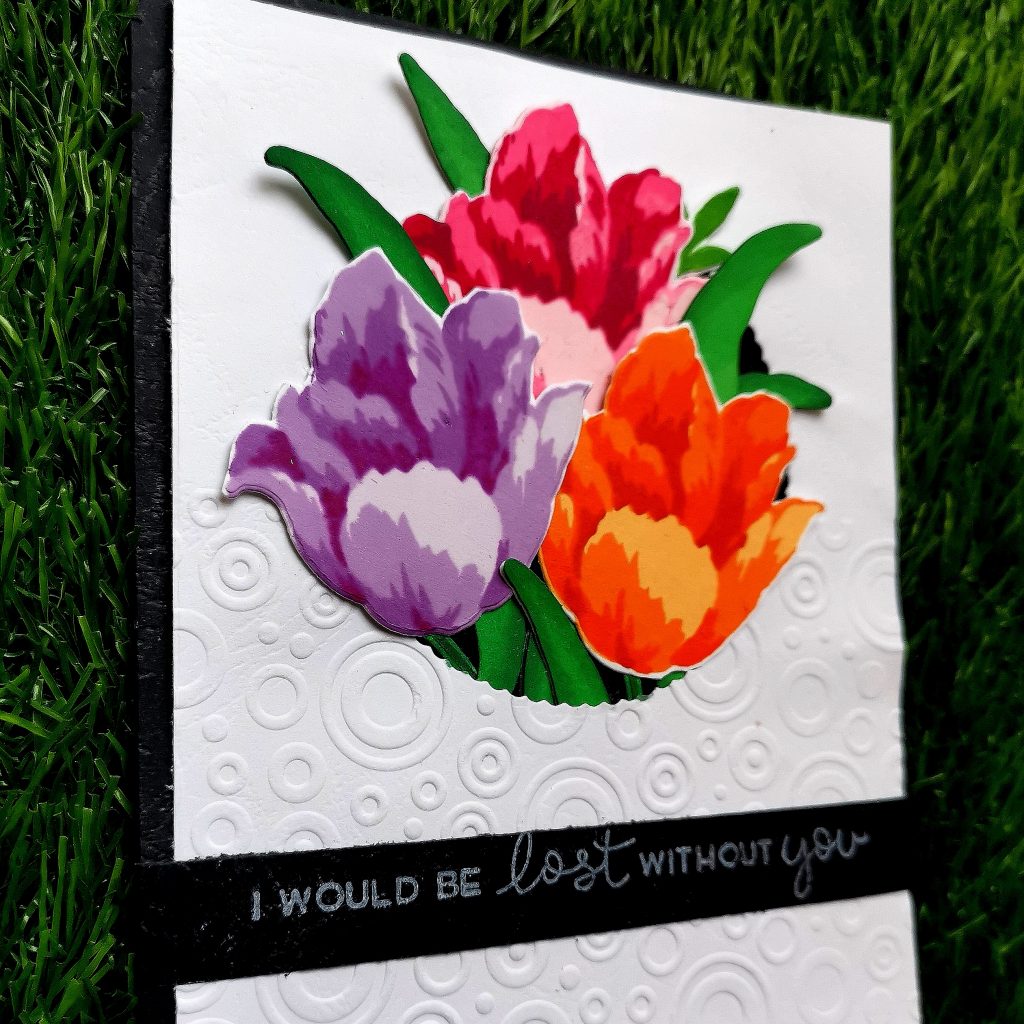
A black banner was added below the circle and with a stamped sentiment from loads of fun stamp set with unicorn white pigment ink(hero arts). I trimmed 1/2 inches from all the four sides of my cardstock and stuck some foam tape at the back of my cardstock. I finished it off by placing a black cardstock below the white one. It gave a raised look to the overall beauty of the finished card. Hope to see you at my next post. Until then happy stamping and thanks for stopping by!
-Shahi
 CASE your fellow AECP Crafter
  Clean & Simple Boutique Cards
  Easy Die Cutting Techniques
  Graduation card
  Let it shine
Recent Comments