Hi, let’s explore the this part of my Altenew Educator Certification Program’s Level 2 challenge . Today I’m presenting something a little different from what I usually post, but it’s a project I’ve been wanting to do for a long time. This section’s task was to produce an Altered Item/Upcycled Project. I had tons of ideas running inside my head after getting the challenge details mail from erum. But was confused about finalizing into something specific. I wanted to explore into something unusual. Dint want to take the same track of my other aecp friends.
Finally!!!!! it’s time for the big reveal.
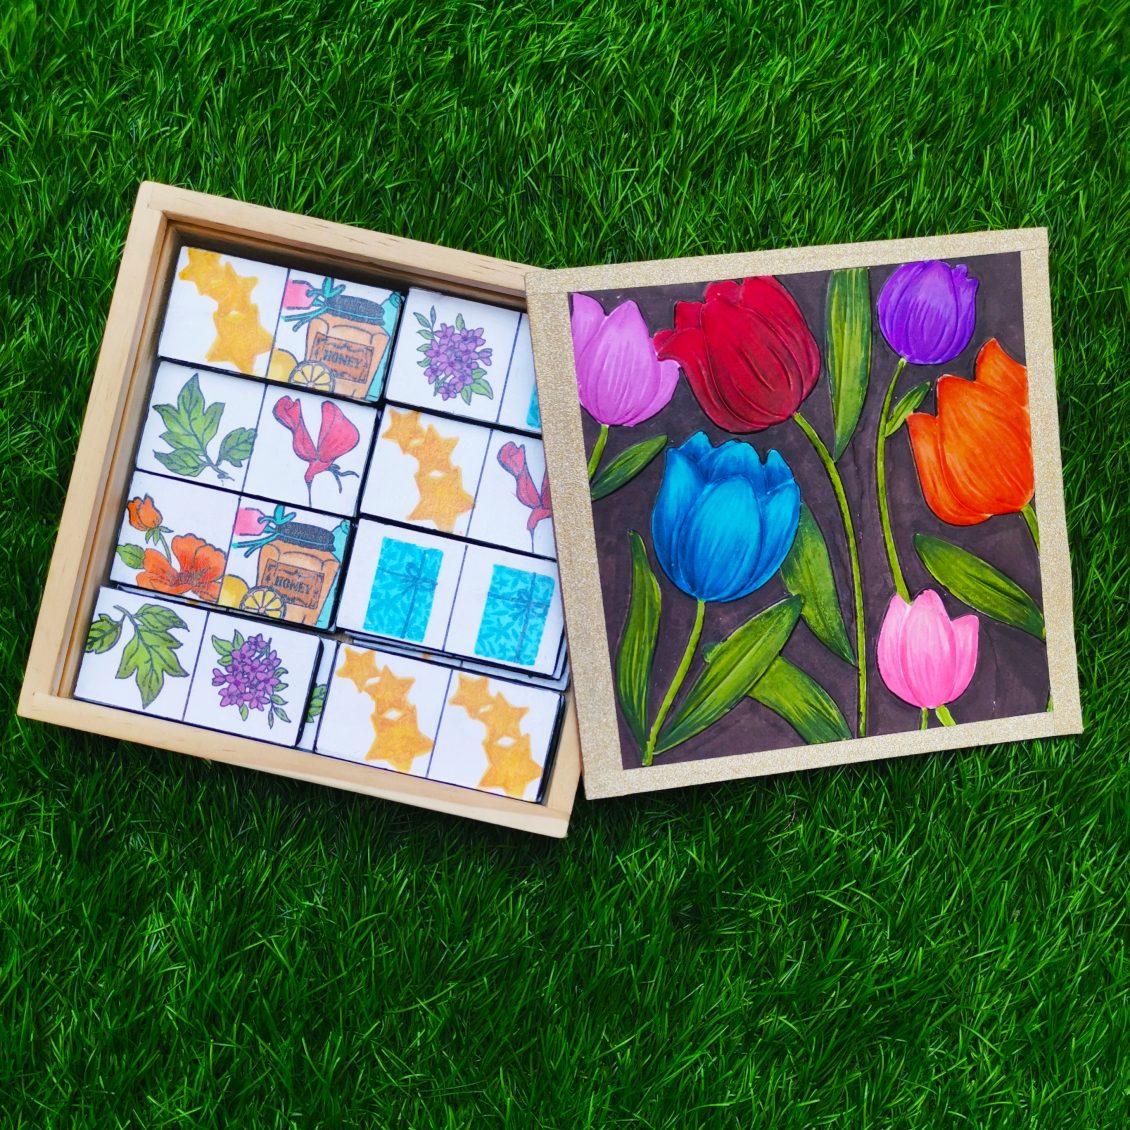
We all know that, there are various varieties of domino sets in use all over the world and a great number of games that can be played with them. But today I am presenting before you a different one .” DOMINOES FROM ALTENEW “
The Game
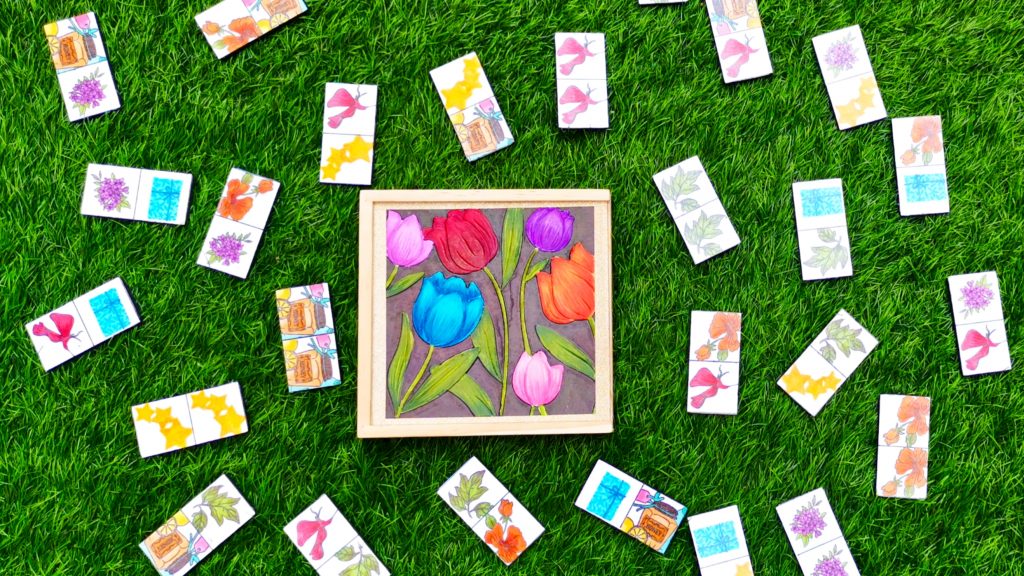
The dominoes are ritually shuffled face down . Each player draws 6 dominoes and places them so that the other players can’t see their value. The first person to play is that person holding the double picture. The tile played must be the double tile that permitted the player to take the first turn. If none of the players hold a double picture tile, then the tiles are reshuffled and re-drawn. Each player must in turn then play a tile onto the table positioning it so that it touches one end of the domino chain which thus gradually increases in length. A player may only play a tile which has upon it a picture showing at one end of the domino chain or the other . If a player plays a domino with the result that both ends of the chain show the same picture (normally a number which is useful to the player and distasteful to the opponents), that player is said to have “stitched up” the ends.
The way that the tiles are placed provides a small part of the entertainment. Each tile being placed must be positioned so that the two matching ends are adjacent. Unless, the tile is a double, the tile can be placed square in any one of the three directions as long as the two matching sides are touching fully. Doubles are always placed cross-ways across the end of the chain. A tile played to a double must also be placed accordingly – perpendicular to the double touching at its middle. The shape of the domino chain develops snake-line at random according to the whims of the players and the limitations of the playing surface. If a player can lay a domino, then it must be played. Otherwise the player “knocks”, or raps the table and play passes to the next player. The opposing players will, of course, make mental note of the numbers currently available on the table and try to ensure that they are available in future too…..
Normally play stops when one player “chips out” (plays his last domino) . Anyone who can’t go has to miss their turn. The winner is the player who gets rid of their cards first.
Planning
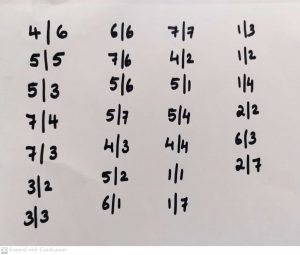
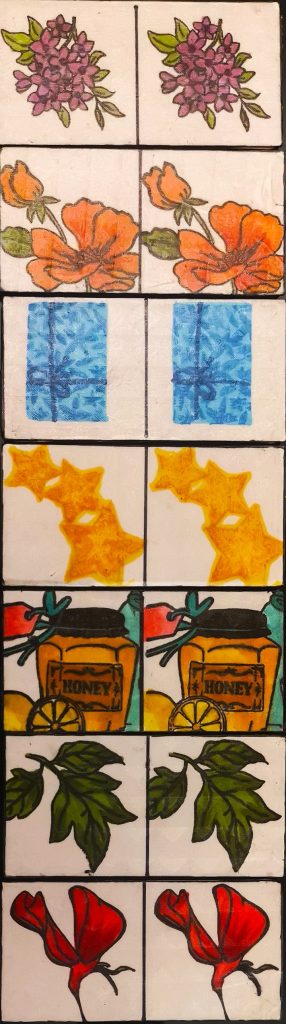
This is a project which requires lot of planning in the beginning stage. Each dominoes set contains 28 pieces. So I made a pattern for 28 tiles with 7 patterns. I choose different pictures from various stamp sets . I also created a list of how they should be combined. Total of 28 tiles with 2 divisions makes a total of 56 pictures. Thus each pattern was to stamp 8 times including doubles. Next step was to create a pattern for them. Below is the rough sketch of the pattern I made.
Making domino cards
This is definitely not a simple project. But I promise you this is something worth all your effort. Initially I bought some wooden tiles from a local store. Then traced it onto a classic crest white card stock . And trimmed it of in the shape of tiles I did the same for all 28 tiles. Then measured the middle point and drew a line across it using a black pinpoint pen. Then i stuck them on to the tiles and stamped the images on it. I positioned the stamp on my misti tool and stamped it using jet black ink . Some pictures were also stamped with crisp dye inks. For stamping the pictures on the right side, I placed a tile vertically towards the corner of the stamping tool and then positioned the second tile on its left thus the picture gets stamped on the right side of the second tile. But if you want to stamp it on the left side, then remove the first tile and then move the main tile towards the corner of the stamping tool. Thus we get the image stamped on the left side of the tile. Then I colored those pictures with artistic markers.
For the box , I took a wooden box from my kid’s storage and then transformed it to a dominoes box. The box had a peace of cardboard sliding in and out to open and close the box. I measured the size of the cardboard and then trimmed a classic crest white card stock in its size. Then I ran it through a 3d embossing folder from Altenew. The remaining part of the paper, was left blank so i stuck glitter tape as a border. Then i colored the embossed paper with the artistic markers from Altenew. The finished paper was stuck to the cardboard. To add little more glitter to the cover, i sprayed Shimmer craft spray over it. As it’s been used by kids,I also stuck a clear coat of transparent sheet over the tiles, as it acts as a protective filim and it’s easy to clean.
Once the tiles are placed inside the box, it turns out to be a perfect handmade gift for any toddler. My 3.5 year old daughter loves it . As I said before, its not as simple as it looks but seeing my daughter play with it ,makes me feel like its definitely worth all my efforts.
Supplies
Stamps
- Sweetest Peas Stamp Set
- Build-A-Flower: Wild Rose Layering Stamp Set
- Get Well Soon Stamp Set
- Wild Flora Stamp Set
- Trophy Life Stamp Set
- Piles of Presents Stamp set
- Poppy Garden Stamp Set
Artistic Markers
- Jet black Artistic Marker
- Emerald Artistic Marker
- Evergreen Artistic Marker
- Frosty pink Artistic Marker
- Corral berry Artistic Marker
- Dusk Artistic Marker
- Velvet Artistic Marker
- Grapevine Artistic Marker
- Caramel toffee Artistic Marker
- Orange cream Artistic Marker
- Volcano lake Artistic Marker
- Bamboo Artistic Marker
- Olive Artistic Marker
- Puffy Heart Artistic Marker
- Purple wine Artistic Marker
- Deep iris Artistic Marker
- Midnight violet Artistic Marker
- Crimson Artistic Marker
- Autumn blaze Artistic Marker
- Forest glades Artistic Marker
- Moss Artistic Marker
- Orange cream Artistic Marker
- Fire brick Artistic Marker
- Ruby Red Artistic Marker
- Ocean waves Artistic Marker
- Desert night Artistic Marker
- Mountain Mist Artistic Marker
- Volcano Lake Artistic Marker
- Warm sunshine Artistic Marker
- Mango Smoothie Artistic Marker
- Cotton Candy Artistic Marker
- Paper bag Artistic Marker
Inks
- Versa fine black ink
- Tide blue crisp dye ink
- Star light crisp dye ink
- Maple yellow crisp dye ink
- Carved pumpkin Distress ink
Other Products
- Wooden tiles
- Wooden box
- Scissors
- Glue
- Guillotine Paper Trimmer
- Scale
- Glitter tape
- Pencil
- Black pinpoint pen
- Sheer shimmer craft spray
- Clear coast stickers sheets

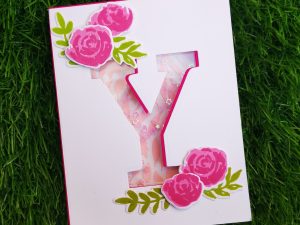
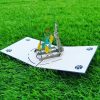
Before I finish, If you are looking for an altered project as a display piece . Here is one below.
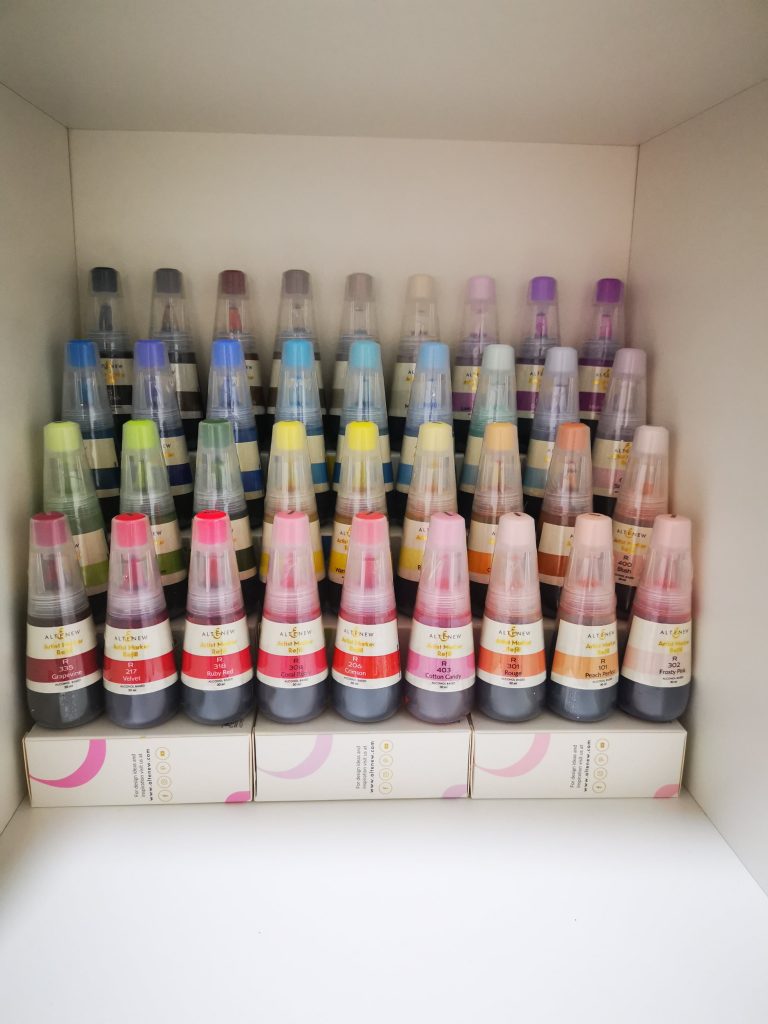
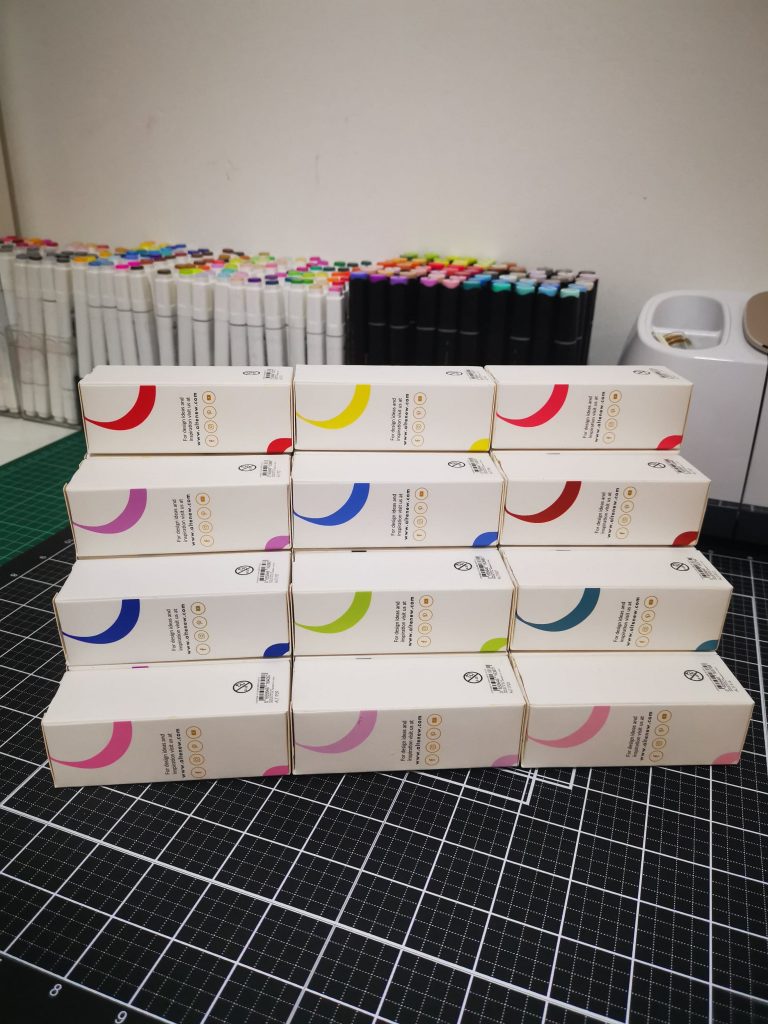
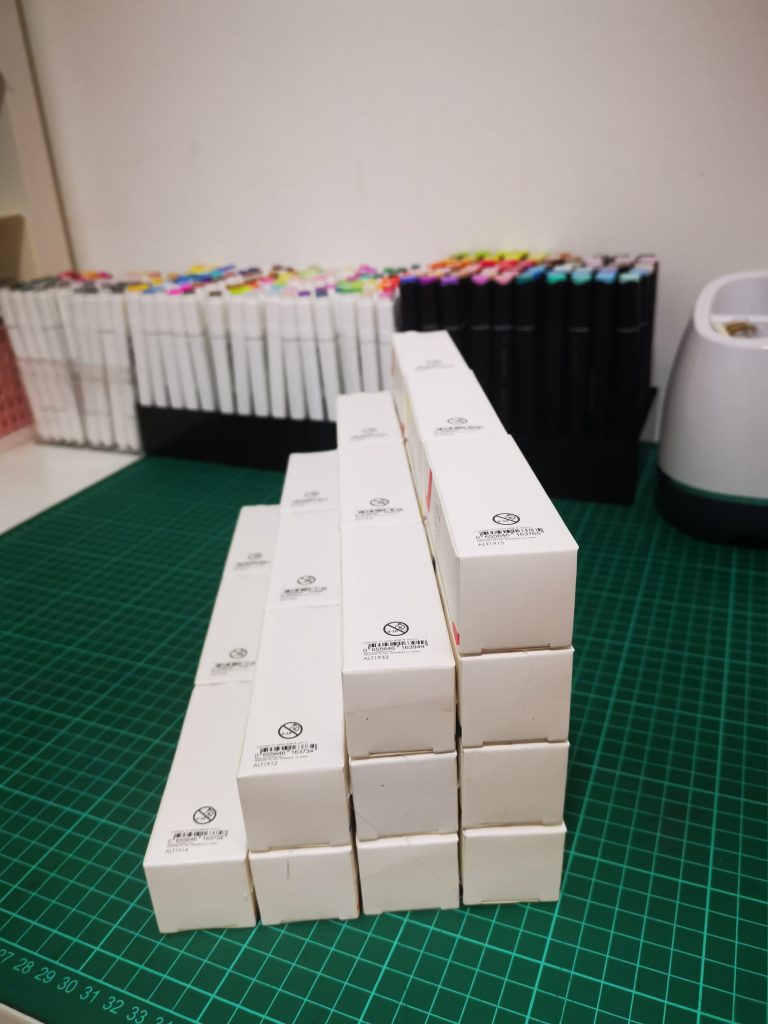
Artistic markers from Altenew are something I always reach out with. If you are someone like me, then its refills are a must buy and It’s something that you should definitely catch hold of. But organizing them was kind of tricky for me. I wanted to see all the colors in a single sight. It helps me to choose the right one. That’s why I choose to create my own stand for that. Altenew is always best for its products. Buy it once, you can never stop buying things from them. It’s not just their products, their packaging is also always on my favorite list. So I decided to create a stand for my refills, using their own boxes. And it definitely came out great. Do give a try for yourself. All you need is to stick the boxes together and create a stair like stand. The boxes are strong enough to hold your refill markers in its place. when you buy new ones, all you need to do is add an extra layer of boxes and they are good to go.
So That’s the end of my level 2 final challenge . Hope you liked my take on the altered project too. stay tuned to my Instagram and YouTube page for a making video reel on this project.
Thank You so much!
Hope you liked my cards. Have a wonderful day and I hope to see you all soon with another project from AECP. Until then happy stamping and thanks for stopping by! If you like what you’ve seen from me, please give me a follow over on my Instagram (@shahicreationz) and/or subscribing to my vlog and YouTube if you haven’t already.
-shahi


OH MY GOD!!! Your dominos project is BRILLIANT but that organization of refills just stole the show! Double whammy!! LOVE LOVE LOVE everything about both the assignment submissions! BRAVO!!!
Thank you for submitting your work to the AECP assignment gallery!