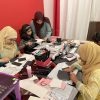
| Date of the workshop | 3rd December 2022, Saturday |
| Time | Uae time: 7:30pm Karachi: 8:30pm Canada: 10:30am |
| Venue | My home (Dubai) |
| No of participants | 4 |
| No of cards prepared for the workshop | 2 |
| Lessons taught | To make an Interactive card Using Mega Dies Stamping Techniques Coloring using Stencils Embossing Folder Techniques Dimensions using Enamel Dots |
| Zoom Meeting ID | Join Zoom Meeting https://us02web.zoom.us/j/4342656458?pwd=NmpTUzBFOVdmcXg0MFhkb2UwS2NGQT09 Meeting ID: 434 265 6458 Passcode: 1234 |
Each participant will be given a basket, which contain the following items:
- Stamping Mat
- Pre-cut out for each card
- A set from Summer Days Washi Tape set
- Color Enamel dots
- Altenew mini ink cubes
- Stencil and Stamp set from a Build a garden set
- Embossing folder
- Color Papers
- Classic Crest Solar White Cardstock
- Obsidian Pigment Ink
- Adhesive roller Tape
- Scissors
- Pencil & Eraser
- Self-healing Mat and rotary blade
- Measuring ruler
Other Essentials:
- Classic Crest Solar White Cardstock
- Stamp Cleaner
- Misti Stamping tool
- Die Cutting Machine
- Paper trimmer
- Primary color Artistic Markers
- Purple Tape
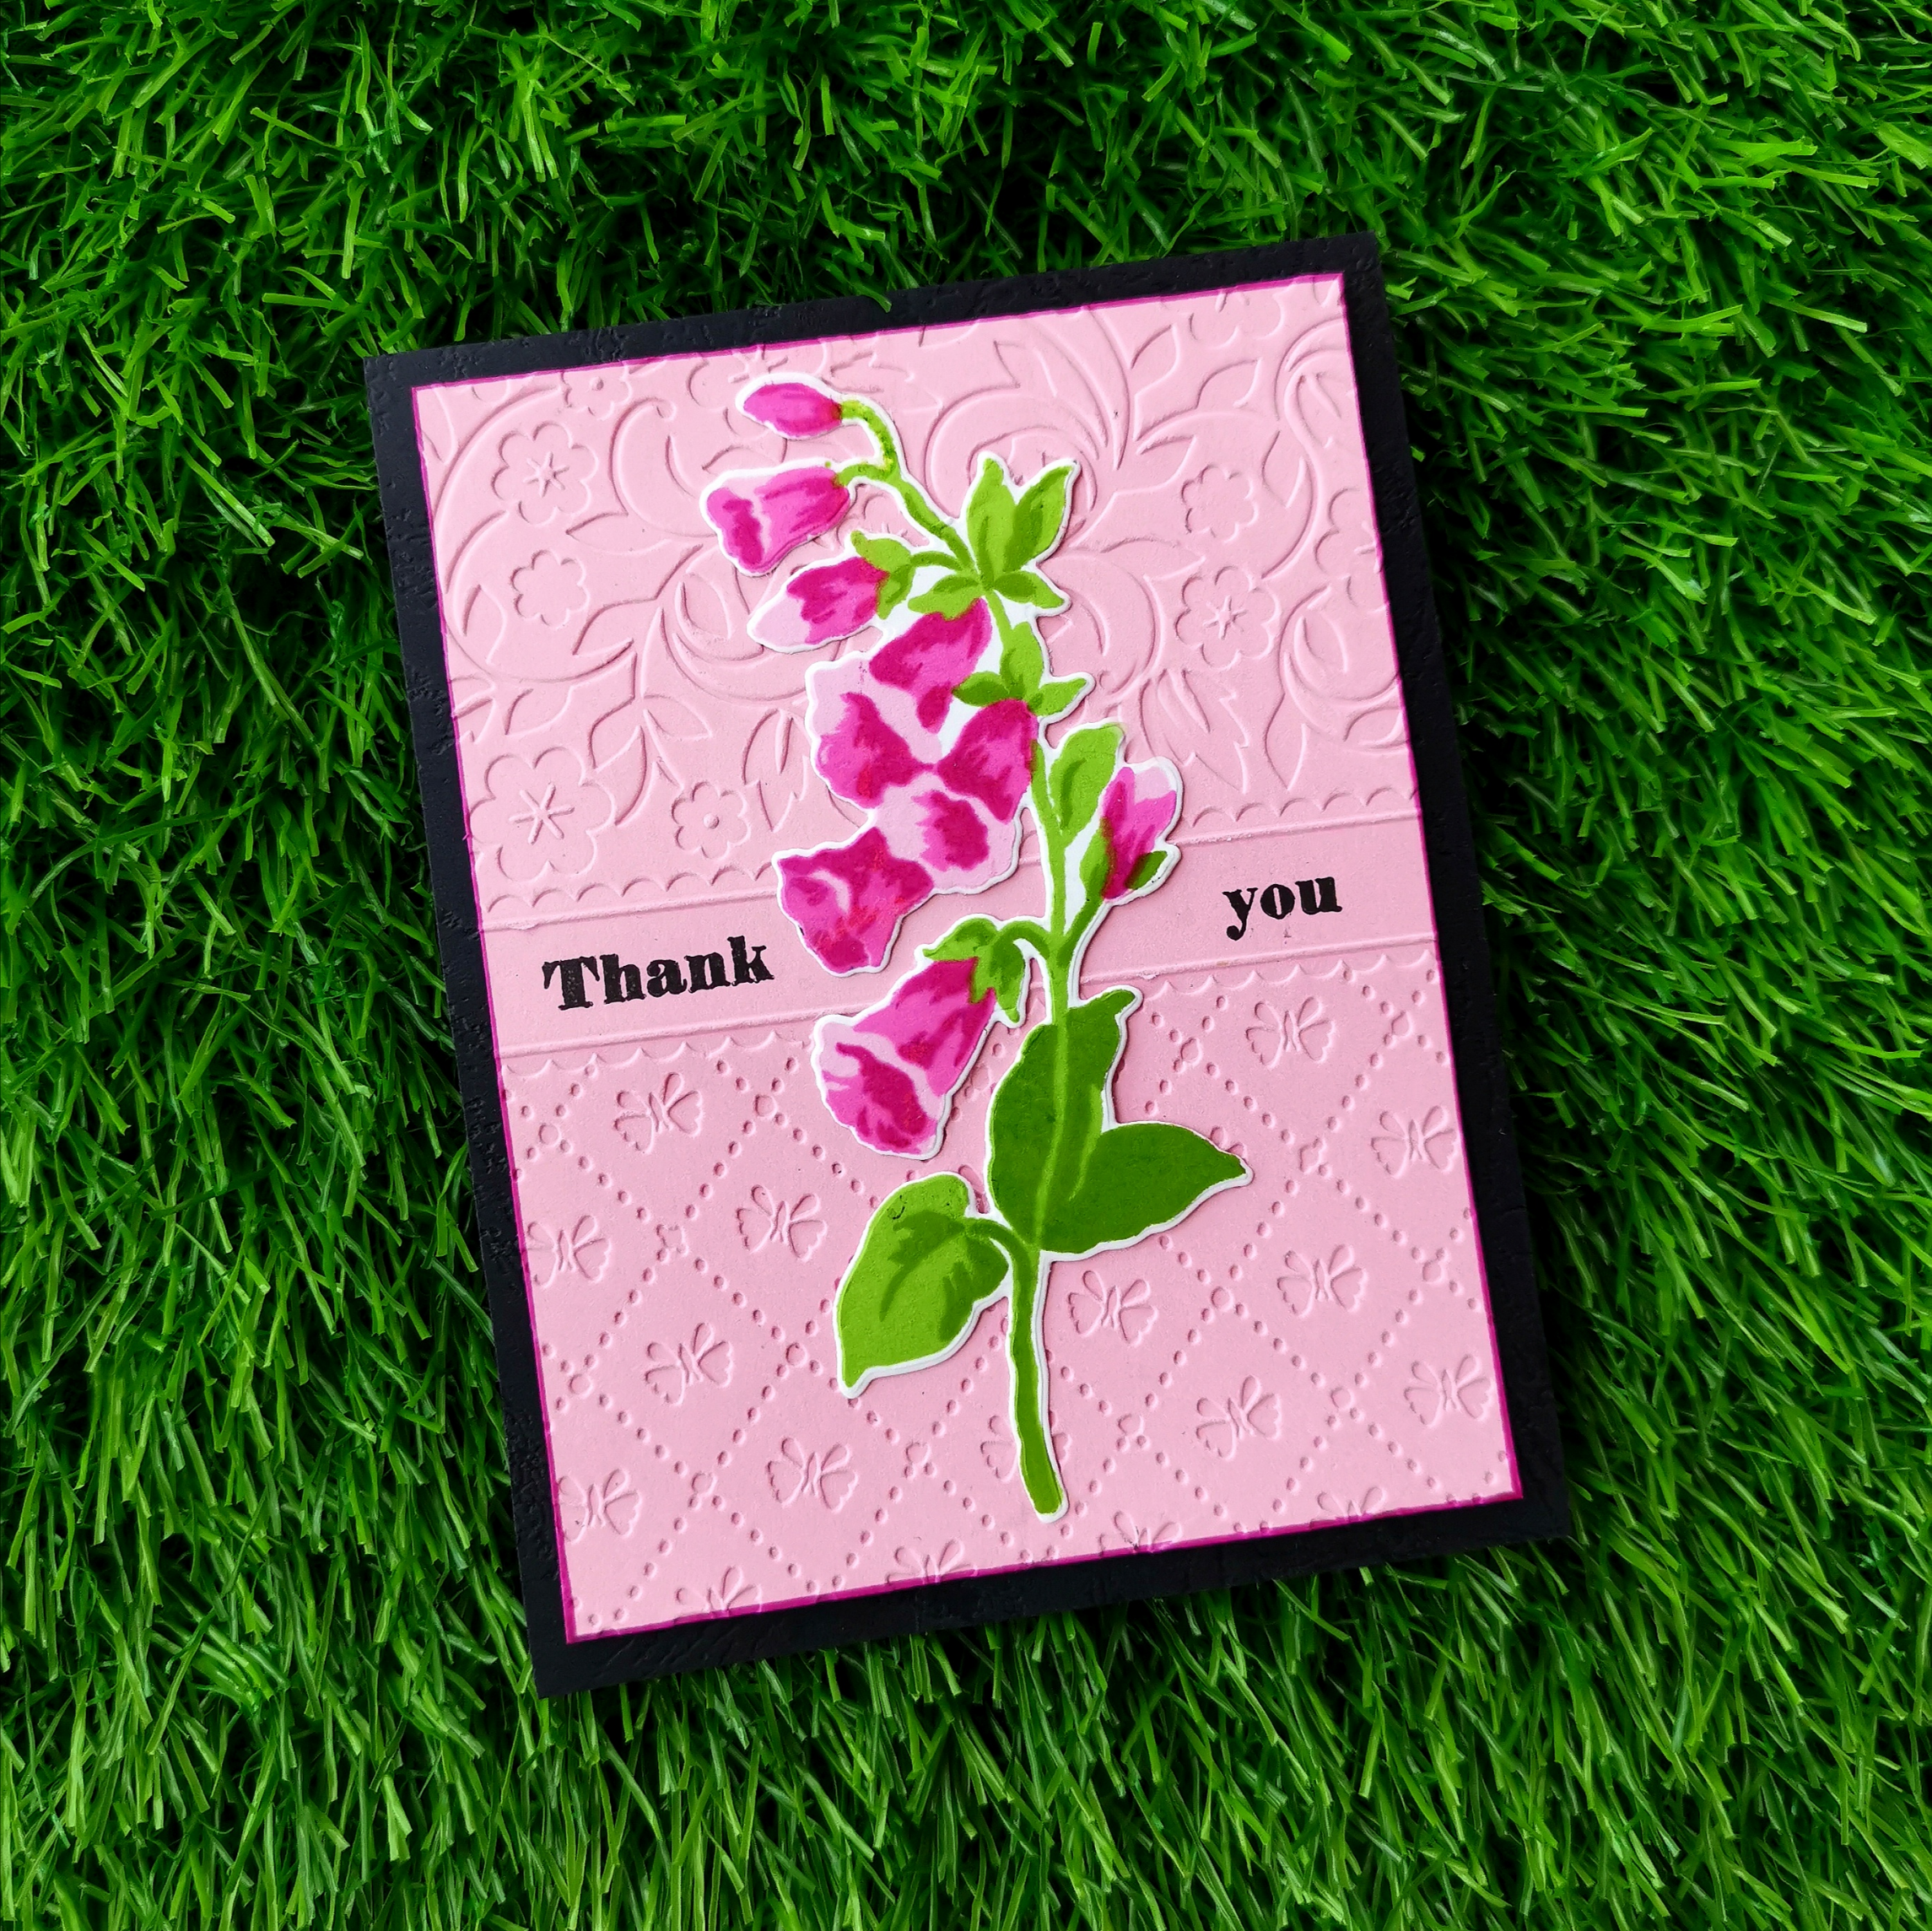
CARD 1: Triple floating diamond card
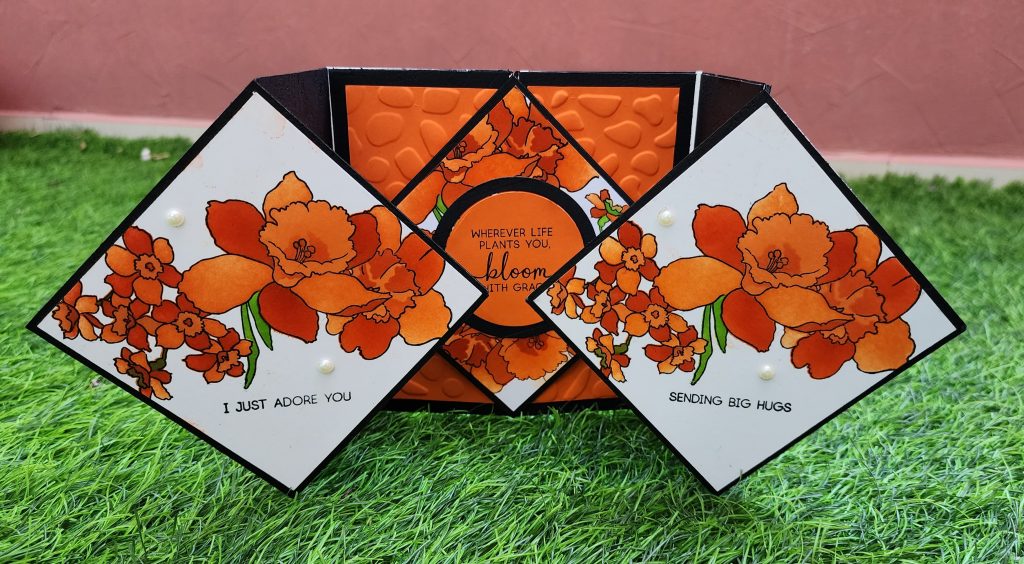
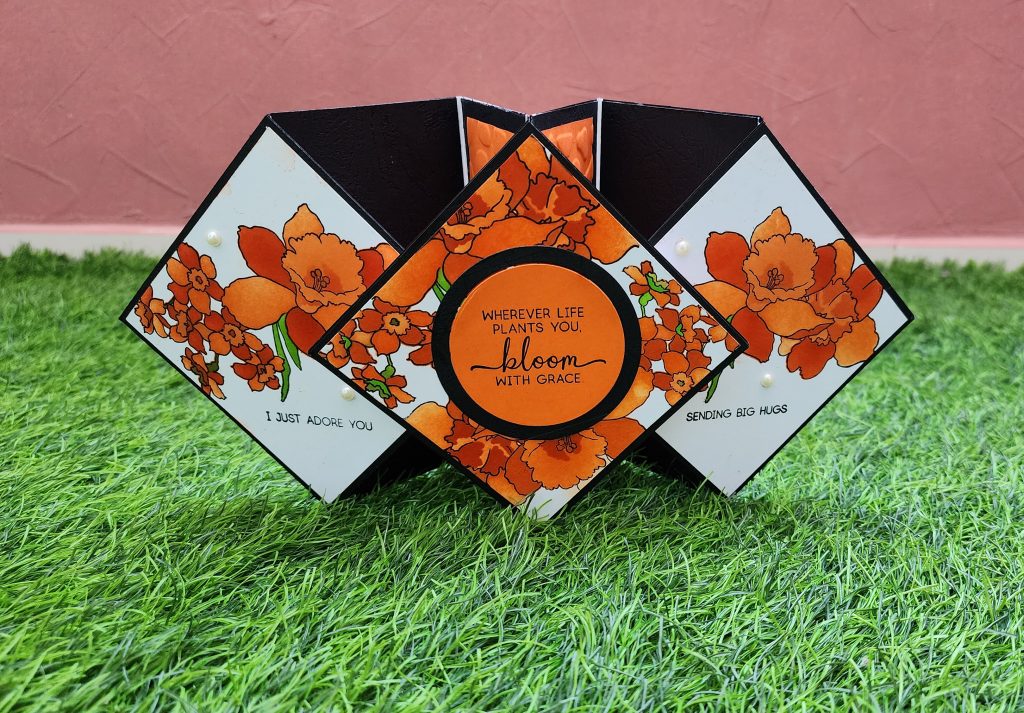
Card Making Method:
- Take a 12 x 12 cardstock and divide it into half. Then you will get two base cardstocks with dimensions 6 x 12
- Score both of your cards at 3 inches, 6 inches and 9 inches.
- Once you have done your scoring, you have to take each piece and make a mark along the short edge, halfway at three inches on both ends of both pieces. `
- Using a craft knife cut off from that crease line on the left to that bottom mark and from bottom mark to the crease line on the right.
- Repeat the same process on both the ends on the two cardstocks.
- You will end up having two pieces.
- Fold and burnish your score lines
- Make three black base square cards that are 4 ¼ x 4 ¼
- Now to line up those cards, putting both the pieces flat on the deck and then you fold in the nearest triangular piece inwards and line those up to make it like a square.
- Glue down a square cardstocks over the folds.
- If the points of the square are overlapping the folds, then trim down the edges of the card if required. ( 4 1/8)
- Glue up the remaining squares on the triangles on both the sides. Adjust it and Make it fit to dimensions.
- Next, You will need six black panels and four Color themed Panels
- Make your own panels by running your color cardstock paper through your embossing folder.
- Stick them over the main base card.
- You may stick two, color themed pattern paper on both sides of the middle square.
- You will also need three color paper squares of dimensions 4 x4 and three pattern squares or toppers of dimensions 3 ½ x 3 ½
- Make your own pattern paper using your favorite Altenew stamps and colors.
- Cut out two circles using halftone dies. (Bigger circle in black and smaller one in the color theme.)
- Add a greeting sentiment on the smaller circle die cut and paste in on the middle of the square card. Add sentiments on the other square panels too.
- You may add pearls and gems to make your card more beautiful.
- When folded flat, it will fit in an envelope for 6 x 6 card.
Pre-cuts for the card:
- Two base cardstocks with dimensions 6 x 12 scored at 3 inches, 6 inches and 9 inches
- Three black base square cards that are 4 ¼ x 4 ¼
- Four Color papers trimmed 6 x
- Six black panels
- Black Circle
- Color Circle
CARD 2: Washi tape Card

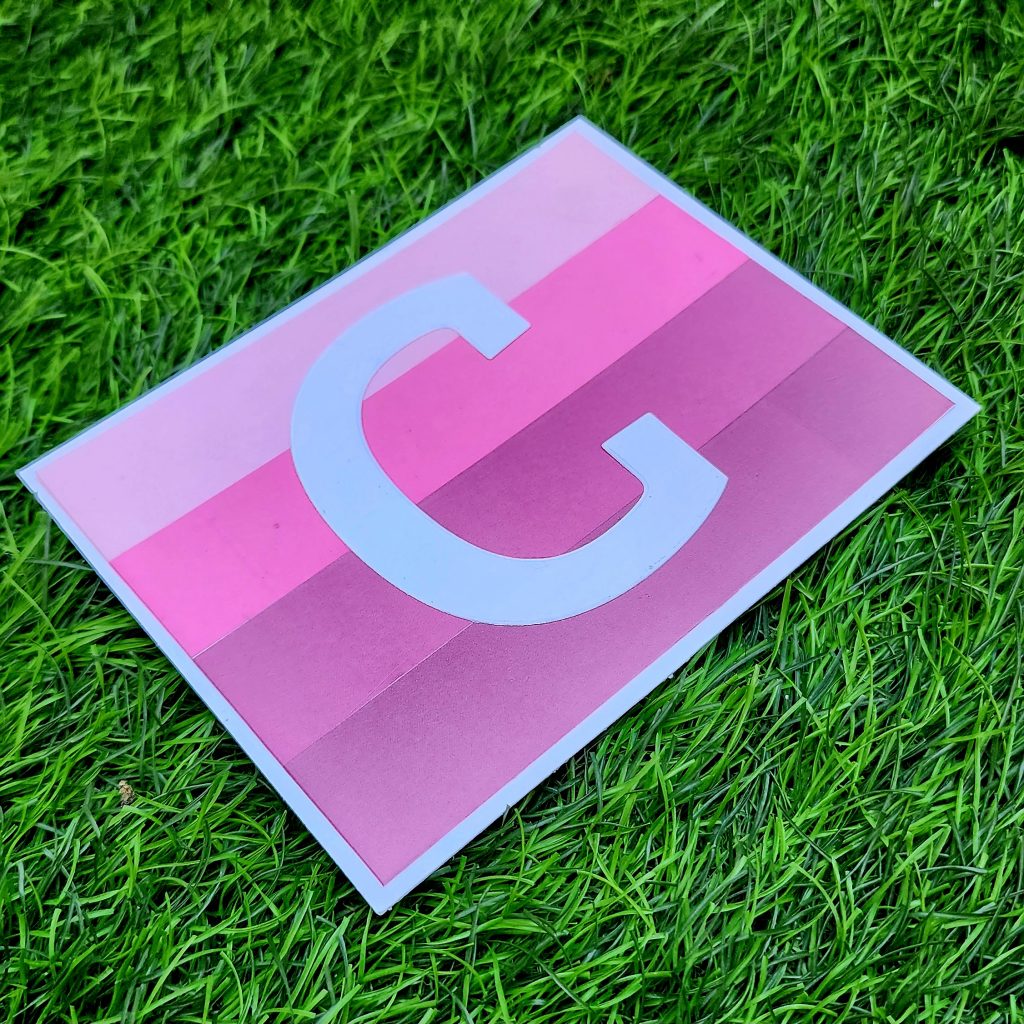
Card Making Method:
- Create a 4 ¼” x 5 ½” base folding card from Classic Crest Solar White Cardstock.
- Create a 4 ” x 5 ¼” card from Classic Crest Solar White Cardstock and stick the four washi tapes (Summer Days Washi Tape) according to the ombre effect
- Take a piece of Classic Crest Solar White Cardstock, place the mega alphabet Die (starting letter of your name) over it and run it through the die cutting machine.
- Stick it to the center of the card
- Once done, you may adhere it to the base card
Pre-cuts for the card:
- 4 ¼” x 5 ½” base folding card
- 4 ” x 5 ¼” Classic Crest Solar White Cardstock
- A5 size Classic Crest Solar White Cardstock
Let’s head on to part 2 for more updates on my upcoming workshop.